Model assets
Currently, model files in FBX and glTF formats. For how to export these two model files from third-party tools, you can refer to the DCC Export Mesh documentation.
Model importing
After importing into the editor, from the outside, the corresponding model asset file can be obtained in the Assets panel. It's directory structure is as follows:
The structure of a model file without animations is as follows:

The structure of the model file that contains animations is as follows:
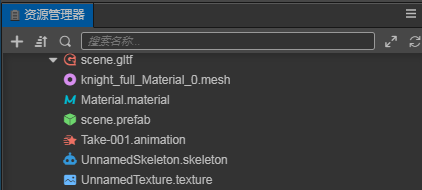
.material-- Material files.mesh-- Model files.texture-- Model texture files.animation-- Model animation files.skeleton-- Model bone files.prefab-- Prefab files that are automatically generated on import
Using Models
After importing a model file, drag the root node of the model file directly from the Assets panel to the node you want to place in the Hierarchy panel to complete the node creation. At this point the model is successfully created in the scene.
Alternatively, you can expand the node of the model file, select the .prefab file under the model file node, and drag it from the Assets panel into the Hierarchy panel to complete the creation.
Model asset Properties panel description
When the model asset file (.fbx or .gltf) is selected in the Assets panel, the properties of the model asset can be set in the Inspector panel.
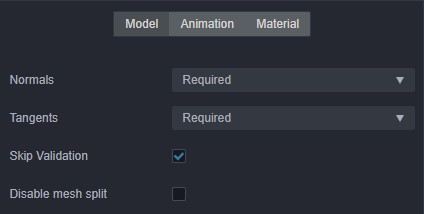
Model module
| Property | Description |
|---|---|
| Normals | Normals import setting, including the following four options: 1. Optional: Import normals only if the model file contains normals. 2. Exclude: Do not import normals. 3. Required: Import normals that are contained in the model file, or recalculate if not contained. It is recommended to use this option if the model data itself is fine, without additional processing. 4. Recalculate: Recalculate normals and import, ignoring whether if the model file contain normals. Selecting this option will increase the calculated amount, but it will eliminate the subsequent problems caused by the absence of normalization of the model's original normal data. |
| Tangents | Tangents import setting, including Optional、Exclude、Require、Recalculate four options, option feature can refer to the description of Normals, the two are not very different. |
| Skip Validation | Skip validation of the model file |
| Disable mesh split | Currently there is a joint-counting-based mesh splitting process during the import pipeline to workaround the max uniform vector limit problem for real-time calculated skeletal animation system on many platforms. This process has a preference impact on other runtime system too. So if it can be pre-determined that the real-time calculated skeletal animations (when useBakedAnimation option of the SkeletalAnimation component is unchecked) will not be used, this option can be checked to improve preference. But note that toggling this would update the corresponding prefab, so all the references in the scene should be updated as well to accompany that. This process will be removed in further refactors. |
Animation Module
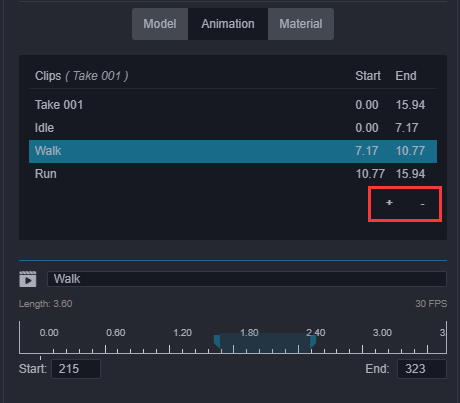
The above image is all the animation asset information under the current model, and the editing area of the specific frame number information of the currently selected animation. You can change the animation name or perform simple animation cropping here. To do so:
Click the + button in the red box on the image to add an animation clip asset. The new file added by default copies a complete clip data. You can input the number of frames in the
StartandEndinput box to crop the animation. (Drag and drop animation is not currently supported)Click the - button in the red box on the image to delete the currently selected animation file
Material module
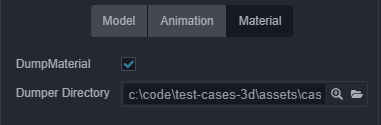
DumpMaterial: When you are not satisfied with the material that comes with the model file and want to modify it, you need to enable this option to dump the material files in the file structure directory out of the model assets. You can adjust and modify the materials.Dumper Directory: Here you can specify or view the directory location for the dumped files.