创建脚本
创建组件脚本
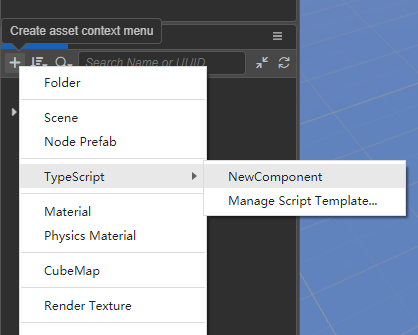
在 Cocos Creator 中,脚本也是资源的一部分。在 资源管理器 中创建的脚本,默认是一个 NewComponent 组件,我们称之为组件脚本。可通过以下两种方式创建:
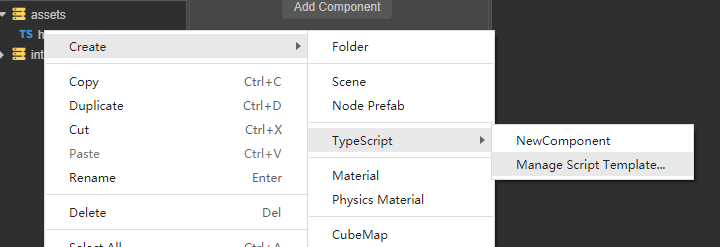
- 资源管理器 面板空白位置或某个文件夹资源下右击菜单,选择 Create > TypeScript > NewComponent。
- 资源管理器 左上角的 + 按钮,点击后选择 TypeScript > NewComponent。
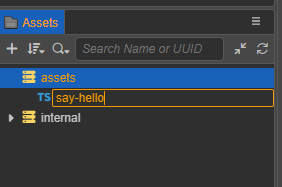
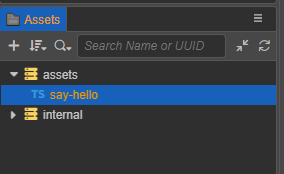
在创建脚本时,名称不能为空,输入框默认为 NewComponent。我们将其修改为 say-hello,可以看到在 资源管理器 中生成了一个名为 say-hello 的脚本文件。
新建后的初始脚本代码如下:
import { _decorator, Component, Node } from 'cc';
const { ccclass, property } = _decorator;

@ccclass('say_hello')
export class say_hello extends Component {
    start() {

    }

    update(deltaTime: number) {

    }
}
注意点:
项目中所有脚本的类名
ClassName(如上例中的 'say_hello') 不允许重复,即使脚本文件在不同的目录下,各自的代码里也不允许有相同的类名。脚本文件名称和脚本的类名不同,在输入初始的文件名之后,文件名会被处理为类名,处理的逻辑详见下文 类名的生成。脚本文件生成后,对文件的后续操作脚本重命名,新的文件名不会再去生成并替换代码里的类名,不再影响了。
我们推荐用户使用 TypeScript 来编写脚本,目前 资源管理器 中仅支持创建 TypeScript 文件。但如果用户想要使用 JavaScript 来编写脚本的话,可以直接在操作系统的文件夹中创建 JavaScript 文件,或在其他代码编辑软件中创建 JavaScript 文件。
类名的生成
在获得初始文件名数据后,会生成两种规则的类名 ClassName,并以变量的方式提供给脚本模板。
- 下划线格式,变量名为
<%UnderscoreCaseClassName%>。这种格式是为了保持类名尽可能地与文件名一致,保持一致的好处是有利于代码全局搜索和替换。 - 驼峰格式,变量名为
<%CamelCaseClassName%>。这种格式是为了保持与主流的脚本标准一致,首字母大写的驼峰格式。
添加脚本到场景节点中
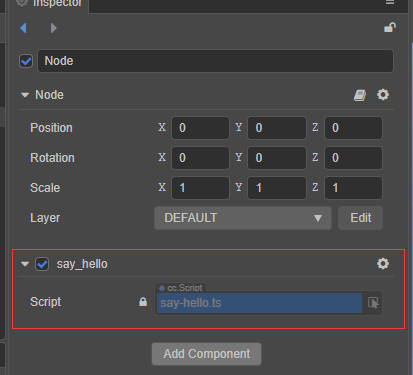
将脚本添加到场景节点中,实际上就是为这个节点添加一个脚本组件。 在 层级管理器 选中某个节点,此时 属性检查器 面板会显示该节点的属性。以下两种添加方式:
直接将 资源管理器 中的脚本拖拽当前节点的到 属性检查器 中,即为挂载了一个组件。
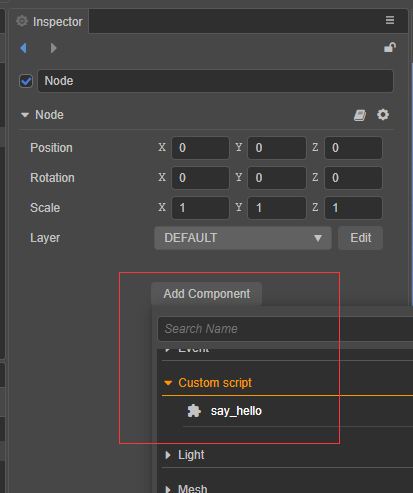
点击 属性检查器 最下方的 添加组件 按钮,选择 自定义脚本 -> say_hello,即为挂载组件。
编辑脚本
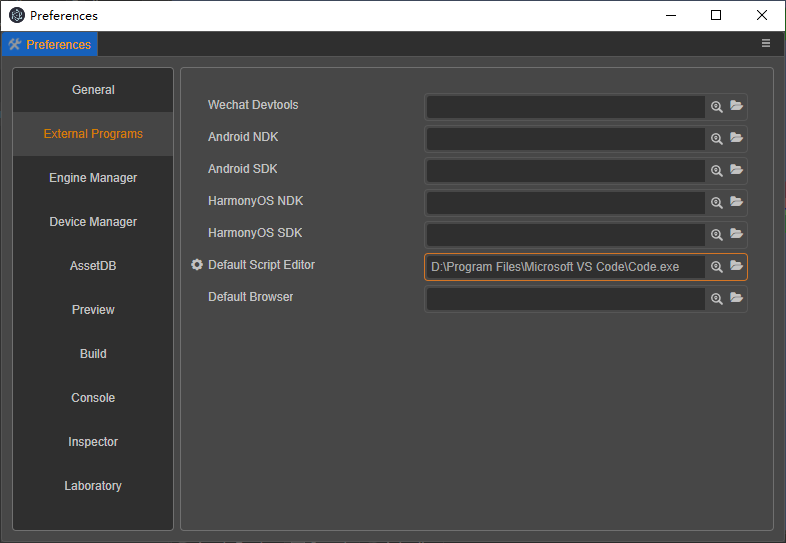
开发者可根据自己的需求,选择自己喜爱的代码编辑软件(如:Vim、Sublime Text、Web Storm、VSCode 等)进行脚本编辑。编辑器的 偏好设置 > 外部程序 可设置指定的脚本打开工具。
外部程序配置完成后,在 资源管理器 中双击脚本资源,便会用指定的程序打开该脚本。 编辑脚本代码保存后,鼠标点击回到编辑器,编辑器会自动检测到脚本的改动,重新对其进行编译后使用。
编写脚本代码,可阅读以下文档了解相关内容:
脚本文件创建成功后,再对文件进行重命名,或者对代码里的类名进行修改,文件名和类名均不会再互相影响。
- 以
say-hello为例,我们在 资源管理器 中将其重命名为hello。
重新选中该资源,查看 属性检查器,代码还是显示 class say_hello,不会变动。
重新选中 层级管理器 上刚添加组件的节点 Node,查看 属性检查器,组件名称还是显示 say_hello,不会变动。
我们继续双击当前的 hello 资源,将类名改为 say,保存后回到编辑器:
import { _decorator, Component, Node } from 'cc';
const { ccclass, property } = _decorator;

@ccclass('say')
export class say extends Component {
    start() {

    }

    update(deltaTime: number) {

    }
}
同样的脚本文件名 hello 不会变化。节点 Node 里的组件名称变为 say。
注意:这里需要记得将装饰器
@ccclass('say_hello')中的内容也改为@ccclass('say')。

脚本模板
从编辑器 v3.3 开始,支持在项目中管理不同的脚本模板。
- 新建一个项目,新项目不会自动创建自定义脚本模板所在的目录
.creator/asset-template/typescript。 可以手动创建上述目录。也可以通过 资源管理器 的右击菜单里的菜单,点击后才生成目录。
默认的 NewComponent 脚本模板仍在引擎内置资源目录下 resources\3d\engine\editor\assets\default_file_content\ts。
文件代码为:
import { _decorator, Component, Node } from 'cc';
const { ccclass, property } = _decorator;

@ccclass('<%UnderscoreCaseClassName%>')
export class <%UnderscoreCaseClassName%> extends Component {
    start() {

    }

    update(deltaTime: number) {

    }
}

/**
 * COMMENTS_GENERATE_IGNORE
 * Use "COMMENTS_GENERATE_IGNORE" tag if you do not want later created scripts to contain these comments.
 *
 * Predefined Variables
 * You can use predefined variables below to setup your scripting preference. For example, whether to use camel case style.
 *
 * <%UnderscoreCaseClassName%>, class name in underscore format, like 'new_component'
 * <%CamelCaseClassName%>, class name in camel format, like 'NewComponent'
 * <%Author%>, Who create this file
 * <%DateTime%>, when create this file
 * <%FileBasename%>, creating file name with extension
 * <%FileBasenameNoExtension%>, creating file name without extension
 * <%URL%>, url of this file in COCOS ASSET URL format
 * <%ManualUrl%>, url of office help document, like 'https://docs.cocos.com/creator/manual/en/'
 *
 *
 * Example:
 *
  @ccclass('<%UnderscoreCaseClassName%>')
  export class <%UnderscoreCaseClassName%> extends Component {

    // class member could be defined like this.
    dummy = '';

    // Use 'property' decorator if your want the member to be serializable.
    @property
    serializableDummy = 0;

    start () {
        // Your initialization goes here.
    }

    update (deltaTime: number) {
        // Your update function goes here.
    }

  }
 *
 * Learn more about scripting: <%ManualUrl%>scripting/
 * Learn more about CCClass: <%ManualUrl%>scripting/decorator.html
 * Learn more about life-cycle callbacks: <%ManualUrl%>scripting/life-cycle-callbacks.html
 */
注意:
脚本模板中大量的注释并不会生成到脚本文件中,因为在注释里我们使用了关键词标注
COMMENTS_GENERATE_IGNORE只要此关键词在某段注释里,那么生成脚本文件就会将该段注释忽略掉。
Predefined Variables我们准备了一些预制的变量,在生成脚本文件的时候可以作为辅助的信息,比如作者<%Author%>。特别准备了两种类名格式:
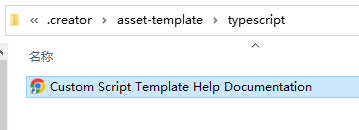
<%UnderscoreCaseClassName%>和<%CamelCaseClassName%>。名称前后仍可以添加自定义的前缀或后缀,如加个Robot前缀Robot<%CamelCaseClassName%>。通过点击右击菜单的方式,项目自定义脚本模板目录下会自动生成一个文档网址快捷链接,双击即会调出浏览器打开指定网页:
Custom Script Template Help Documentation。
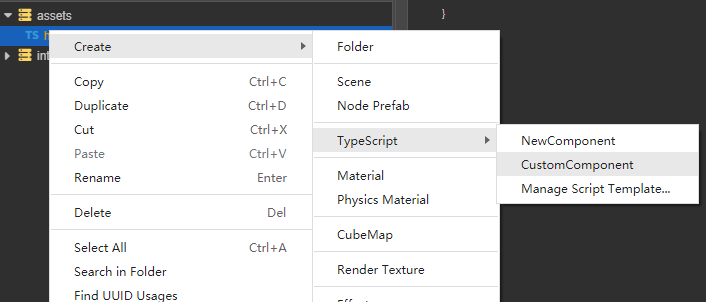
添加脚本模板
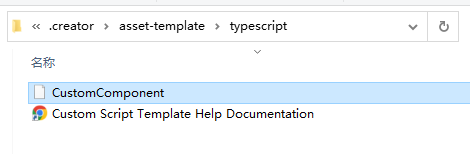
我们从复制上述内置 NewComponent 模板的代码进行修改,类名为驼峰格式,加 Robot 前缀,文件另存为无后缀名的文件 CustomComponent,保存在项目自定义脚本模板的路径下,即 .creator/asset-template/typescript/CustomComponent。
CustomComponent 模板内容修改为:
import { _decorator, Component, Node } from 'cc';
const { ccclass, property } = _decorator;

/**
 *
 * <%UnderscoreCaseClassName%>
 * <%CamelCaseClassName%>
 * <%Author%>
 * <%DateTime%>
 * <%FileBasename%>
 * <%FileBasenameNoExtension%>
 * <%URL%>
 * <%ManualUrl%>
 *
 */

@ccclass('Robot<%CamelCaseClassName%>')
export class Robot<%CamelCaseClassName%> extends Component {
    start() {

    }

    update(deltaTime: number) {

    }
}
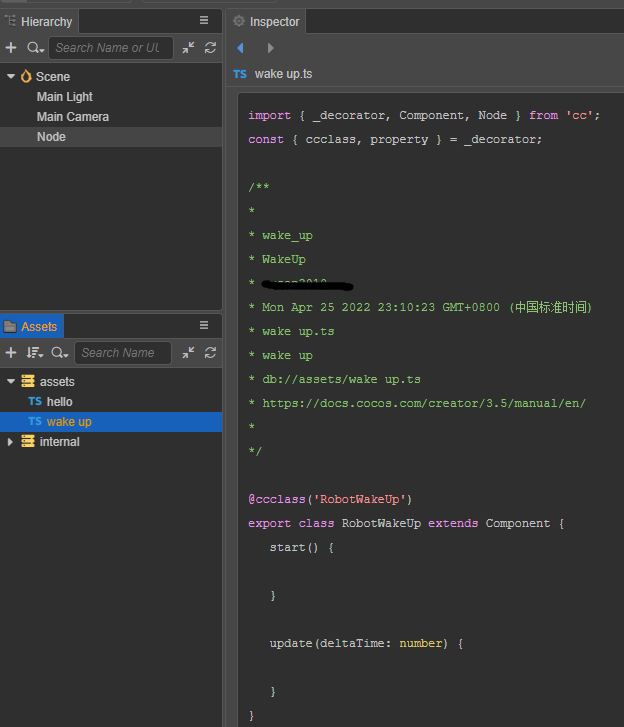
那么最后的我们新建一个 wake up 脚本资源看看,效果如下图: