Keyframe Editing View
The node track display area and the property track display area are both displayed in keyframe editing view by default. In this view, one can edit the overall keyframe layout, add and delete keyframes more easily. The following describes the various keyframe manipulation methods supported in the keyframe edit view, and how to understand these methods and techniques to edit animation clips faster and more easily.
Selecting keyframes
The selected keyframe will change from blue to white, including the following:
Clicking on a keyframe in the animation property track will select it.
Double-clicking a keyframe will move the time control line to the current keyframe while it is selected.
Clicking on a node's keyframe in the animation timeline selects all keyframes of the node's animation properties at the same location.
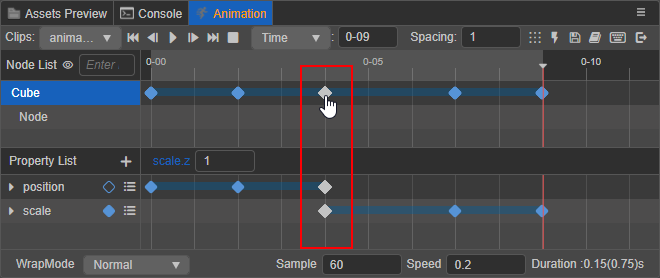
Multiple selection of keyframes is also supported, including the following:
Holding Ctrl while clicking multiple keyframes
Selecting multiple keyframes by box selection will show the number of frames in the animation timeline for the first and last keyframes on the left and right side of the box.
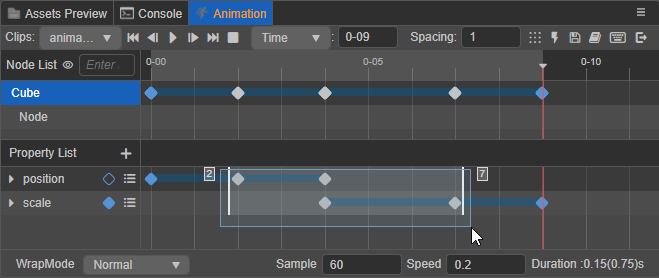
After selecting any property track, press Ctrl/Cmd + A to select all the keyframes on the current animation property track.
Adding keyframes
In addition to adding keyframes by modifying properties as described in Creating Animation Curves, they can also be added in the following ways:
Select the animation property and use the shortcut K, which will add a keyframe at the location of the time control line, or ignore it if the animation property is not checked.
Move the time control line to the position where you want to add the keyframe, and click the
button on the right side of the animation property to add a keyframe to the current animation property track.
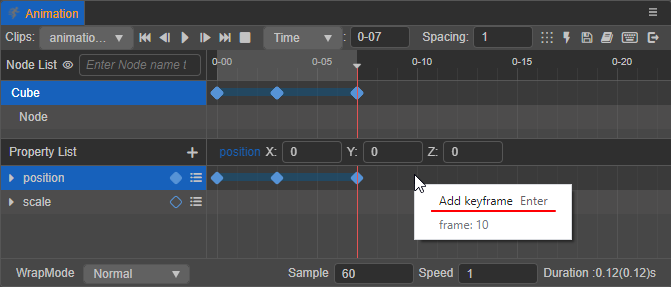
In the animation property track, right-click the position where you want to add the keyframe, and then select Add keyframe in the popup menu, the menu will also show the number of frames in the current added keyframe position.
When dragging a batch of assets corresponding to an animation property from the Assets panel to the property track, keyframes will be added in the order in which the assets are selected, according to the spacing size set in
in the toolbar.
Removing keyframes
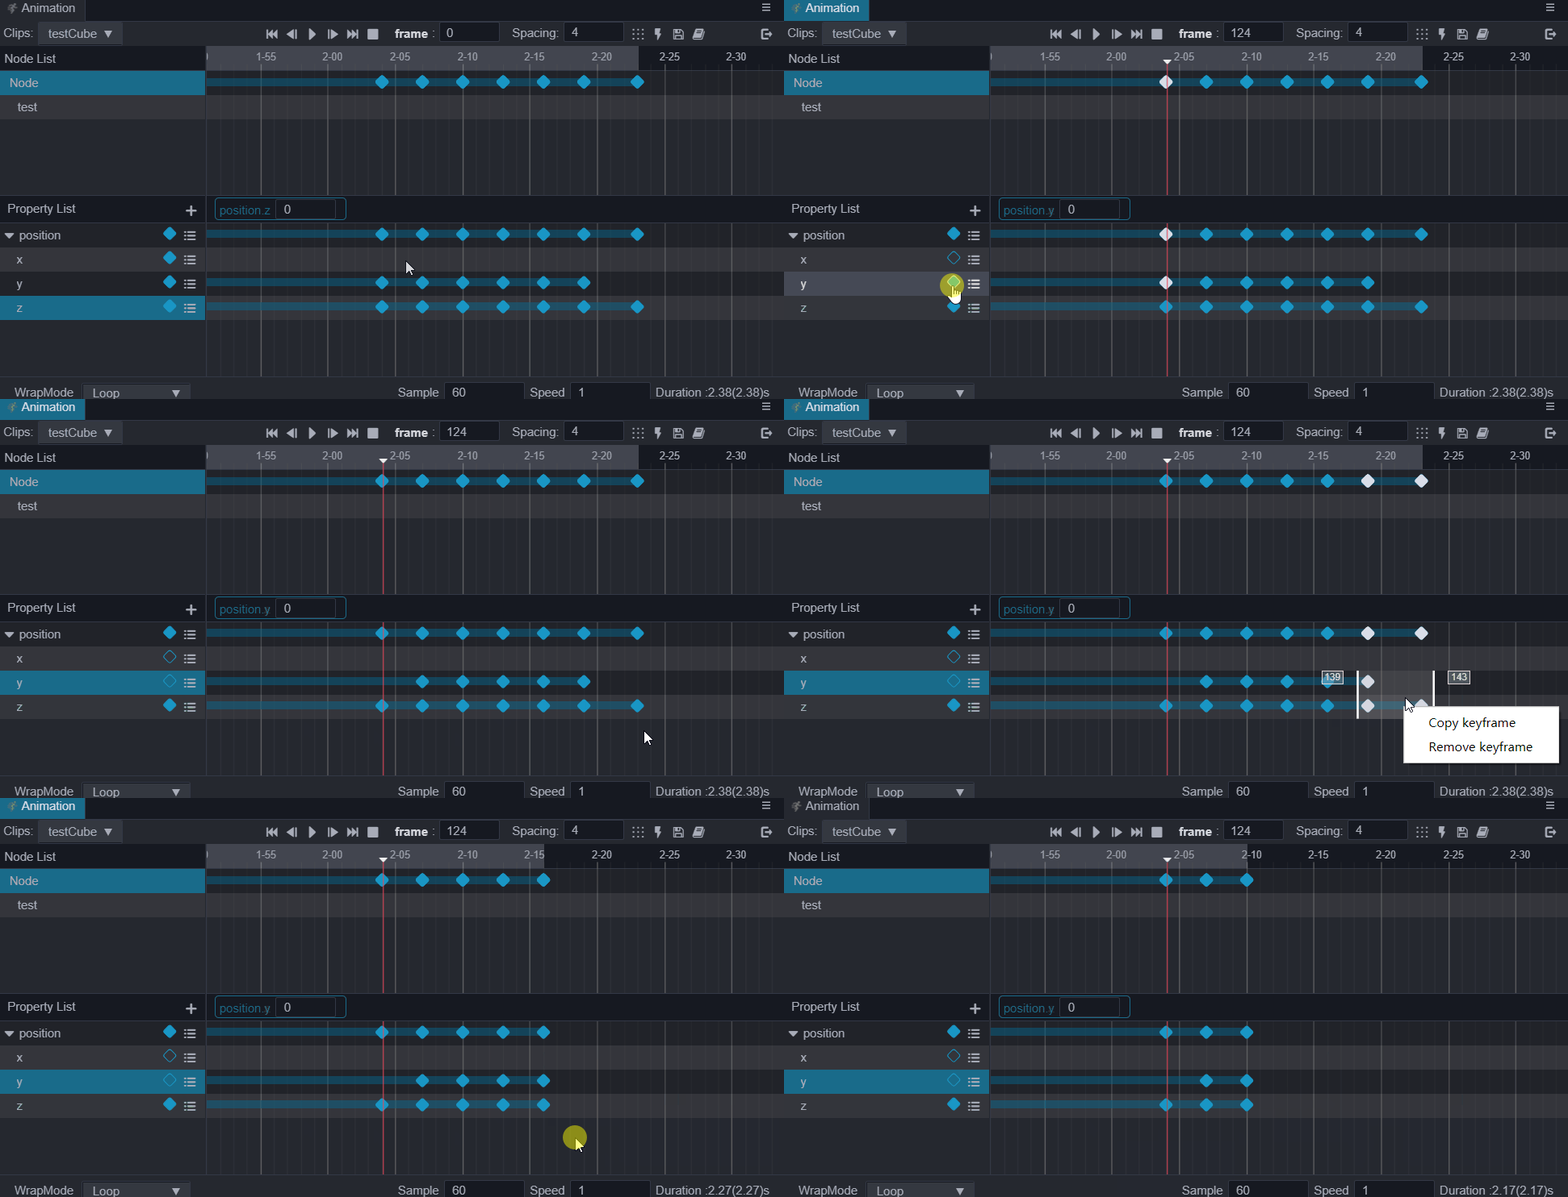
Select the keyframe to be deleted (multiple selections are allowed) and press Delete (Windows) or Cmd + Backspace (macOS).
Select the keyframe you want to delete (you can select more than one), then right click and select Remove Keyframe in the popup menu.
Drag the time control line to the position of the keyframe to be removed or double-click the keyframe, and then click
button to the right of the corresponding animation property.
Moving keyframes
Dragging a keyframe while it is selected will move it to the desired position.
- When dragging a single keyframe, a small white box will appear below the keyframe, showing the number of frames and the distance moved during the move.
- When dragging multiple keyframes, the box will show the number of frames in the animation timeline for the first and last keyframes during the move, on the left and right side respectively.
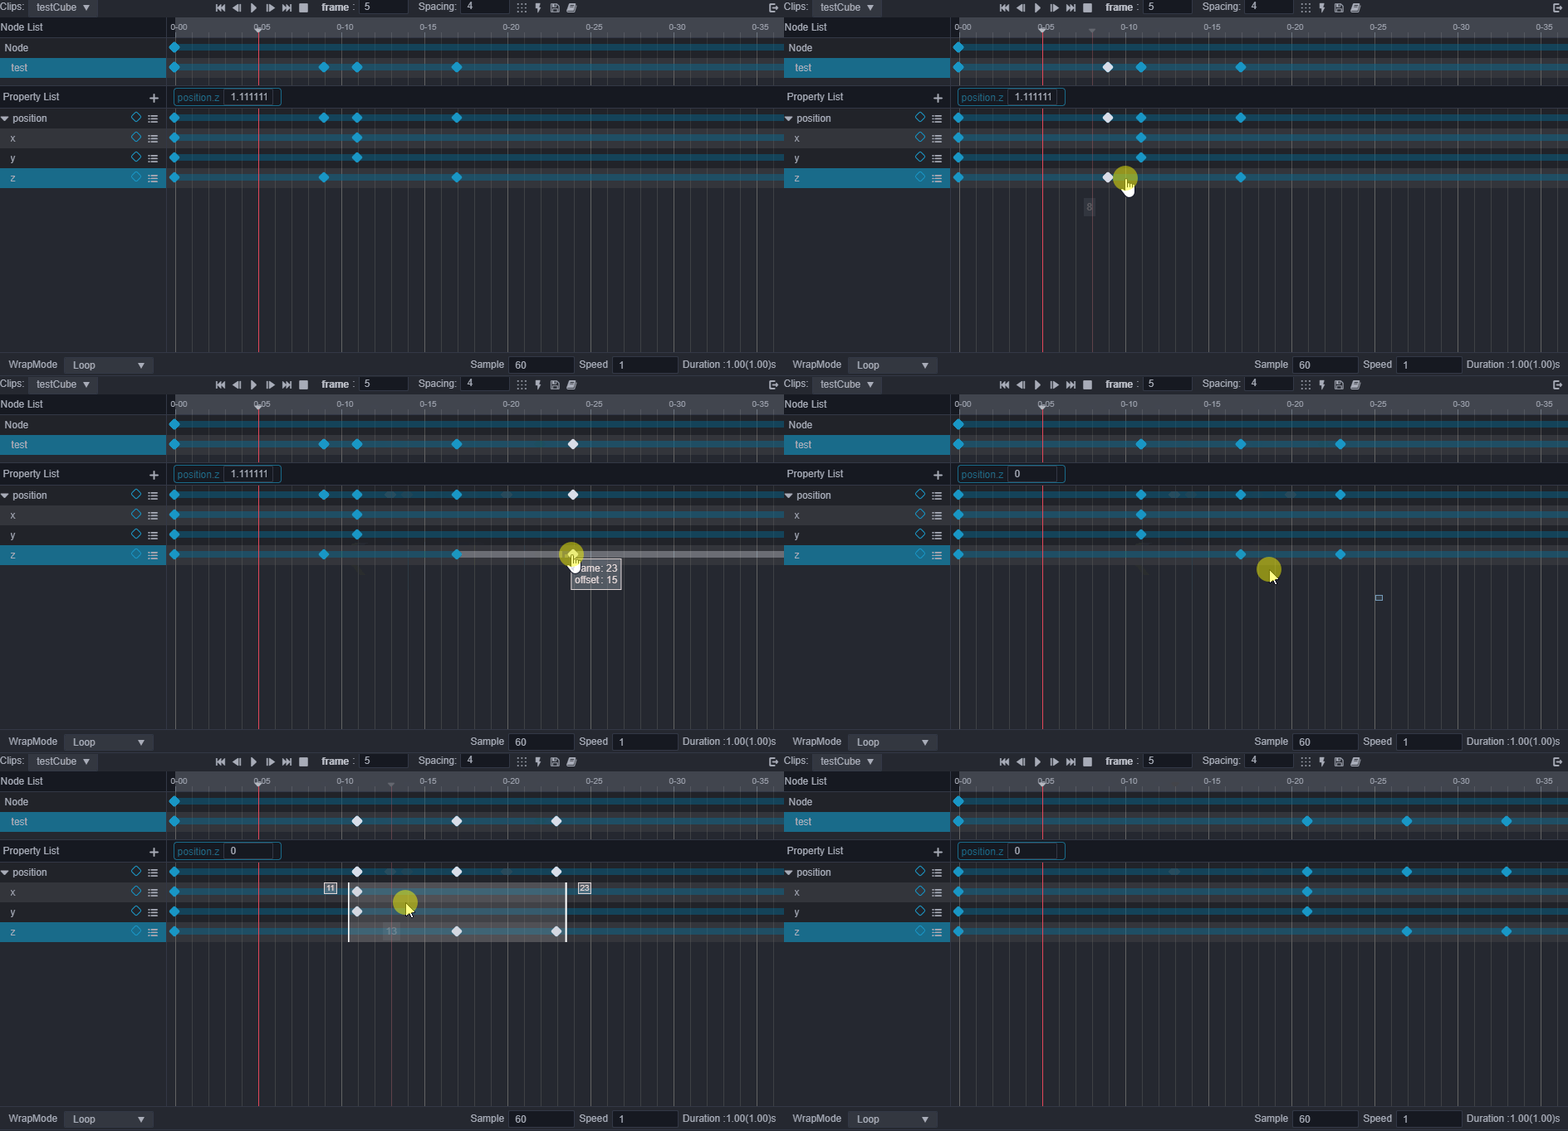
Scaling keyframes
When multiple keyframes are selected, the first and last keyframes will show two control levers, drag any of the levers to move them to scale the selected keyframes as a whole.
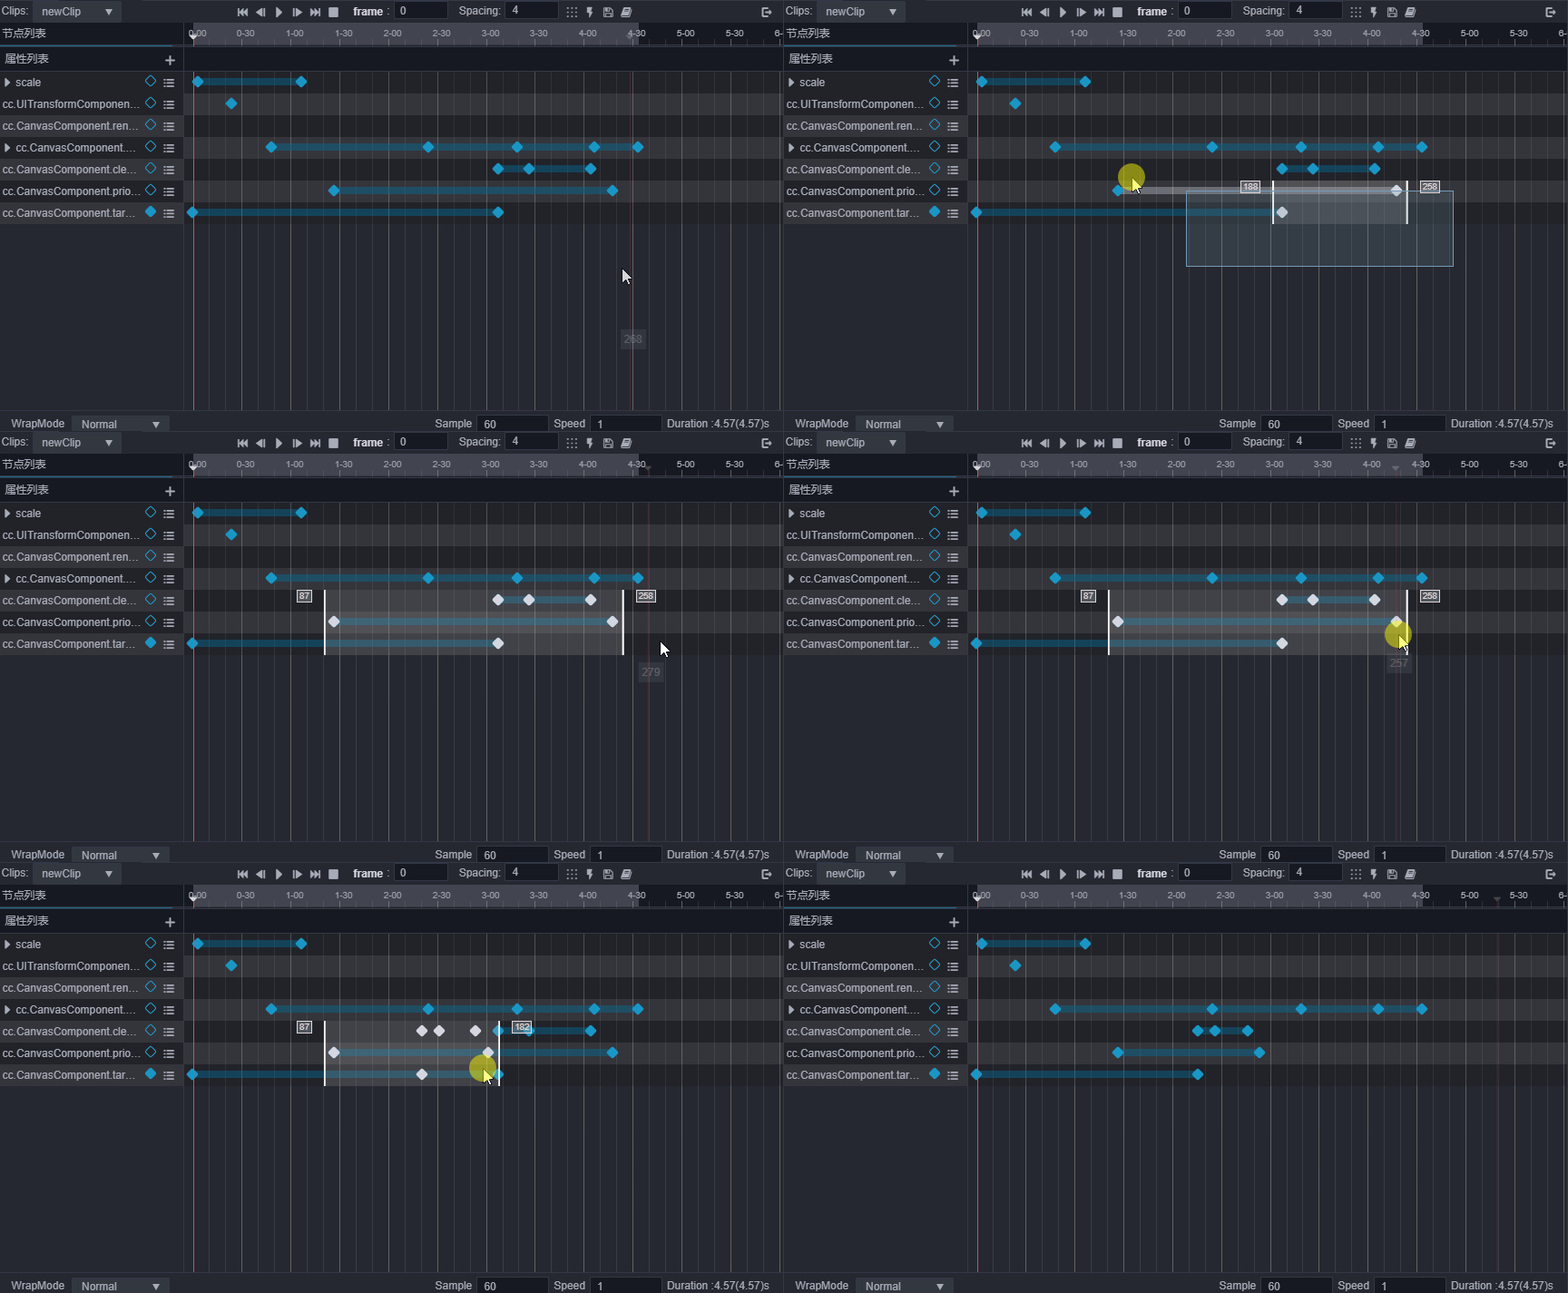
Spacing keyframes
With multiple keyframes selected, click the button in the upper menu bar, the selected keyframes will be arranged in order with the first keyframe as the base and the value set in the
input box as the number of spacing frames.
Copying/pasting keyframes
Copy and paste keyframe data, support cross-node and cross-clip usage. The following two usage methods are included:
- After selecting a keyframe (multiple selection is possible), use the shortcut keys Ctrl + C and Ctrl + V to copy and paste. Note that the shortcut paste will start at the position of the current time control line.
- After selecting a keyframe (multiple selections are allowed), right-click on (any) keyframe and select Copy Keyframe in the popup menu, then right-click on the target animation property track and select Paste Keyframe to paste the keyframe on the current animation property track.
The above two pasting methods differ when copying and pasting data from multiple property tracks, the difference mainly lies in:
When using shortcut keys to paste keyframes, the keyframes will be pasted on the animation property track where they were copied, in the order of the copied keyframes.
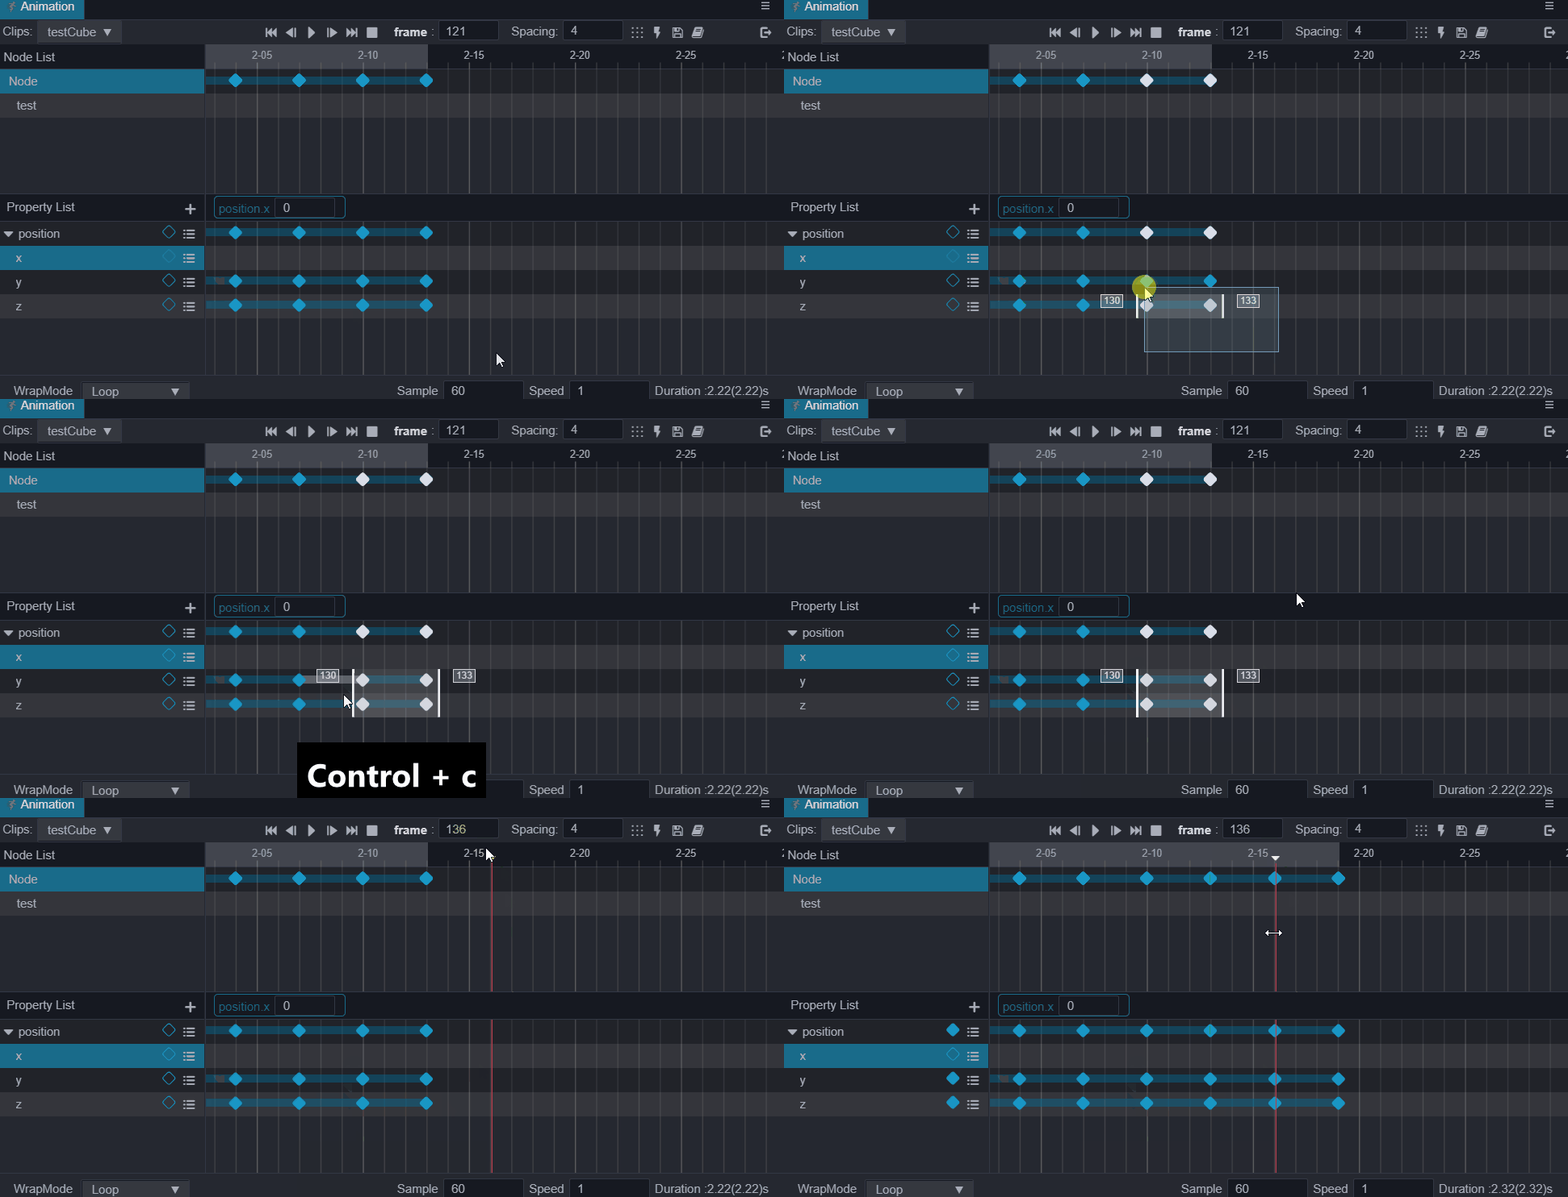
When right-clicking on the target property track and select Paste, only the copied data will be pasted on the target property track.
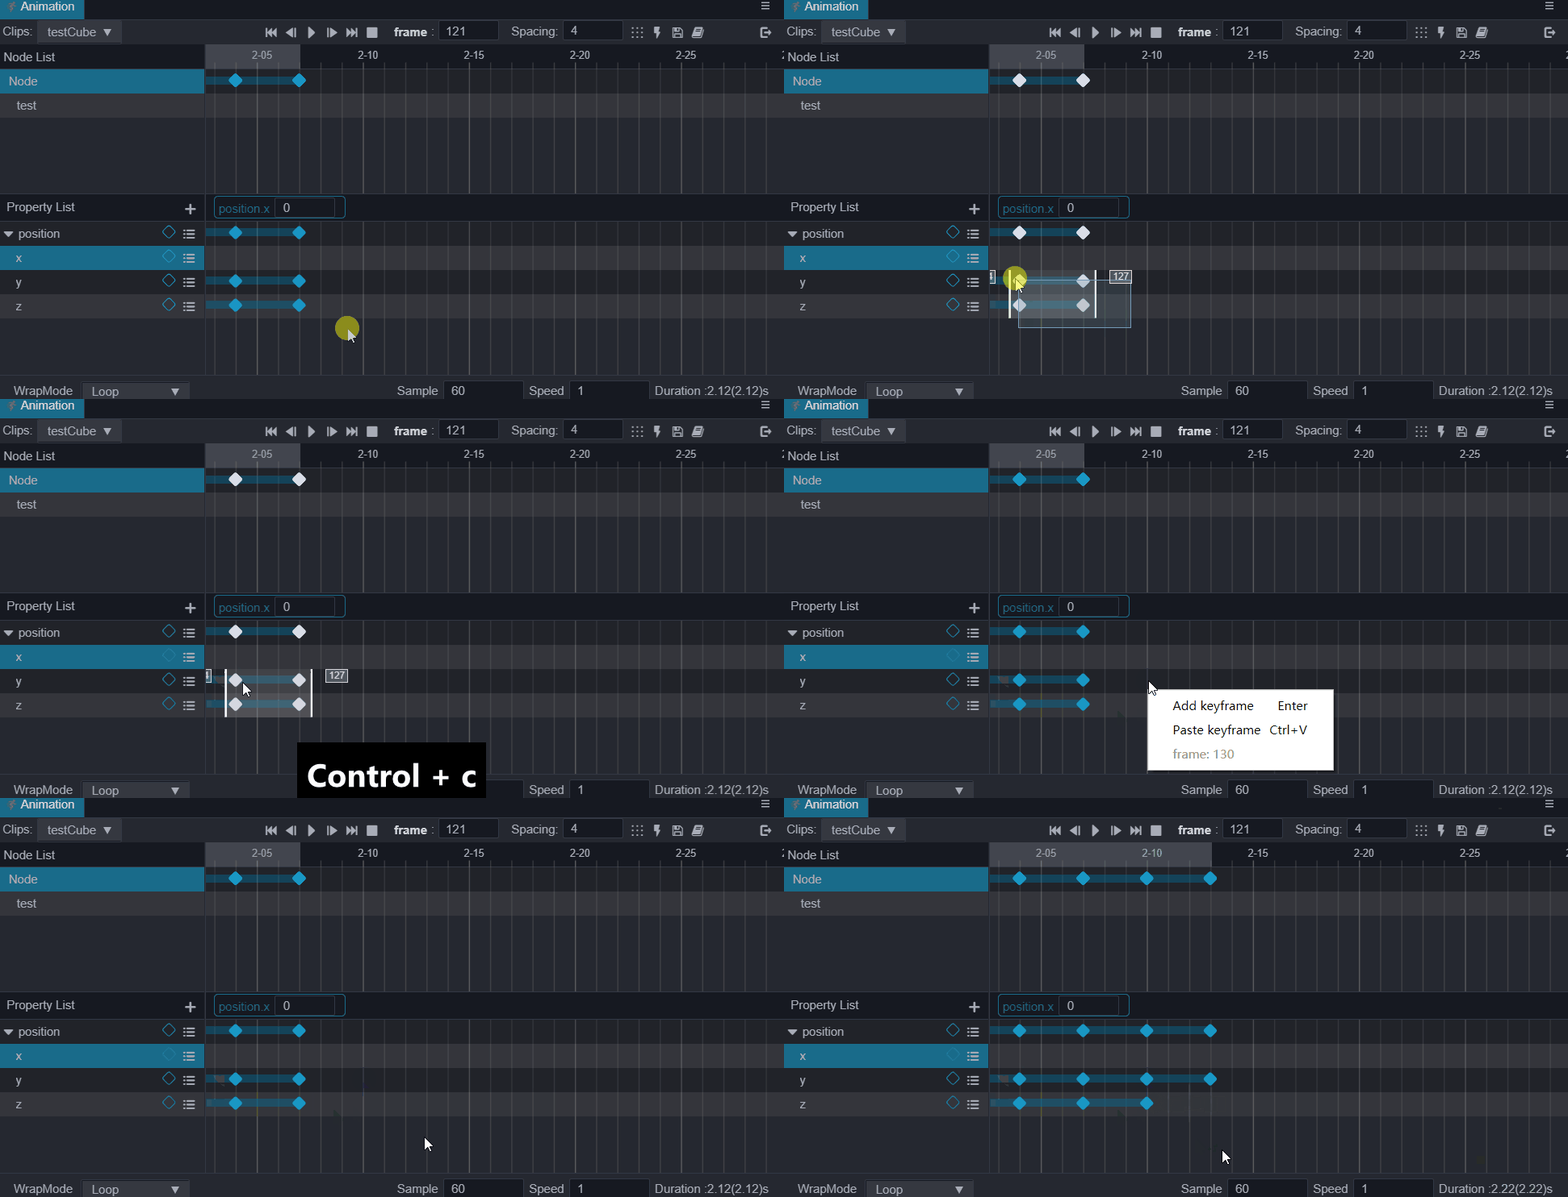
Component property tracks (e.g.: x, y, z properties under the animation property track position) as separate property tracks will also follow this rule. If right-clicking on the target component track after copying the keyframe data on the main track (e.g.: animation property track position) to paste it, only the target component track will be pasted with the keyframe data. Be sure to copy the data according to the actual position you want to paste, to avoid unintended results.