Basic Actions and how to run them
Basic actions are usually a singular action, thus accomplishing a single objective. Let's take a look at a few examples:
Move
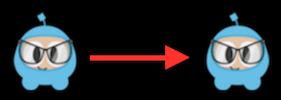
Move a Node over a set period of time.
auto mySprite = Sprite::create("mysprite.png");

// Move a sprite to a specific location over 2 seconds.
auto moveTo = MoveTo::create(2, Vec2(50, 0));

mySprite->runAction(moveTo);

// Move a sprite 50 pixels to the right, and 0 pixels to the top over 2 seconds.
auto moveBy = MoveBy::create(2, Vec2(50, 0));

mySprite->runAction(moveBy);
Rotate
Rotate a Node clockwise over 2 seconds.
auto mySprite = Sprite::create("mysprite.png");

// Rotates a Node to the specific angle over 2 seconds
auto rotateTo = RotateTo::create(2.0f, 40.0f);
mySprite->runAction(rotateTo);

// Rotates a Node clockwise by 40 degree over 2 seconds
auto rotateBy = RotateBy::create(2.0f, 40.0f);
mySprite->runAction(rotateBy);

Scale
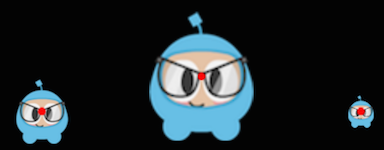
Scale a Node by 10 over 2 seconds.
auto mySprite = Sprite::create("mysprite.png");

// Scale uniformly by 3x over 2 seconds
auto scaleBy = ScaleBy::create(2.0f, 3.0f);
mySprite->runAction(scaleBy);

// Scale X by 5 and Y by 3x over 2 seconds
auto scaleBy = ScaleBy::create(2.0f, 3.0f, 3.0f);
mySprite->runAction(scaleBy);

// Scale to uniformly to 3x over 2 seconds
auto scaleTo = ScaleTo::create(2.0f, 3.0f);
mySprite->runAction(scaleTo);

// Scale X to 5 and Y to 3x over 2 seconds
auto scaleTo = ScaleTo::create(2.0f, 3.0f, 3.0f);
mySprite->runAction(scaleTo);
Fade In/Out
Fade a Node.
It modifies the opacity from 0 to 255. The reverse of this action is FadeOut
auto mySprite = Sprite::create("mysprite.png");

// fades in the sprite in 1 seconds
auto fadeIn = FadeIn::create(1.0f);
mySprite->runAction(fadeIn);

// fades out the sprite in 2 seconds
auto fadeOut = FadeOut::create(2.0f);
mySprite->runAction(fadeOut);

Tint
Tint a Node that implements the NodeRGB protocol from current the tint to a custom tint.
auto mySprite = Sprite::create("mysprite.png");

// Tints a node to the specified RGB values
auto tintTo = TintTo::create(2.0f, 120.0f, 232.0f, 254.0f);
mySprite->runAction(tintTo);

// Tints a node BY the delta of the specified RGB values.
auto tintBy = TintBy::create(2.0f, 120.0f, 232.0f, 254.0f);
mySprite->runAction(tintBy);

Animate
With Animate it is possible to do simple flipbook animation with your Sprite objects. This is simply replacing the display frame at set intervals for the duration of the animation. Let's consider this example:
auto mySprite = Sprite::create("mysprite.png");

// now lets animate the sprite we moved
Vector<SpriteFrame*> animFrames;
animFrames.reserve(12);
animFrames.pushBack(SpriteFrame::create("Blue_Front1.png", Rect(0,0,65,81)));
animFrames.pushBack(SpriteFrame::create("Blue_Front2.png", Rect(0,0,65,81)));
animFrames.pushBack(SpriteFrame::create("Blue_Front3.png", Rect(0,0,65,81)));
animFrames.pushBack(SpriteFrame::create("Blue_Left1.png", Rect(0,0,65,81)));
animFrames.pushBack(SpriteFrame::create("Blue_Left2.png", Rect(0,0,65,81)));
animFrames.pushBack(SpriteFrame::create("Blue_Left3.png", Rect(0,0,65,81)));
animFrames.pushBack(SpriteFrame::create("Blue_Back1.png", Rect(0,0,65,81)));
animFrames.pushBack(SpriteFrame::create("Blue_Back2.png", Rect(0,0,65,81)));
animFrames.pushBack(SpriteFrame::create("Blue_Back3.png", Rect(0,0,65,81)));
animFrames.pushBack(SpriteFrame::create("Blue_Right1.png", Rect(0,0,65,81)));
animFrames.pushBack(SpriteFrame::create("Blue_Right2.png", Rect(0,0,65,81)));
animFrames.pushBack(SpriteFrame::create("Blue_Right3.png", Rect(0,0,65,81)));

// create the animation out of the frames
Animation* animation = Animation::createWithSpriteFrames(animFrames, 0.1f);
Animate* animate = Animate::create(animation);

// run it and repeat it forever
mySprite->runAction(RepeatForever::create(animate));
It's hard to show an animation in text, so please run the example Programmer Guide Sample code to see this in action!
Easing
Easing is animating with a specified acceleration to make the animations smooth. A few things to keep in mind is that regardless of speed, ease actions always start and finish at the same time. Ease actions are a good way to fake physics in your game! Perhaps you want a few simulated physics effects but don't want the overhead and complexity of adding it all for a few very basic actions. Another good example is to animate menus and buttons.
Here are common easing functions displayed over a graph:
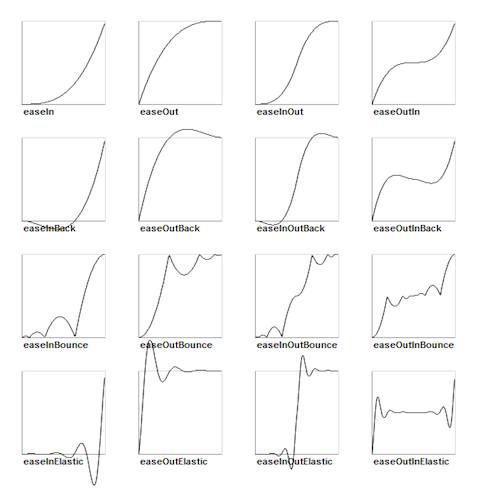
Cocos2d-x supports most of the easing function in the above graph. They are also
simple to implement. Lets look at a specific use case. Lets drop a Sprite object
from the top of the screen and make it bounce.
// create a sprite
auto mySprite = Sprite::create("mysprite.png");

// create a MoveBy Action to where we want the sprite to drop from.
auto move = MoveBy::create(2, Vec2(200, dirs->getVisibleSize().height -
 newSprite2->getContentSize().height));

// create a BounceIn Ease Action
auto move_ease_in = EaseBounceIn::create(move->clone());
auto move_ease_in_back = move_ease_in->reverse();

// create a delay that is run in between sequence events
auto delay = DelayTime::create(0.25f);

// create the sequence of actions, in the order we want to run them
auto seq1 = Sequence::create(move_ease_in, delay, move_ease_in_back,
    delay->clone(), nullptr);

// run the sequence and repeat forever.
mySprite->runAction(RepeatForever::create(seq1));
Run the example Programmer Guide Sample code to see this in action!