Editing a animation sequence
After the animation clip is attached to the Node, click Enter Animation Edit Mode to enter the animation editing mode, and then you can create some animation frame data in the animation clip.
First, it is important to understand about animation properties. Animation properties include a Node's own position, rotation and other properties, as well as the properties in a Component.
The component contains the component's name and other properties, such as Sprite.spriteFrame. The corresponding blue prism on the property track is the key frame.
Animation components can animate the node and component properties on the node and child nodes, including Properties in user-defined scripts. This means that various animation requirements can be flexibly implemented. The specific animation implementation depends on different animation needs and different steps. For an example case, please refer to the official example-3d. This repository mainly introduces some common editing operations and facilitates rapid editing to achieve these effects.
Modify a clip's common properties
sample: define the frame rate of the current animation data per second, the default is 60, this parameter will affect the number of frames between every two integer seconds scale on the time axis (that is, how many divisions within one seconds).
speed: the current playback speed of the animation, the default is 1.
duration: when the animation playback speed is 1, the duration of the animation.
real time: the actual duration of the animation from the beginning to the end of the animation, corresponding to the number in the parenthesis in the lower right corner of the editor.
wrap mode: Loop mode, please refer to the Cycle Mode documentation for specific configuration effects.
Changes to properties take effect after the focus leaves the control.
Common operations of node panel
The animation clip defines the position of the data by the name of the node, ignoring the root node itself, and the remaining child nodes find their corresponding data through the relative path index of the root node.
Clear node data: right-click the node item of the animation editor, select Empty Data, and select Clear after the pop-up window prompts
Copy and paste node data:right-click the node item of the animation editor, select Copy Node Data, and then right-click the target node item, select Paste Node Data.
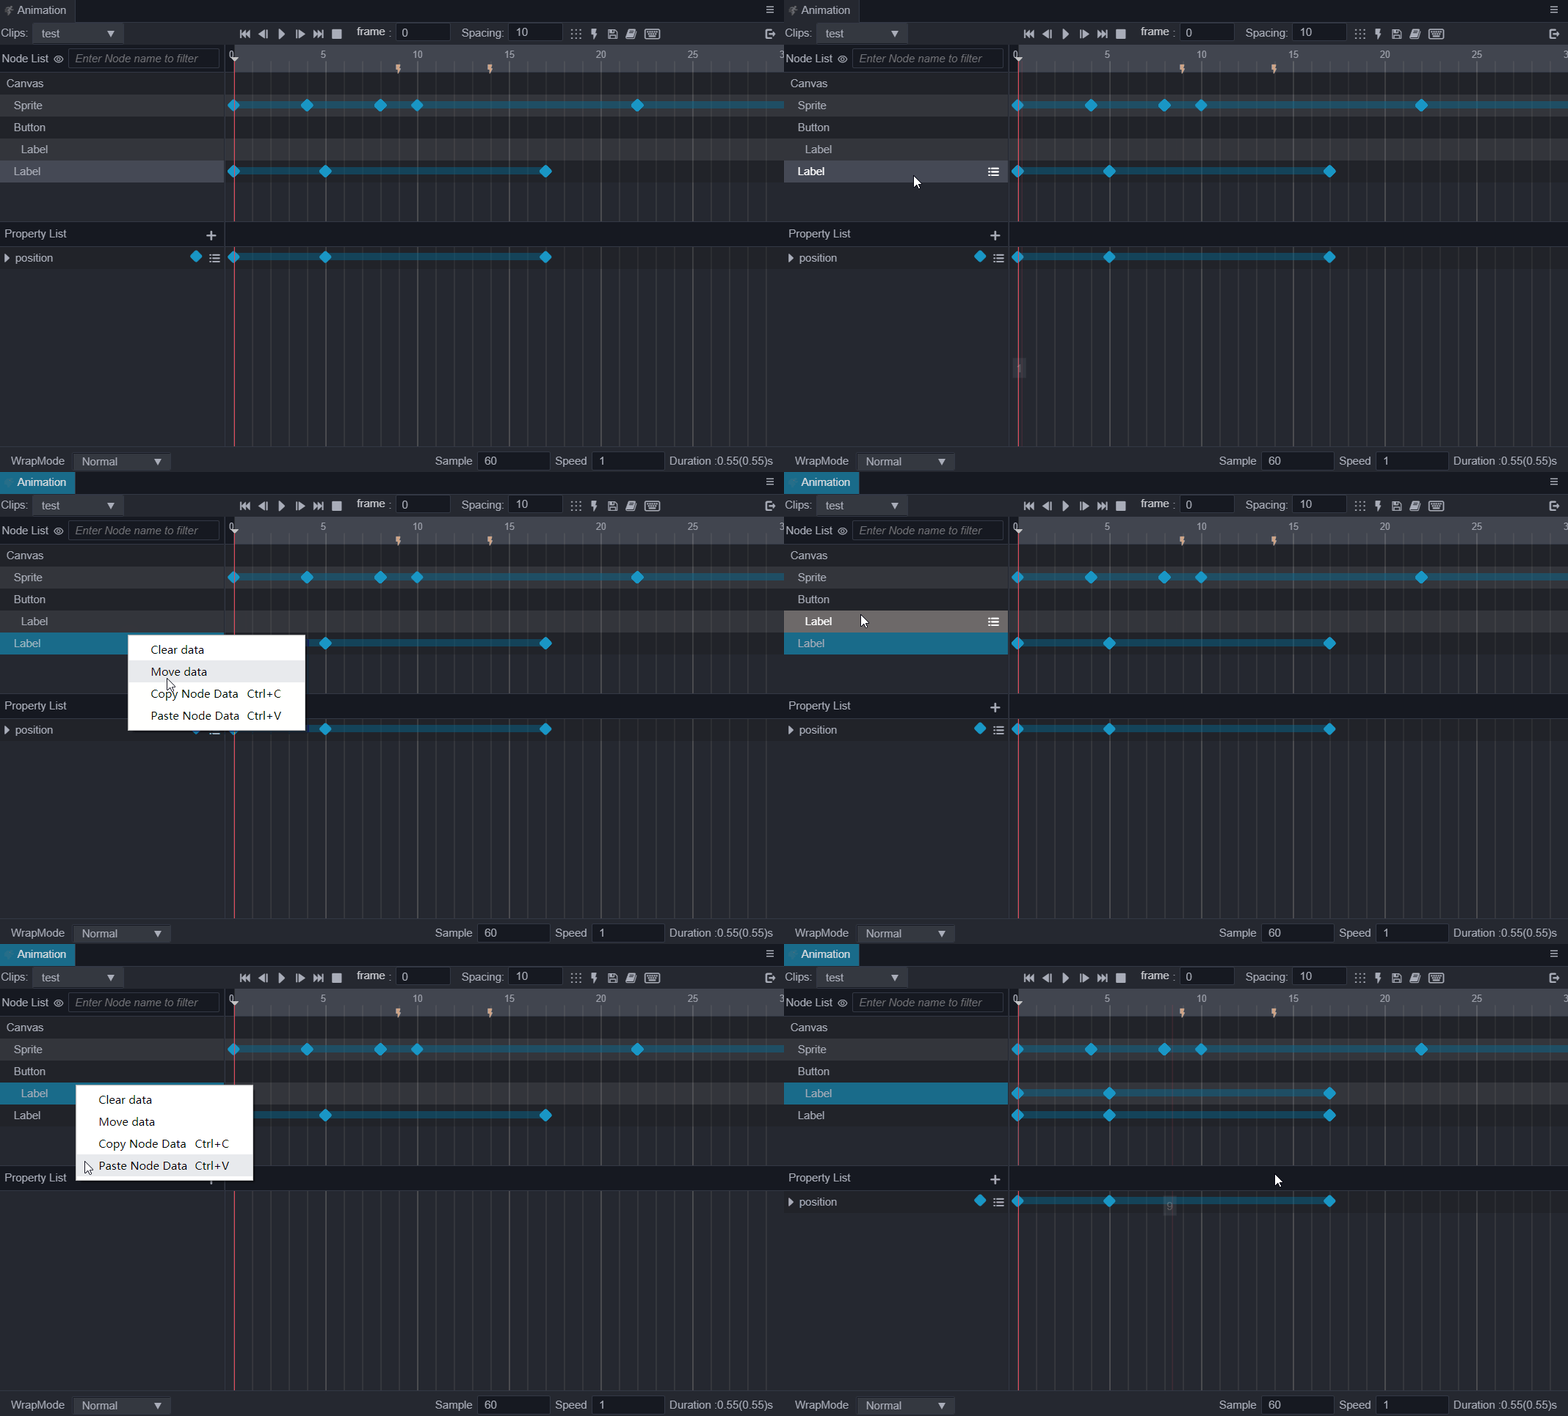
Note: When using shortcut keys to copy and paste node data, please make sure that no attribute track or keyframe is currently selected. Because when there is a selected attribute track or key frame, the animation data will be copied first. If the paste target node does not exist when the attribute track in the animation data is copied, it will not be created automatically. Please create the required components in advance.
Migrating node data: sometimes we will rename the node after the animation is completed, which will cause problems with the animation data, as shown below:

Next, right-click on Migrate Data on the missing node, and then click on other nodes to migrate the data. If you do not want to migrate after clicking Migrate Data, click directly in the timeline area or click Cancel in the pop-up window after clicking other nodes.
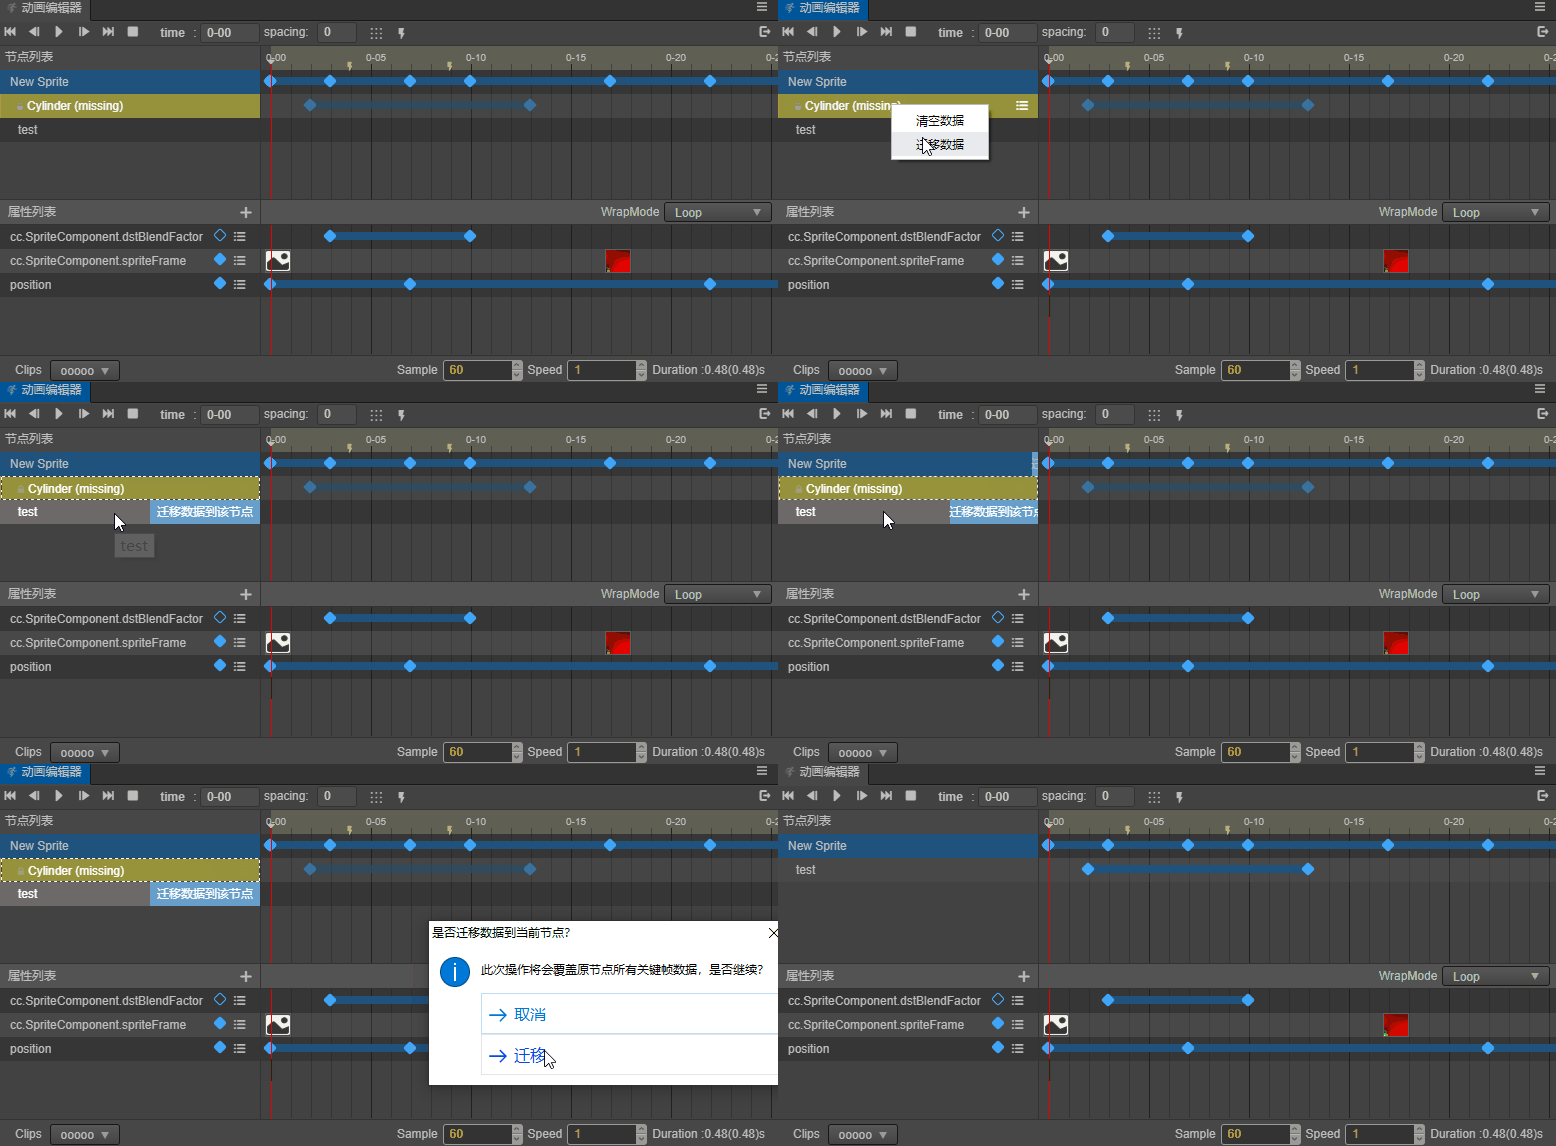
Note: by default, node data migration will overwrite the data on the target node
Common operations of property track data
An animation clip may contain multiple nodes, and multiple animation properties are bound to each node. The data in each property is the actual key frame. The key frame operation in the property has been mentioned above. This section mainly introduces some operations for the entire property track:
Add an property track: click the
+small button next to the property list, after the pop-up property menu pops up, click on the property that needs to be added. Example: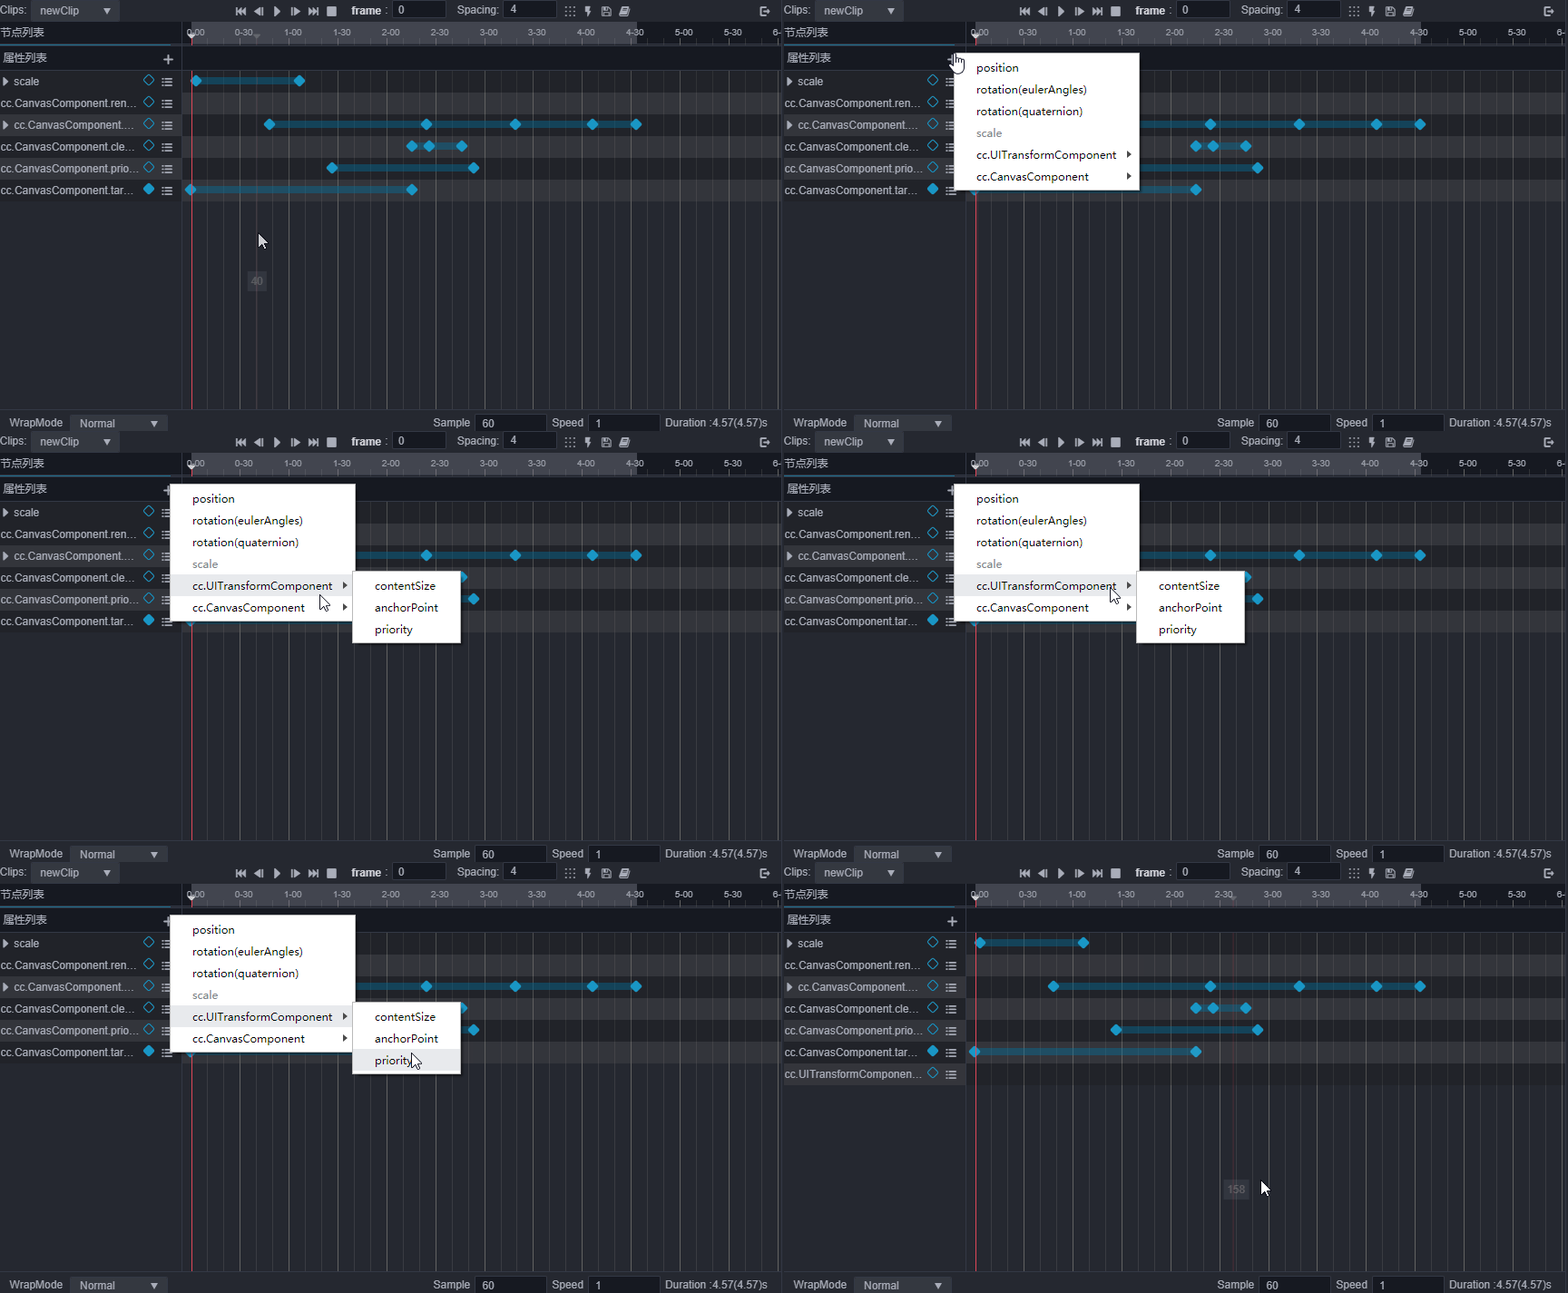
Remove property track: right-click the property list item and select Remove property track. Example:
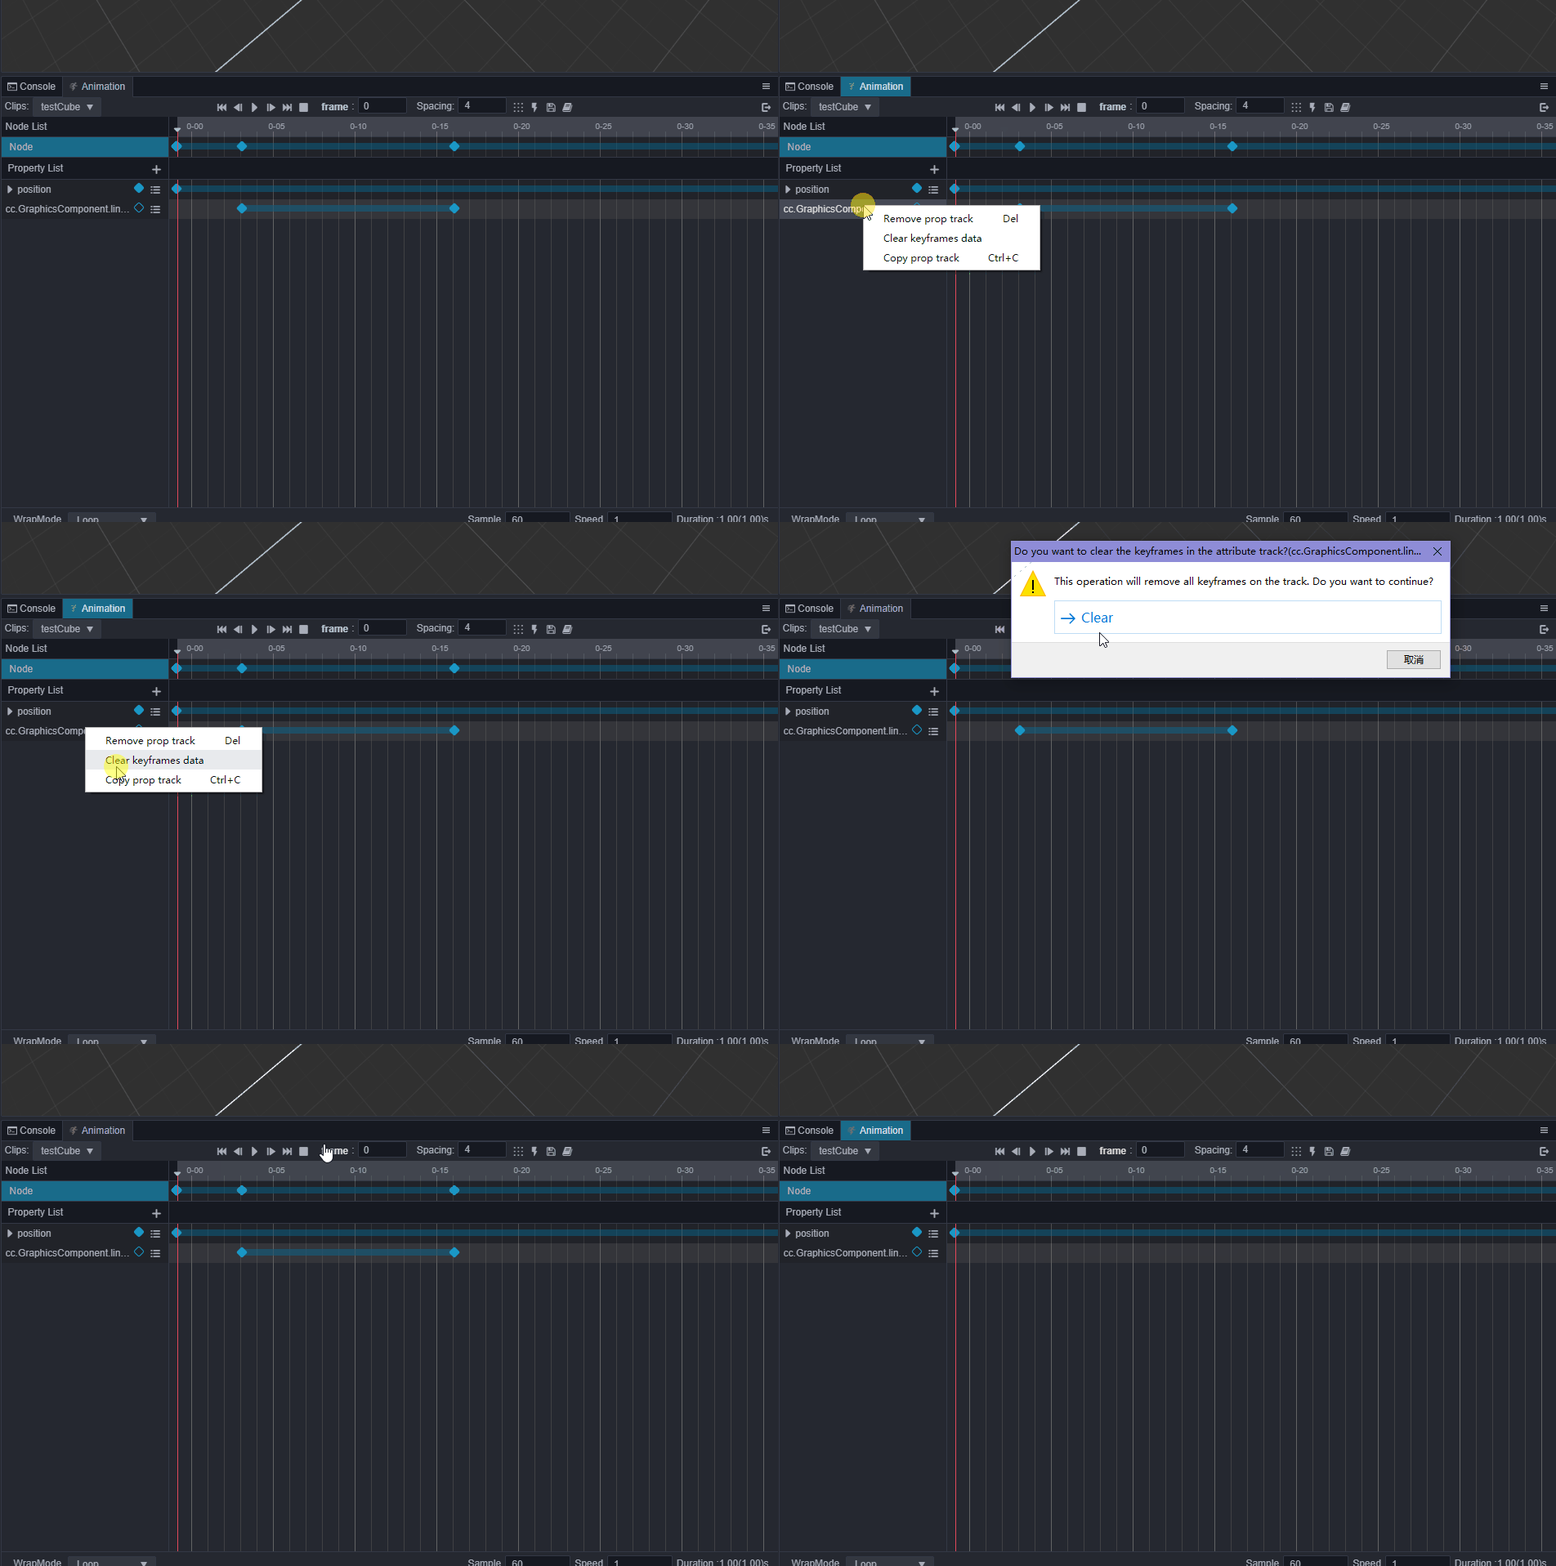
Clear track data: right-click the property list item and select Clear property track. Example:
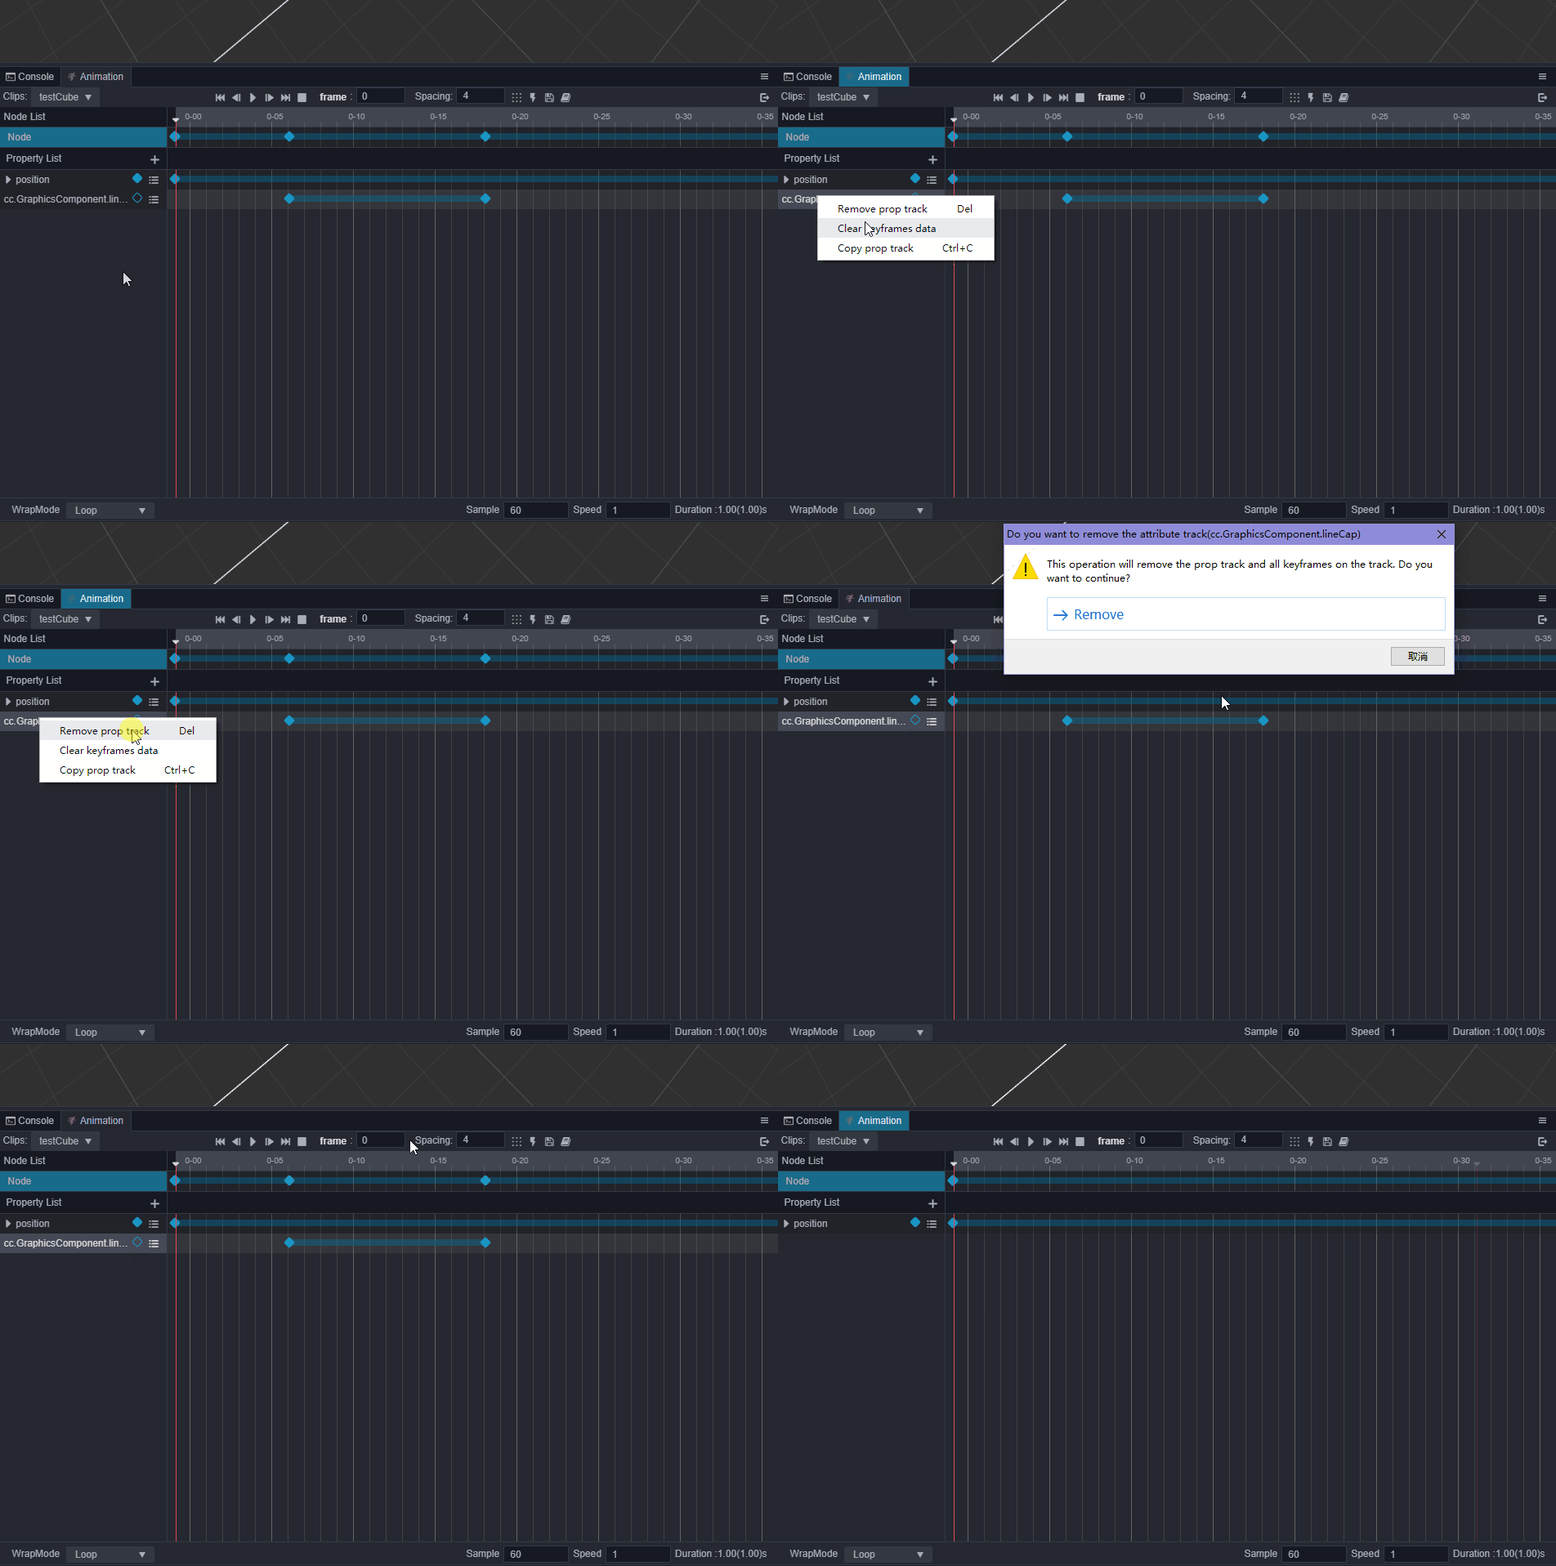
Copy and paste track data: right-click the property list item, select copy track data or press Ctrl + C, then click the same type of track as the copied track, right-click will see the paste option, click or press Ctrl + V to paste. Example:
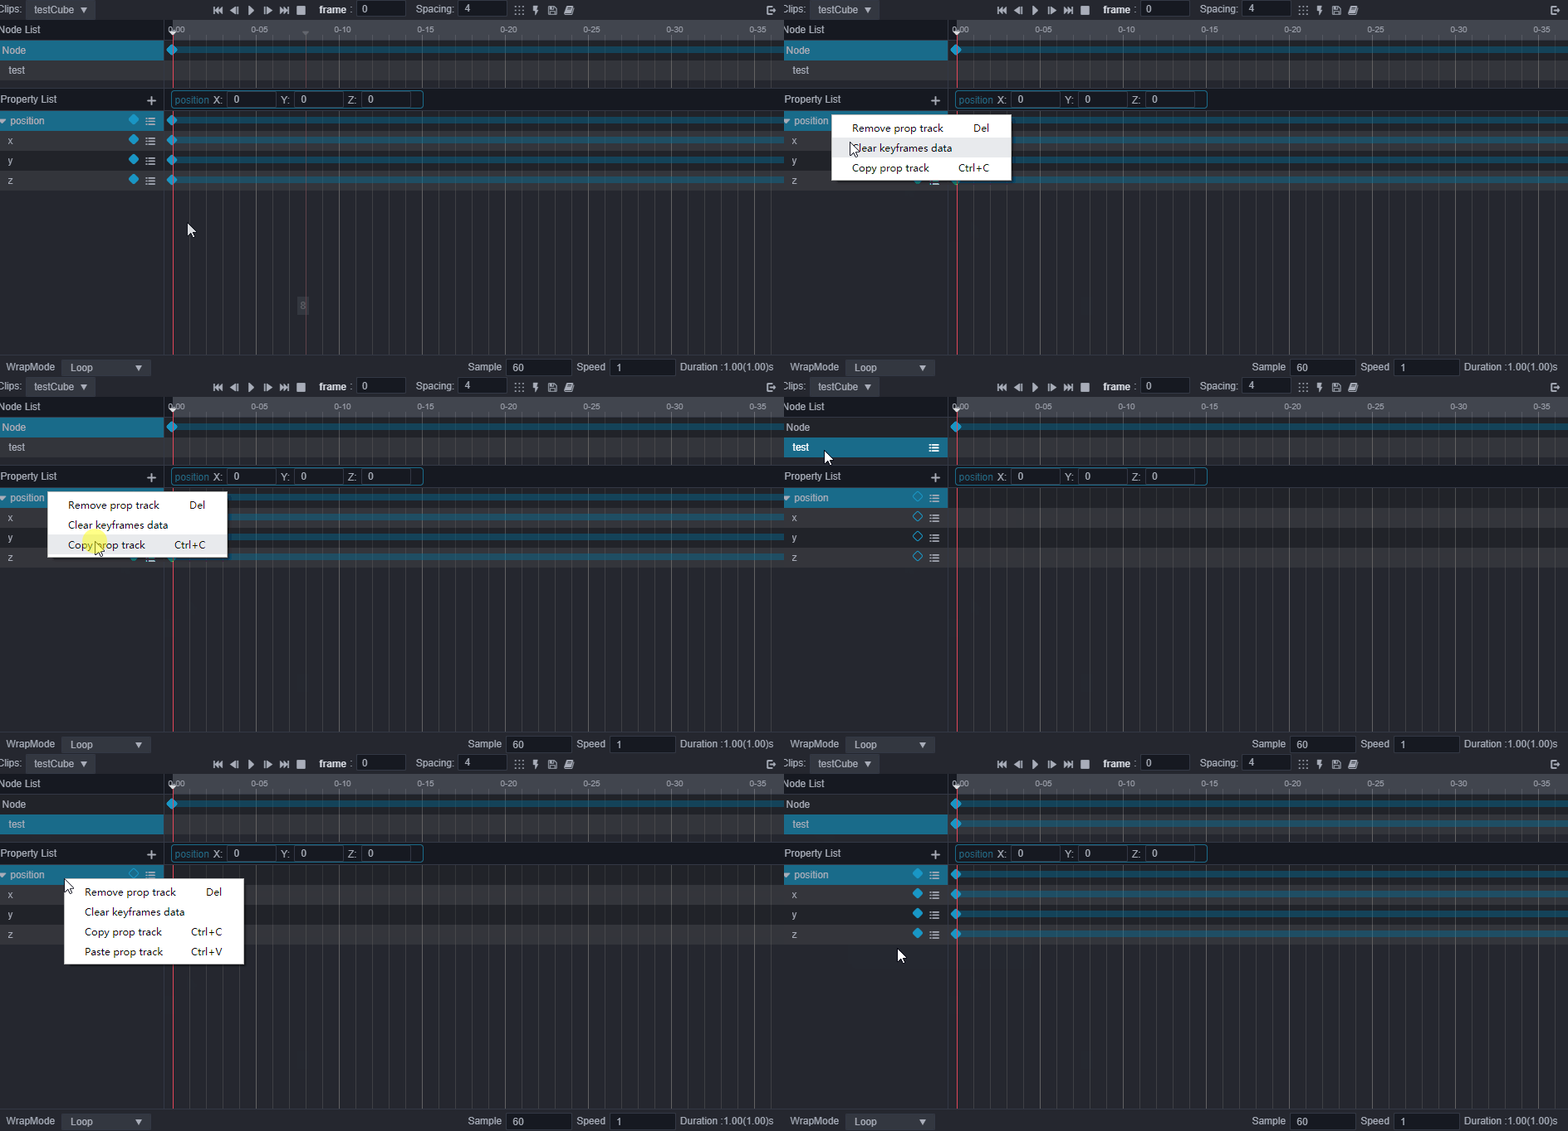
Common Key Frame Operations
In the process of producing animations, there are often some manipulation of key frames. There are a variety of key frame processing methods in the animation editor.. Knowing these methods and techniques can help to edit animation clips faster.
Selecting a key frame
After clicking the key frame, the key frame will be selected. At this time, the key frame changes from blue to white. Currently, there are the following ways to select the key frame:
- Right-click a key frame to select it, press Ctrl and right-click to select multiple key frames.
- Drag the frame directly in the key frame area to select the key frame.
- Press down the mouse in the empty area of the key frame panel and drag to form a selection area to select all key frames inside.
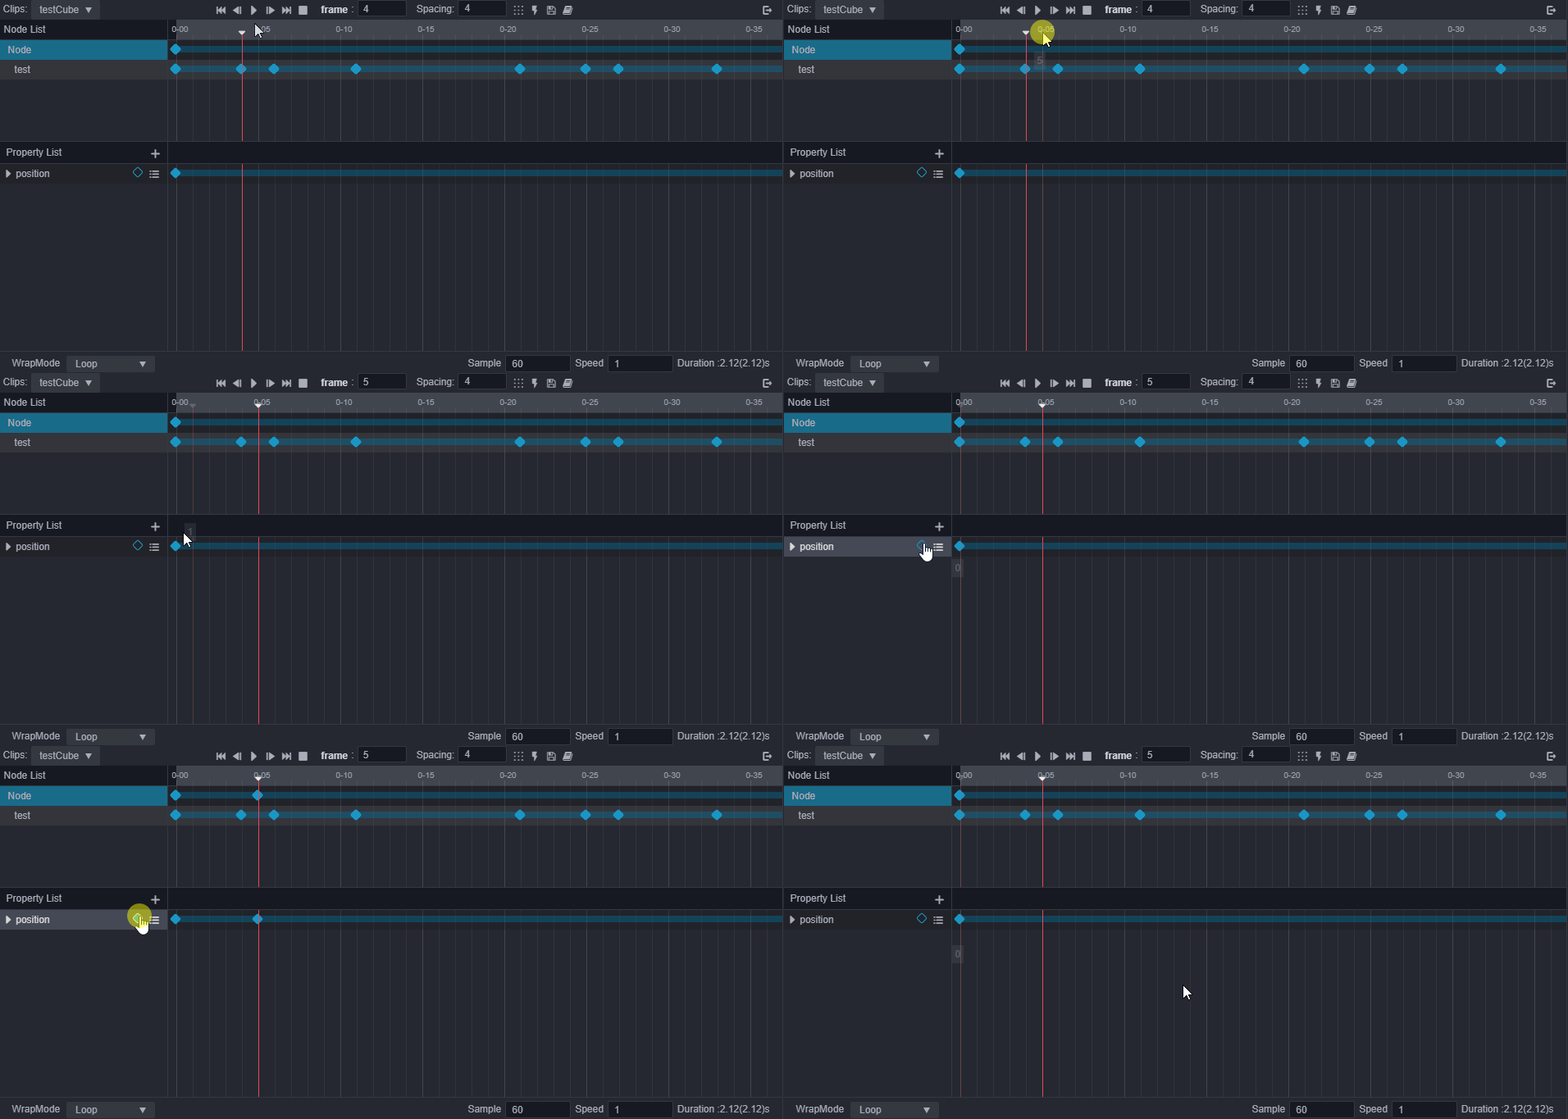
Add key frame
To add a key frame:
Right-click on the corresponding property track position and select Add Key Frame. The current number of key frame frames will also appear on the right-click menu.
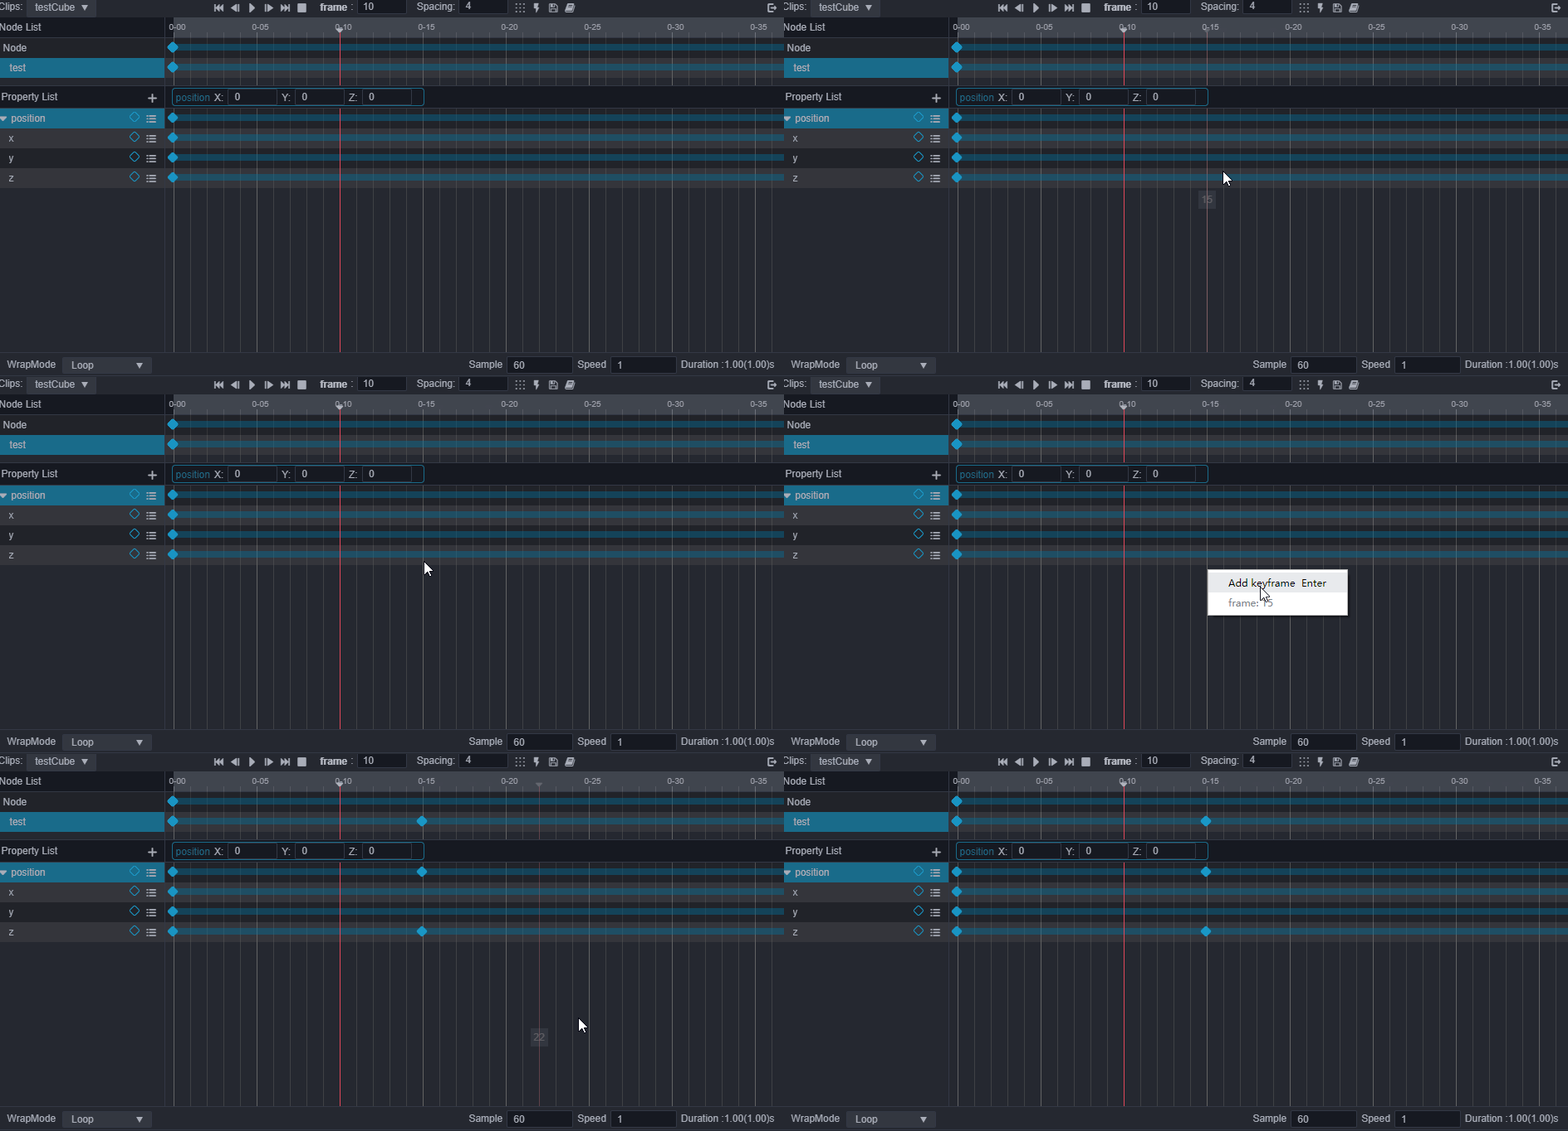
Select the corresponding node and the corresponding property, move the time cursor to the position where the key frame needs to be added, and press the I (inset) key
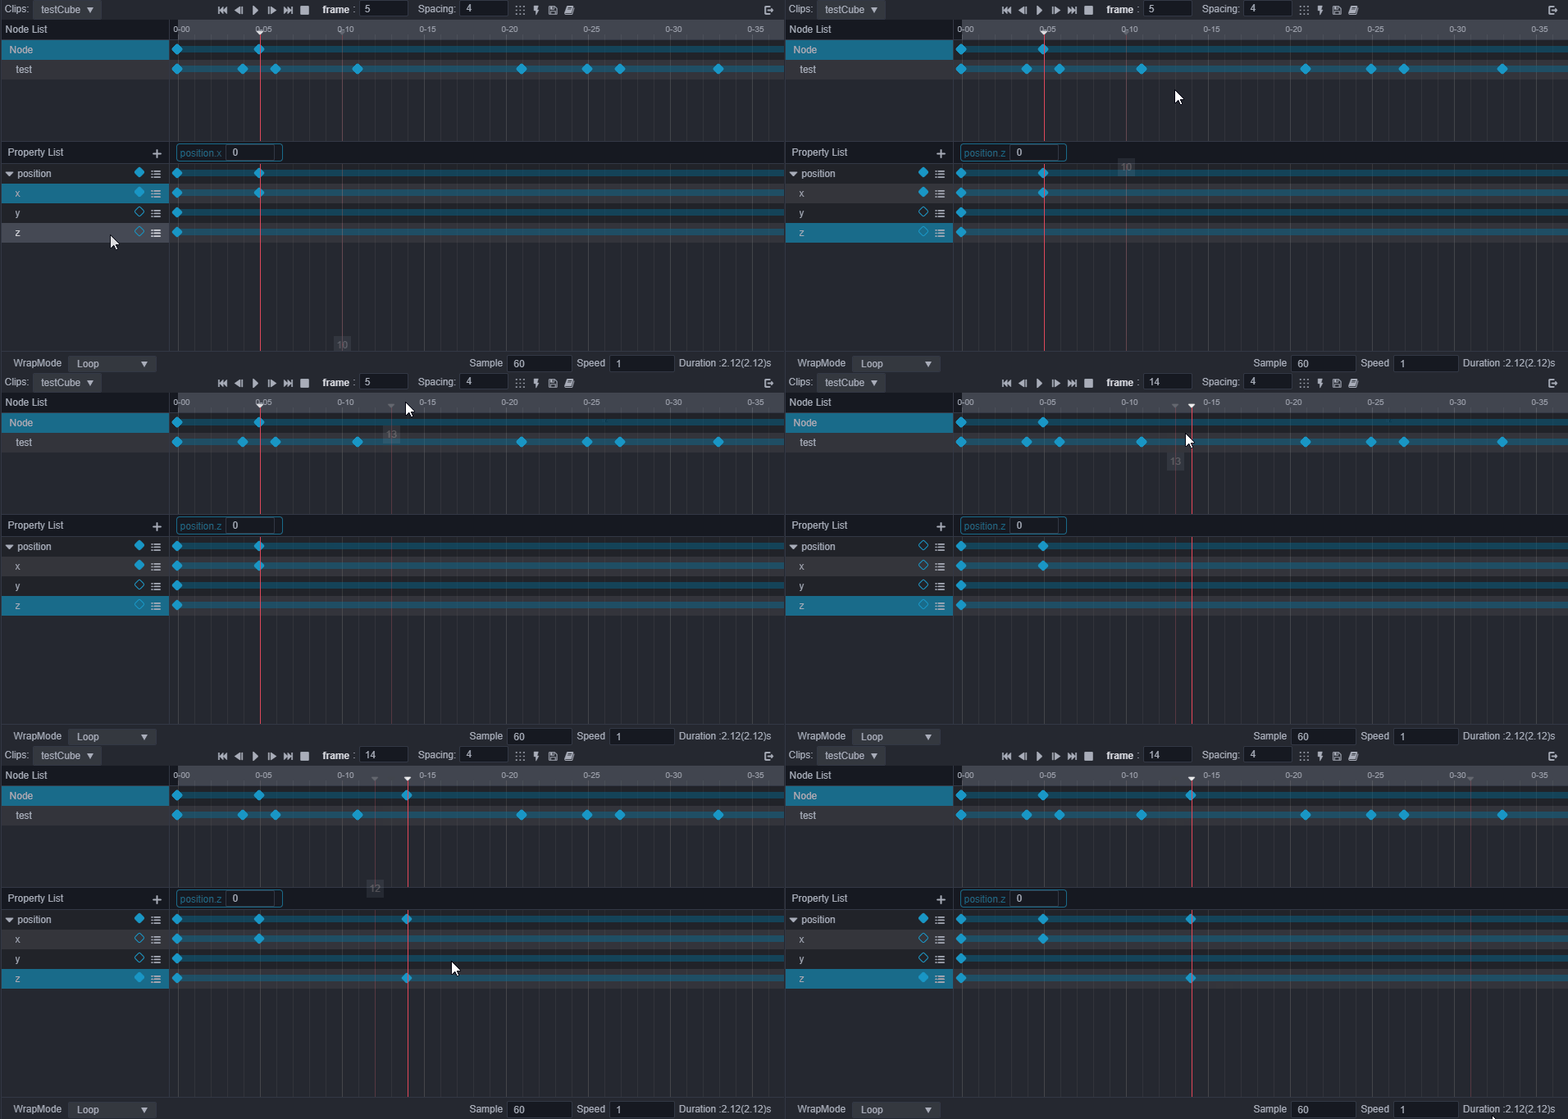
Move the time cursor to the position where the key frame needs to be added. In the corresponding property list item, click
 .
.
After selecting the corresponding node and the corresponding property track, the editor control for the corresponding property will appear in the middle of the animation editor, and the key frame can be marked by modification.
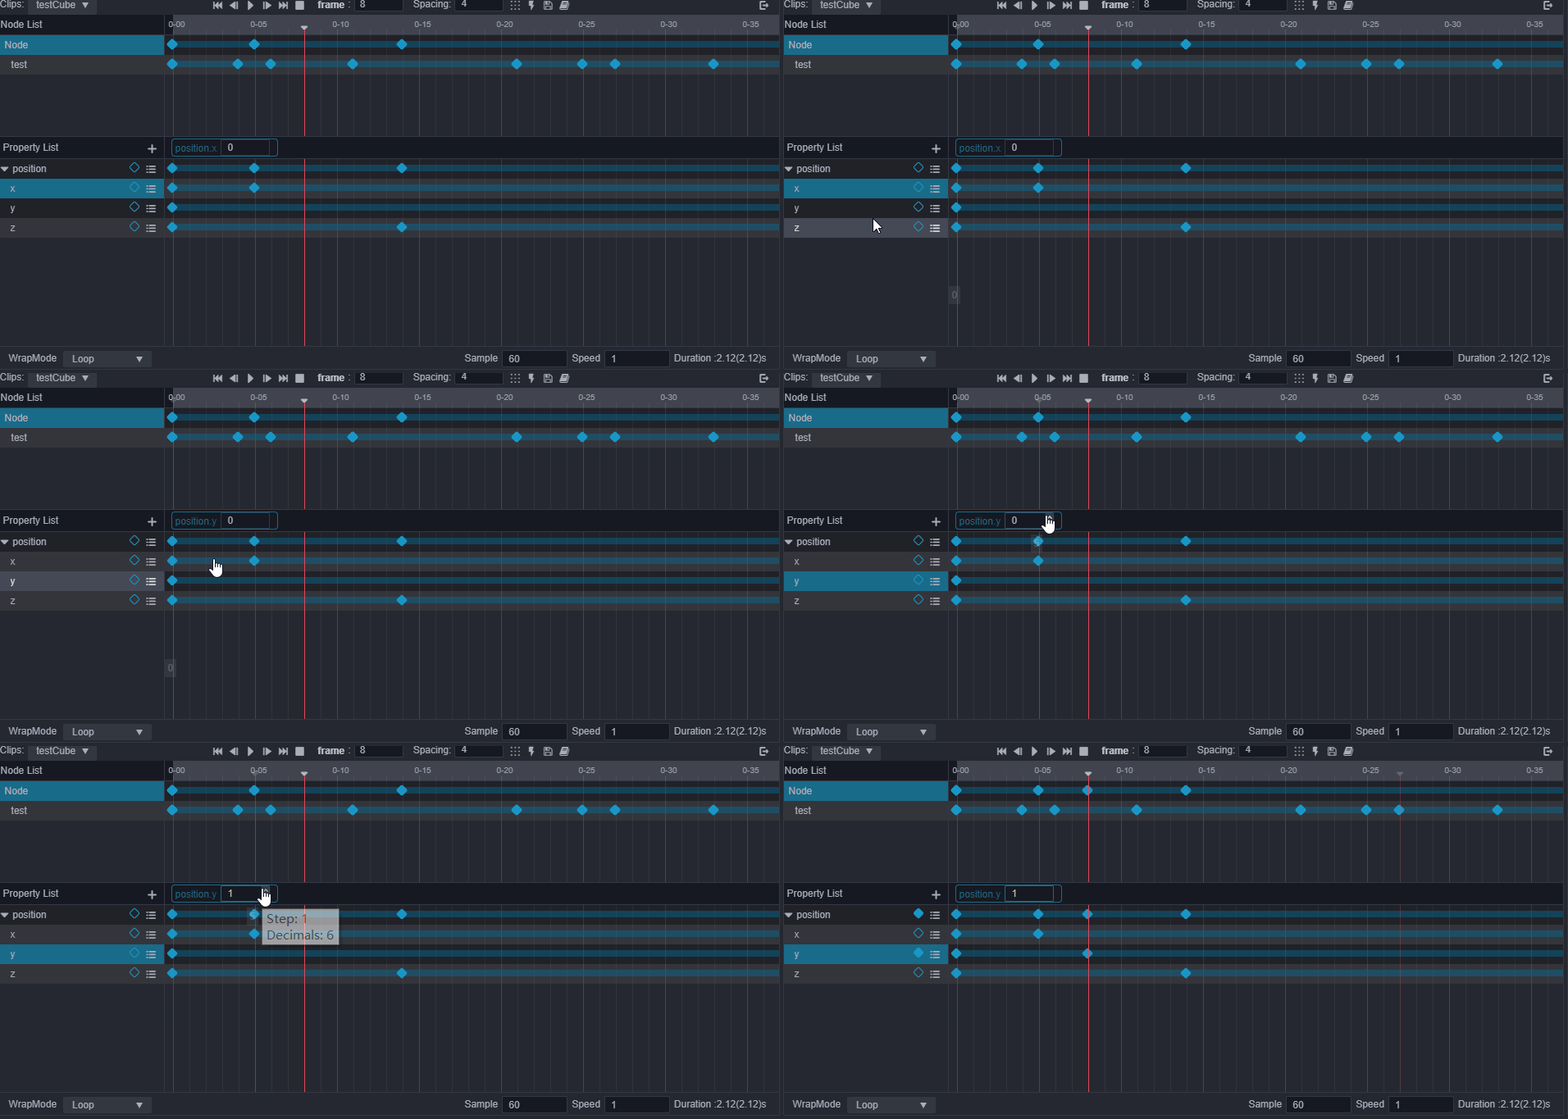
After adding the property track, move the time cursor to desired position of the Property Inspector or perform scene operations to automatically generate key frames.
Removing key frames
- Select the key frames you want to delete and press delete/Cmd + backspace on MacOS and delete/Ctrl + backspace on Windows.
- At the position of the key frame to be deleted right-click, select Remove Key Frame.
Drag the time cursor to the position where the key frame needs to be removed and double-click the key frame, in the corresponding property list item, click

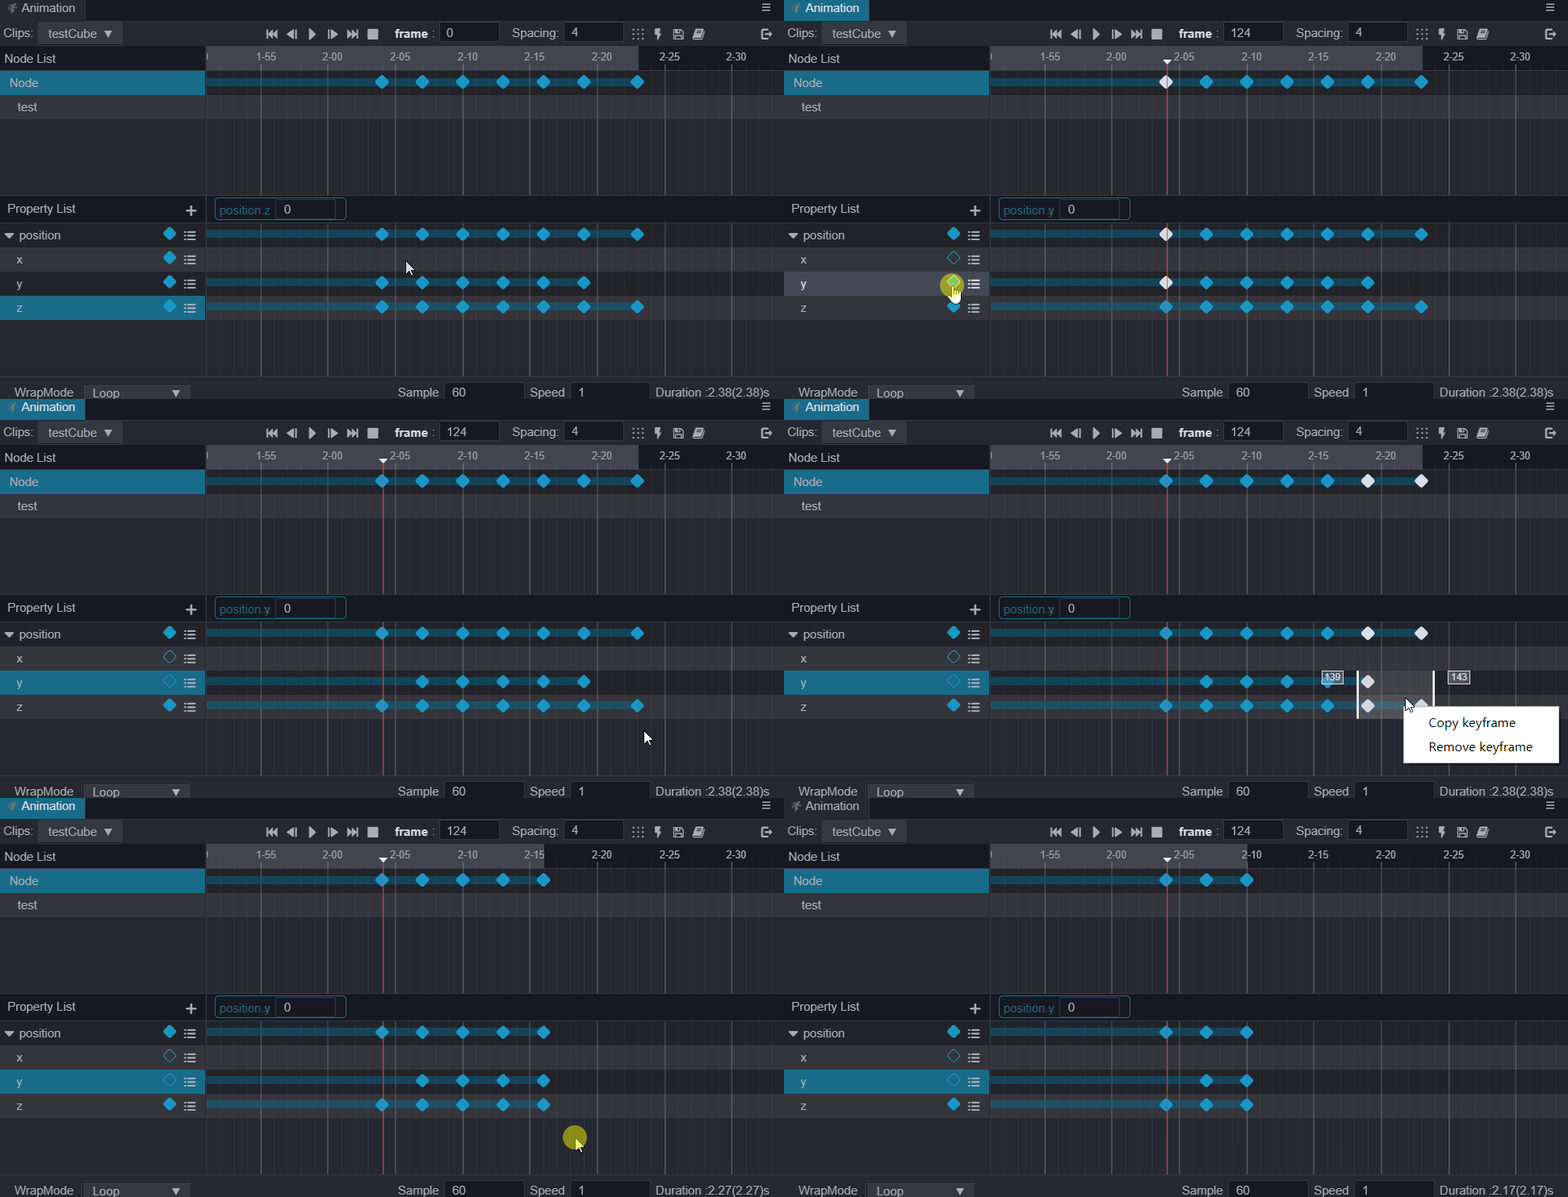
Modifying key frame data
On the timeline double-click the key frame that needs to be modified. The time cursor will move to that position. You can also directly drag the time cursor to the corresponding position, and modify the corresponding properties directly in the Property Inspector. Make sure the animation editor is in edit mode. For example, there are three property tracks in the property list: position, scale, and rotation. After the key frame is selected, you can modify the position, scale, and rotation properties in the Property Inspector.
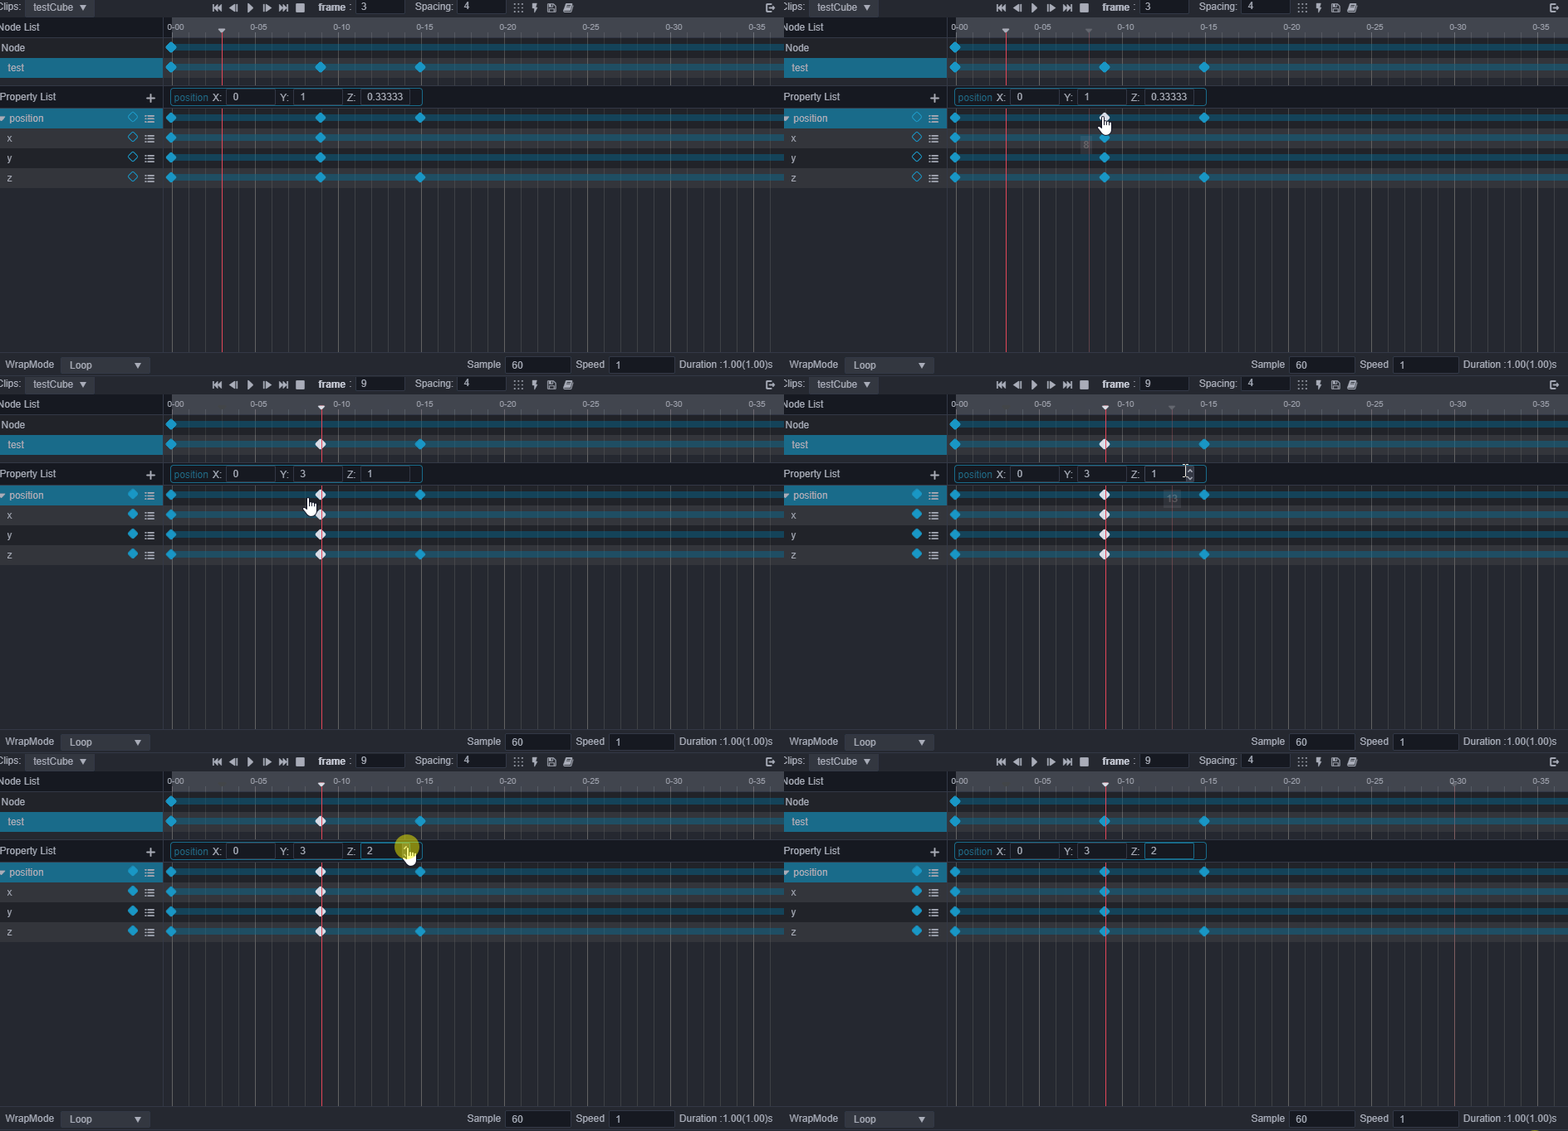
In animation editing mode, move the time control line to a position where there are no key frames on the timeline, and then modify the corresponding properties in the Property Inspector, and a frame will also be inserted automatically.
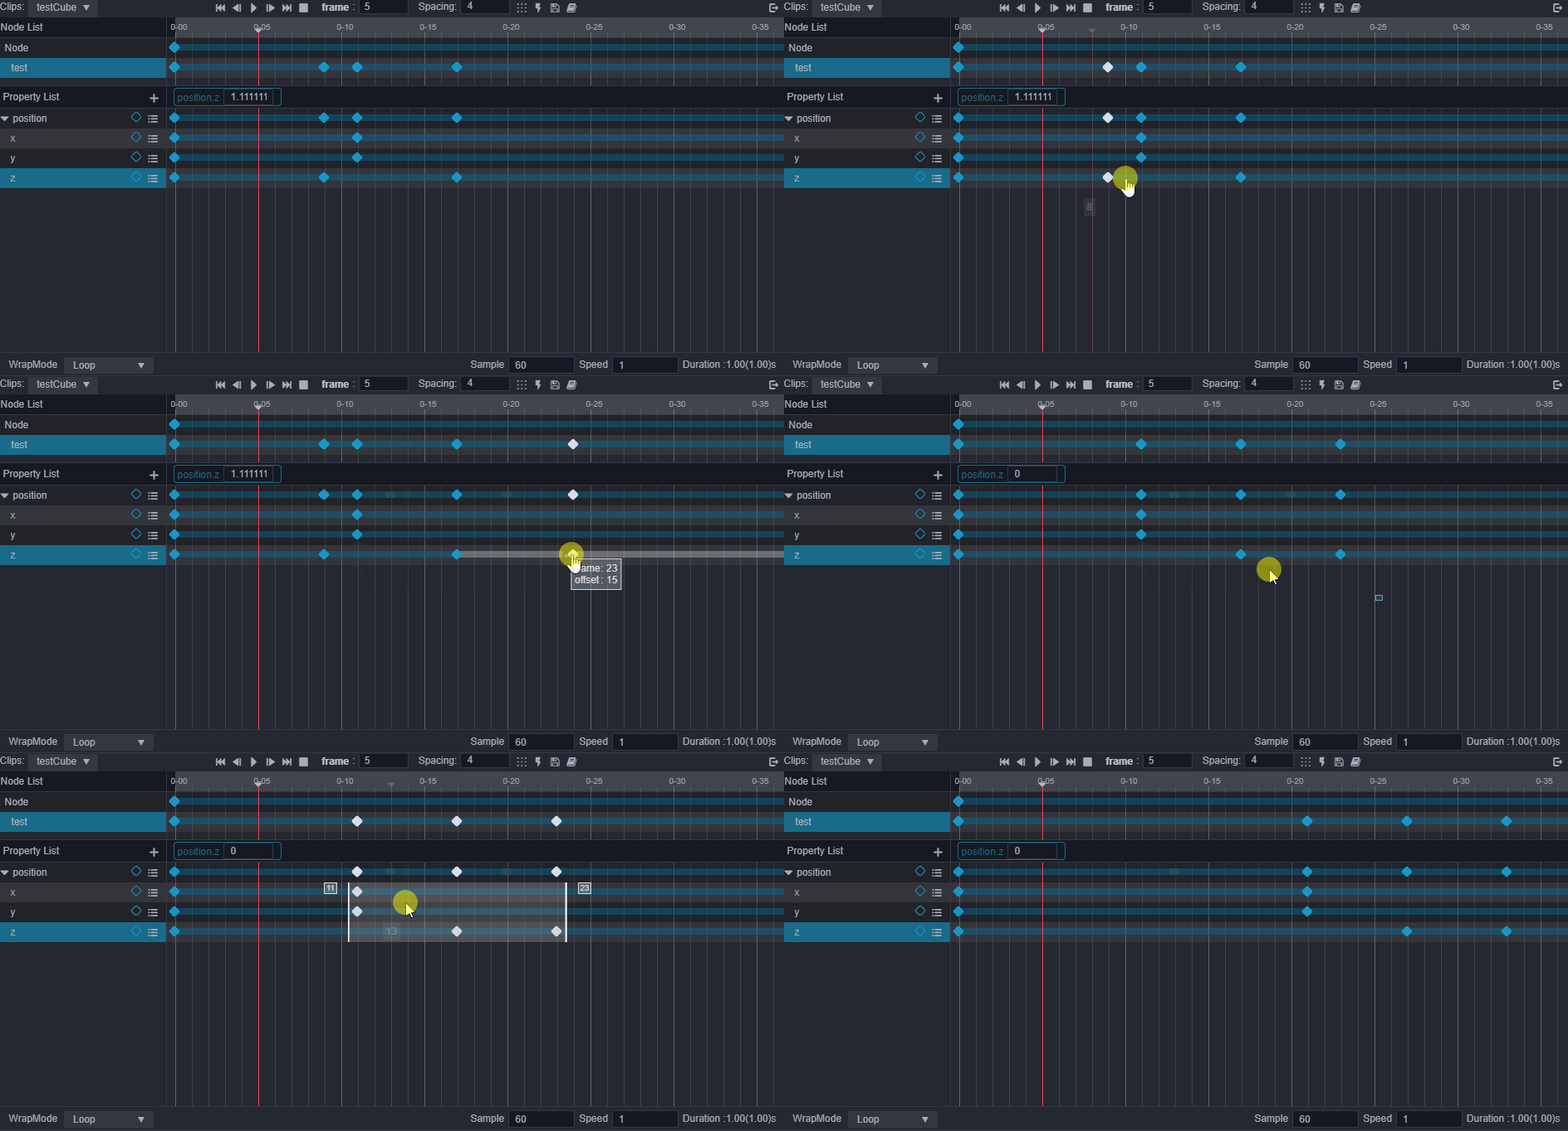
Moving a key frame
After selecting a key frame, right-click and hold on the selected key frame to drag, and release it to complete the movement. There will be prompts for the distance and the number of frames in the final position during the movement.
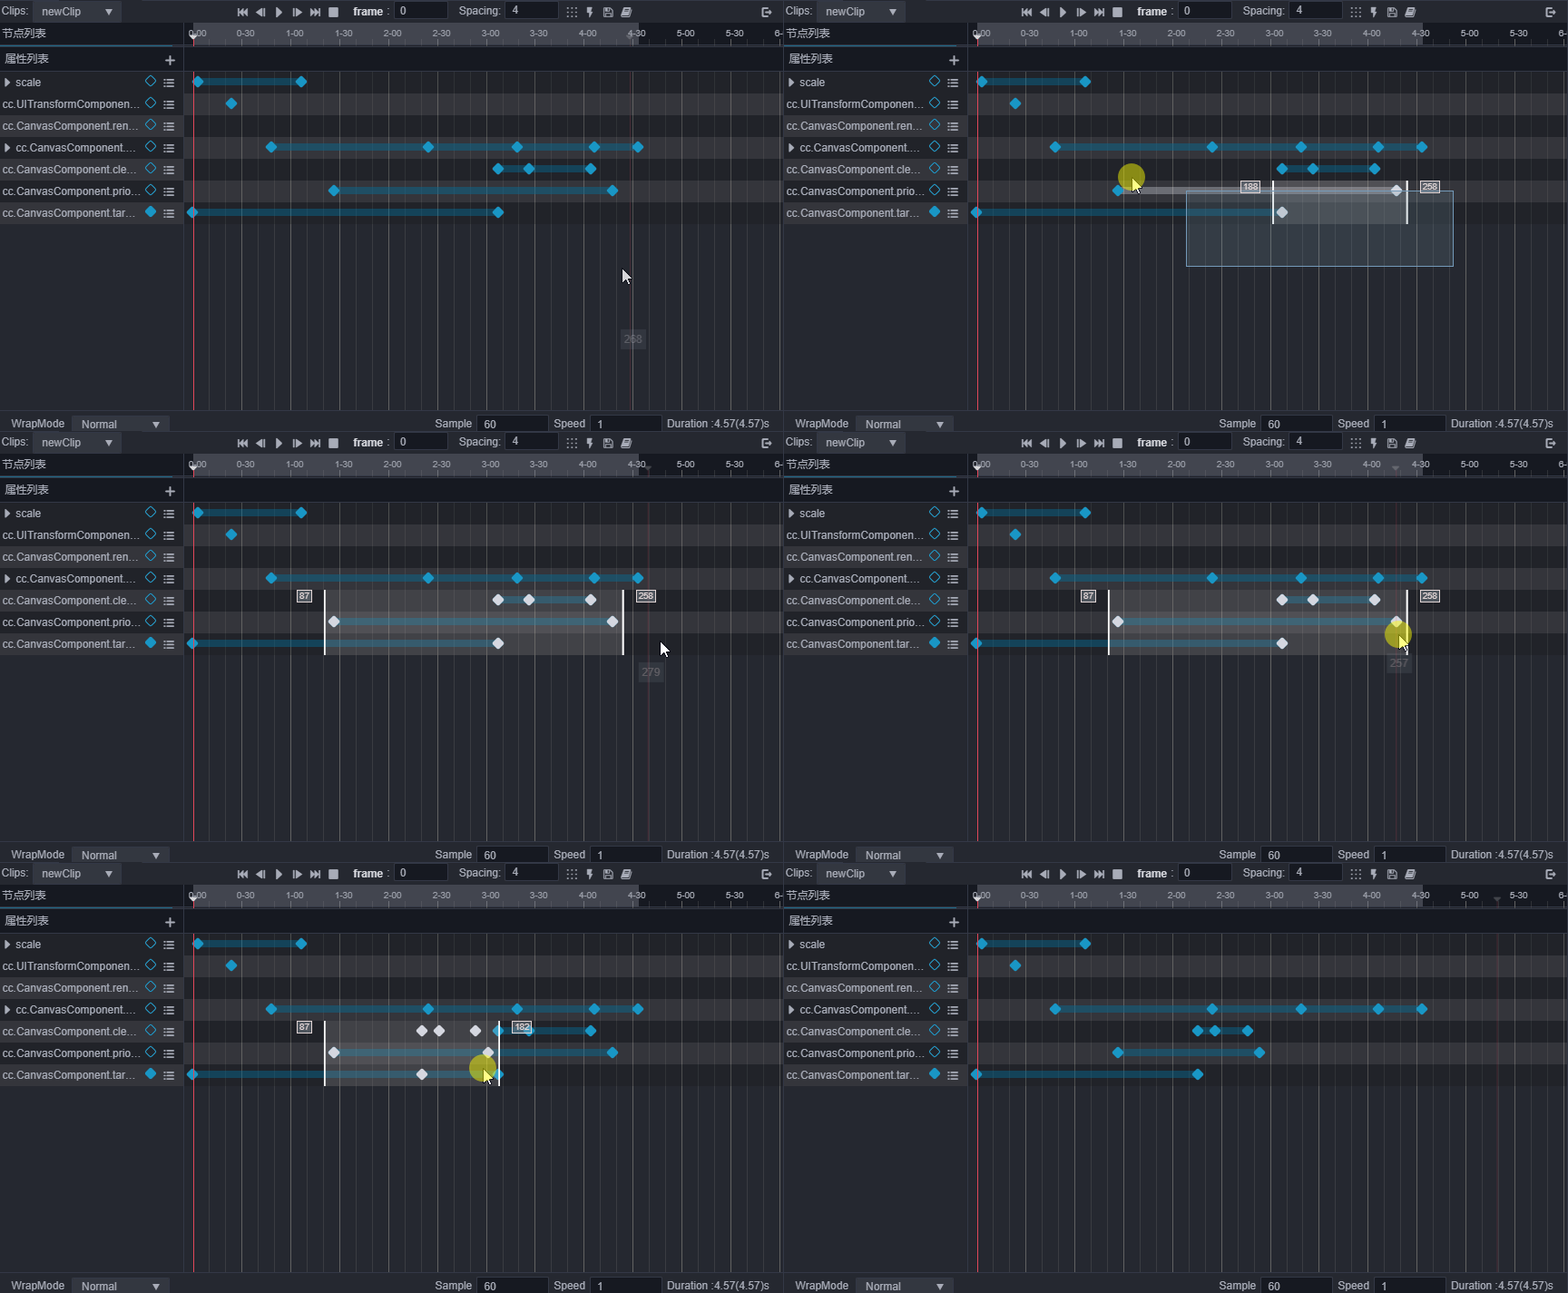
Zooming a keyframe
After selecting multiple key frames, the left and right control levers will be displayed. Drag any one of the joysticks to move and perform zooming of the key frames.
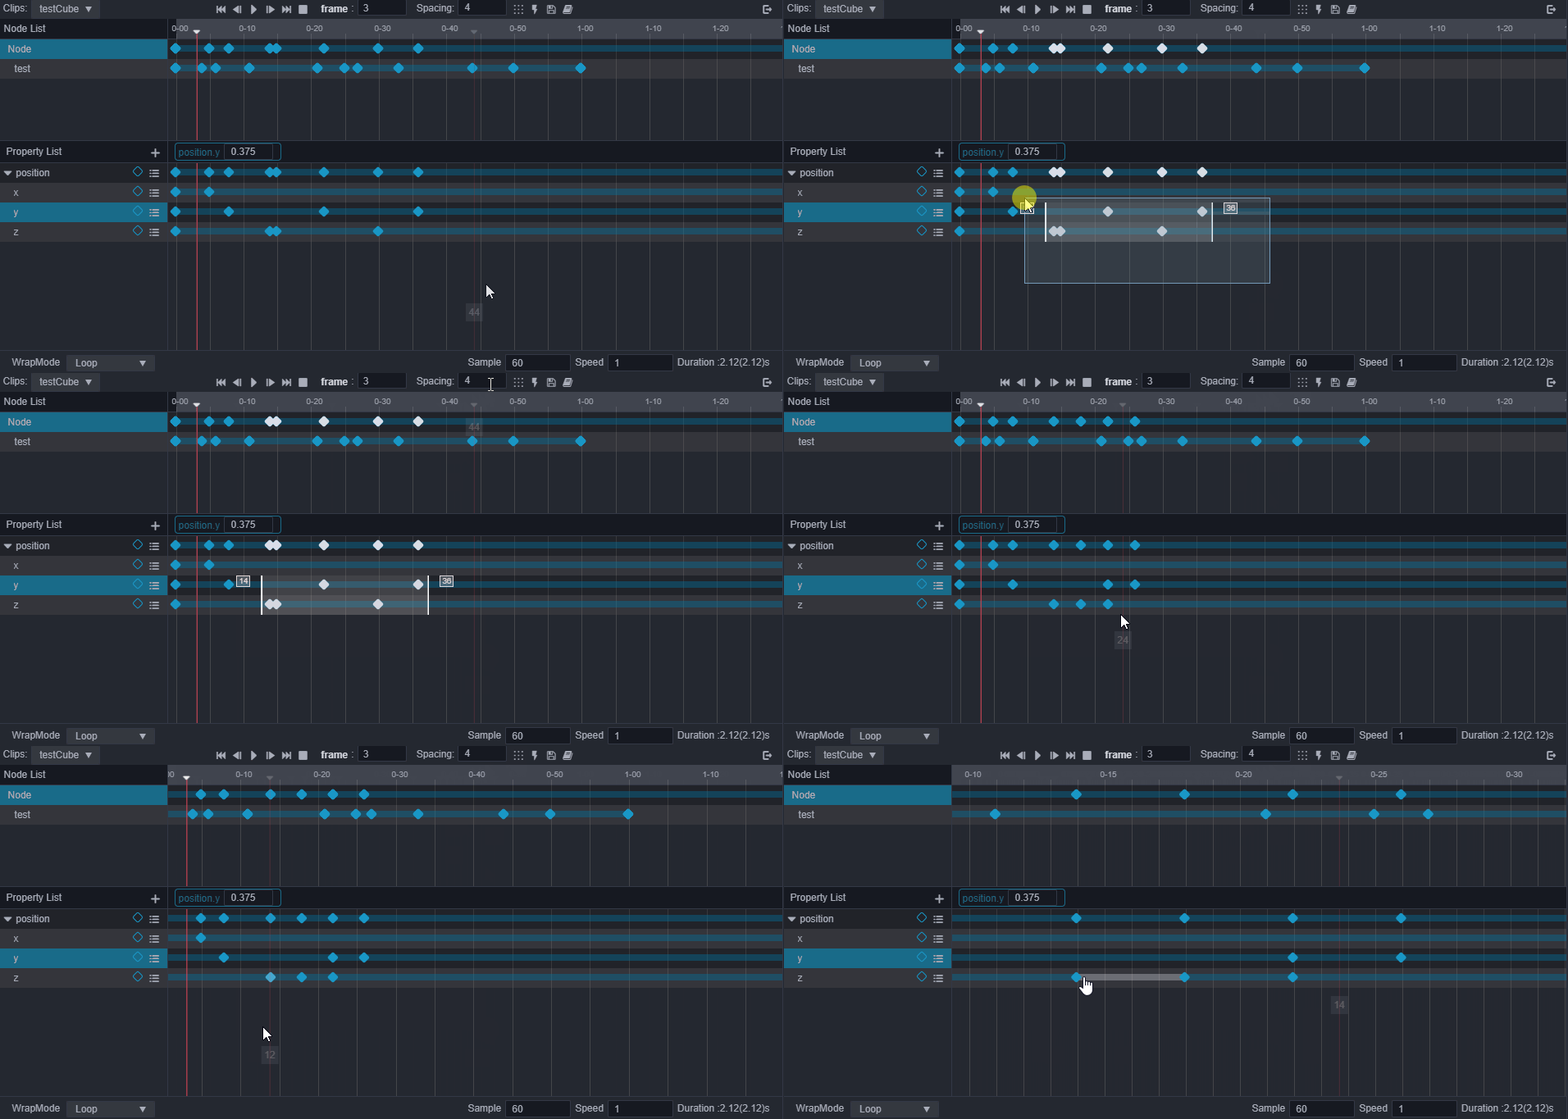
Arranging key frames at specific intervals
After selecting multiple key frames, adjust the number of interval key frames. After pressing the button for arranging intervals, the selected key frames will be arranged in sequence according to the set number of intervals.
Copying/pasting keyframes
- A. After selecting the key frame, follow the normal shortcut key C/V to copy and paste. Note that the location of the shortcut key paste will start from the current key frame(The red line position).
B. After selecting the key frame, right-click on the selected key frame, select Copy Key Frame, and then right-click elsewhere, select Paste Key Frame.

The copy and paste of key frame data supports cross-node and cross-clip use.
Note: There is a difference between A and B. When using the shortcut key to paste the keyframe data, it will be pasted one by one in the order of the copied track data, while right-clicking on the target property track and selecting paste will only pasted on the target property track.Please be sure to copy the correct data to produce unexpected results.
For more about the design of animation sequences and the content of scripting animations, you can refer to the Animation Clip documentation.
Continue to the Making a Frame Animation documentation.