Advanced Topics
BillBoard
You may not have heard of a BillBoard before. No, I'm not talking about an
advertisement on the side of a highway. Rather, Billboard is a special Sprite
that always faces the Camera. As you rotate the Camera, Billboard objects
also rotate. Using aBillBoard is a very common rendering technique. Take for
example a downhill skiing game. Any trees, rocks or other objects that are in
the way of the skier are Billboard objects.
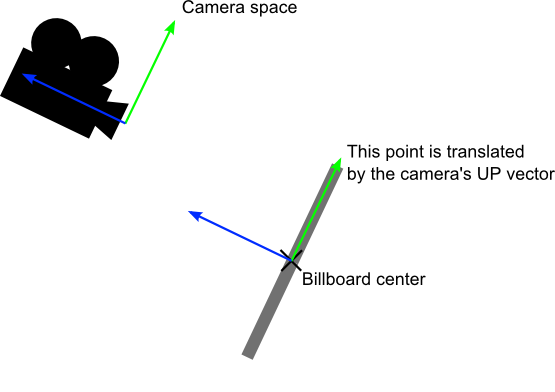
This is how Camera and Billboard objects relate to each other.
Billboard objects are easy to create. BillBoard is derived from Sprite, so
it supports most of the features as a Sprite object. We can create one using the
following create method:
auto billboard = BillBoard::create("Blue_Front1.png", BillBoard::Mode::VIEW_POINT_ORIENTED);
You can also create a Billboard object for the camera XOY plane (like the plane
of a floor) by changing the BillBoard objects mode:
auto billboard = BillBoard::create("Blue_Front1.png", BillBoard::Mode::VIEW_PLANE_ORIENTED);
These create methods look a little different since an additional parameter of BillBoard::Mode is passed in. There are two BillBoard::Mode types, VIEW_POINT_ORIENTED and VIEW_PLANE_ORIENTED.
VIEW_POINT_ORIENTED is where the BillBoard object is oriented to the
Camera. Example:
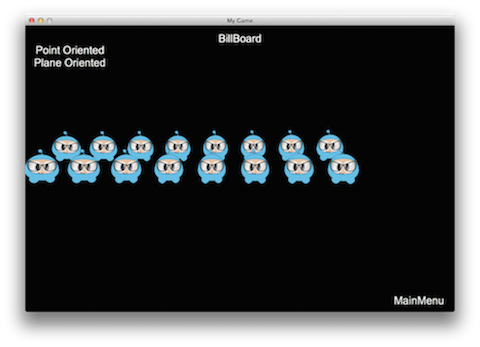
VIEW_PLANE_ORIENTED is where the BillBoard is oriented towards the XOY plane
of the Camera. Example:

You can also set properties for a BillBoard just like with any other Node.
These include, but are not limited to: scale, position, rotation.
Examples:
billboard->setScale(0.5f);
billboard->setPosition3D(Vec3(0.0f, 0.0f, 0.0f));
billboard->setBlendFunc(BlendFunc::ALPHA_NON_PREMULTIPLIED);
addChild(billboard);
ParticleSystem3D
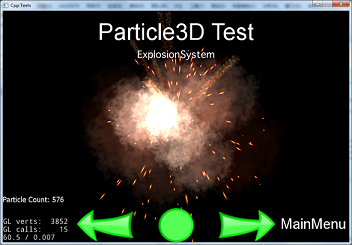
In Chapter 7, you learned about 2D particles and how to use them. When you use 3D you might also want to use a 3D particle system for rich, advanced effects. Many of the same concepts apply for a 3D particle system as they did with a 2D particle system. Cocos2d-x currently supports Particle Universe (//www.fxpression.com/) for particle system construction. Particle Universe provides a special particle editor that allows you to quickly and easily set up a variety of effects, such as explosions, fire, blood and other special effects. This editor uses a pu file extension when saving or exporting.
When you are happy with your particle and ready to use it in code, exporting to
its built-in format of pu is enough! Cocos2d-x supports this format directly.
Also, as ParticleSystem3D is derived from Node, it supports most of the
features that Node supports. PUParticleSystem3D is an object type specifically
for dealing with Particle Universe particles. PUParticleSystem3D offers two
ways for creating particles.
The first way is to build a particle by passing in a Particle Universe file and its corresponding material file. Remember from Chapter 7 that a material file is what describes the particle. This is required. Example:
auto ps = PUParticleSystem3D::create("lineStreak.pu", "pu_mediapack_01.material");
ps->startParticleSystem();
this->addChild(ps);
The second way is to build the particle system only by passing a particle universe file. When you create a particle this way, besides loading the particle, all material files in the same folder as the particle file will automatically be loaded. Here is an example:
auto ps = PUParticleSystem3D::create("electricBeamSystem.pu");
ps->startParticleSystem();

this->addChild(ps);
Note: using this method will result in an increase in loading times and consumes more memory since everything will be loaded. If you know what material you want to use and don't need to load everything, using the first method would be preferred.
In these images below, on the left is the particle in particle universe, while on the right is the effect running in Cocos2d-x:

Once you have your particle, you can interact with it it fairly obvious ways. You can interact with with the particle system as a whole, starting, stopping, pausing, resuming and obtaining the total number of particles:
virtual void startParticleSystem() override;
virtual void stopParticleSystem() override;
virtual void pauseParticleSystem() override;
virtual void resumeParticleSystem() override;
virtual int getAliveParticleCount() const override;
As PUParticleSystem3D is derived from Node you can run Action and Sequence
objects on your particles! Example:
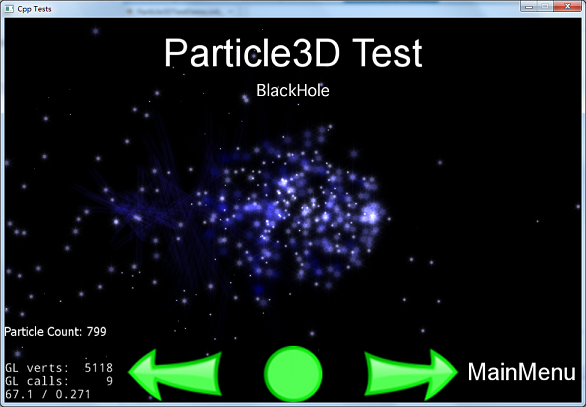
auto ps = PUParticleSystem3D::create("blackHole.pu", "pu_mediapack_01.material");
ps->setPosition(-25.0f, 0.0f);

auto moveby = MoveBy::create(2.0f, Vec2(50.0f, 0.0f));
auto moveby1 = MoveBy::create(2.0f, Vec2(-50.0f, 0.0f));

ps->runAction(RepeatForever::create(Sequence::create(moveby, moveby1, nullptr)));
ps->startParticleSystem();
Combining Action and Sequence objects could produce an interesting black hole
effect:
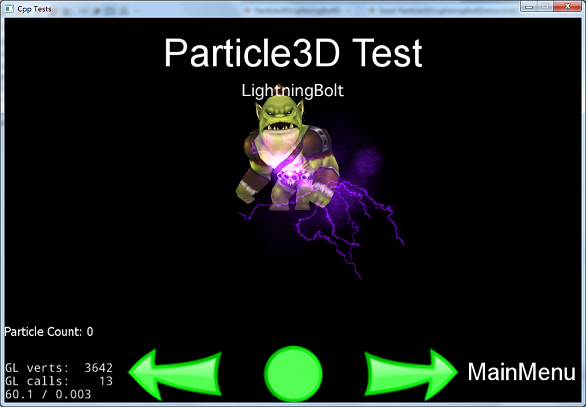
Just like with other 3D objects you can also combine 3D objects using AttachNode.
This allows for creating rich models. Example:
auto sprite3d = Sprite3D::create("orc.c3b");
sprite3d->setPosition3D(Vec3(0.0f, 0.0f, 0.0f));
sprite3d->setRotation3D(Vec3(0.0f, 180.0f, 0.0f));

auto animation = Animation3D::create("orc.c3b");
if (animation)
{
    auto animate = Animate3D::create(animation);
    sprite3d->runAction(RepeatForever::create(animate));
}

auto handler = PUParticleSystem3D::create("lightningBolt.pu");
handler->startParticleSystem();
sprite3d->getAttachNode("Bip001 L Hand")->addChild(handler);

this->addChild(sprite3d);