Main Components
It might seem overwhelming at first, but getting started with Cocos2d-x is simple. Before we dive into depth we must understand some of the concepts Cocos2d-x utilizes. At the heart of Cocos2d-x are Scene, Node, Sprite, Menu and Action objects. Look at any of your favorite games, and you will see all of these components in one form or another!
Let's have a look. This might look a bit similar to a very popular game you might have played:
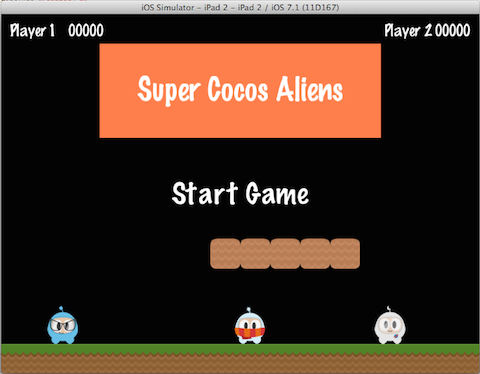
Let's take another look, but splitting up the screenshot and identifying the components used to build it:

You can see a menu, some sprites and labels, which all have an equivalent in Cocos2d-x. Take a look at a few of your own game design documents, and see what components you have, you'll probably have a few that match up.
Let's Build A Game - Step 2
From the previous step, you now have a working Cocos2d-x project created FirstGame. This is good, it allows you to verify that your development environment is working. However, it also lets you see what code starts the game and how some basic decisions are made when the game starts. Let's take a look at a few of these Classes to gain some understanding. Cross-platform code is stored in the Classes/ directory while platform dependent code is stores in a folder for each platform, i.e proj.android, proj.ios_mac, proj.linux, proj.win32.
AppDelegate
AppDelegate is a very important class. AppDelegate is called once all the platform dependent code is run. The magic starts here! Take a look at it. Let's discuss a few key pieces!
Design resolution - help to determine how large or small to design your
Spriteobjects (and much more). This is based upon the screen size of the device the game is running on. Because of this, it is always best to test your game on several devices of different screen resolution. Here is the relevant piece fromAppDelegate:
  static cocos2d::Size designResolutionSize = cocos2d::Size(480, 320);
  static cocos2d::Size smallResolutionSize = cocos2d::Size(480, 320);
  static cocos2d::Size mediumResolutionSize = cocos2d::Size(1024, 768);
  static cocos2d::Size largeResolutionSize = cocos2d::Size(2048, 1536);
AppDelegate::applicationDidFinishLaunching() - this is the main place you will start coding your game. This function does a lot for you already, but it may require tweaking, according to your needs. Consider the following lines where the first
Sceneis loaded and run, using theHelloWorldclass:
  // create a scene. it's an autorelease object
  auto scene = HelloWorld::createScene();

  // run
  director->runWithScene(scene);
Making a few code changes
So that we can get started making this game a bit more personal, we can change the Title of the glView. This is a simple change, made in the AppDelegate class. Take a look (or use Find) for the following lines:
if(!glview) {
#if (CC_TARGET_PLATFORM == CC_PLATFORM_WIN32) || (CC_TARGET_PLATFORM == CC_PLATFORM_MAC) || (CC_TARGET_PLATFORM == CC_PLATFORM_LINUX)
        glview = GLViewImpl::createWithRect("FirstGame", cocos2d::Rect(0, 0, designResolutionSize.width, designResolutionSize.height));
#else
        glview = GLViewImpl::create("FirstGame");
#endif
        director->setOpenGLView(glview);
}
Notice where the code says: FirstGame. We can change this to Bubble Shooter. Make sure to change it in both places! This doesn't change the name of any IDE project names or directory names.
Once you have this step done, keep on reading...