Cocos Creator
Project Settings
The Project Settings panel can be opened by clicking on Project -> Project Settings in the editor's main menu bar and is mainly used to set project-specific configuration items. These settings are stored in the project's settings/packages folder. To synchronize project settings between developers, please add the settings directory to version control.
Project Settings consists of several different sub-pages, including Macro Config, Feature Cropping, Project Data, Layers, Physics, Scripts, and Texture Compression. The Project Settings panel will automatically save the changes after modifying the settings.
Macro Config
Macro Config provides a shortcut to modify the macro configuration. The configured macros will take effect on preview and build, and will also follow the custom engine configuration to update the default values of the current macro configuration.

ENABLE_TILEDMAP_CULLING: whether or not to enable TiledMap auto-culling. It's enabled by default. Note that if
skewandrotationare set in the TiledMap, it's necessary to turn it off manually, otherwise it will cause rendering errors.TOUCH_TIMEOUT: the duration of the delay used to screen a contact object to see if it has failed and can be removed. This value can be modified to get the desired effect, the default value is 5000 ms. Please refer to the API TOUCH_TIMEOUT for details.
ENABLE_TRANSPARENT_CANVAS: used to set whether the Canvas background supports alpha channels.
- If enabled, the Canvas background will be transparent and show the other DOM elements behind it.
- If disabled, it will result in higher performance.
ENABLE_WEBGL_ANTIALIAS: used to set whether to turn on the anti-aliasing option when creating WebGL Context. It's enabled by default.
CLEANUP_IMAGE_CACHE: whether to clear the image cache after uploading a texture to GPU. If the cache is cleared, Dynamic Atlas will not be supported. It's disabled by default.
ENABLE_MULTI_TOUCH: whether to enable multi-touch.
MAX_LABEL_CANVAS_POOL_SIZE: set the maximum number of Canvas object pools used by the Label, and adjust it according to the number of Labels in the same scene of the project.
For more specific information and code about the engine macro module, please refer to the Engine Macro source.
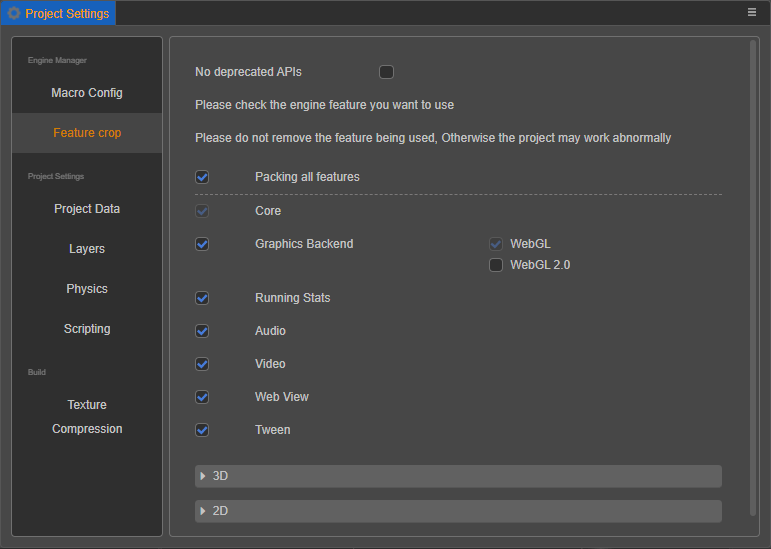
Feature Cropping
The Feature Cropping tab is mainly for modules used in the engine when releasing the game, to achieve the effect of reducing the package size of the released version of the engine. The unchecked modules in the list will be cropped out when packaging and previewing. It is recommended to do a complete test after packaging to avoid scenes and scripts that use modules that have been cropped out.
Project Data
The Project Data tab is mainly used to set the default Canvas, render pipeline, etc. and only works for the current project.
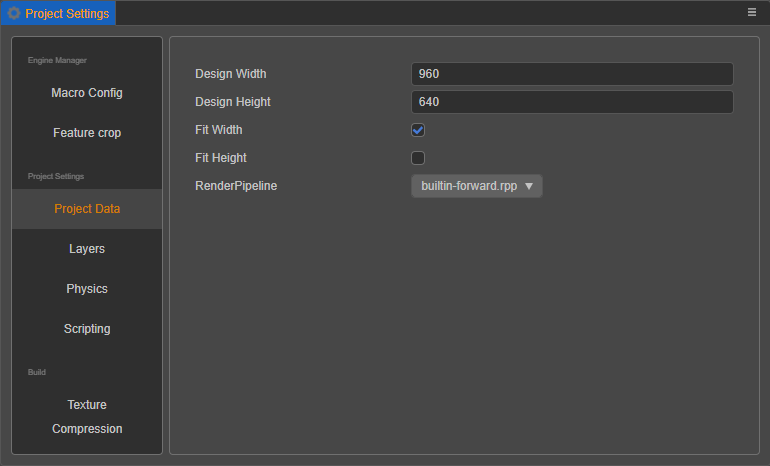
Default Canvas Settings
The default Canvas settings include Design Resolution and Fit Screen Width/Height, which specify the default design resolution values in Canvas when a new scene or Canvas component is created, as well as Fit Height and Fit Width. For more details, please refer to the Multi-Resolution Adaptation Solution documentation.
Render Pipeline
The render pipeline is used to control the rendering process of the scene, currently supports builtin-forward (Forward Render Pipeline) and builtin-deferred (Deferred Render Pipeline), developers can also customize the render pipeline. Please refer to the Render Pipeline Overview documentations for details.
Layers
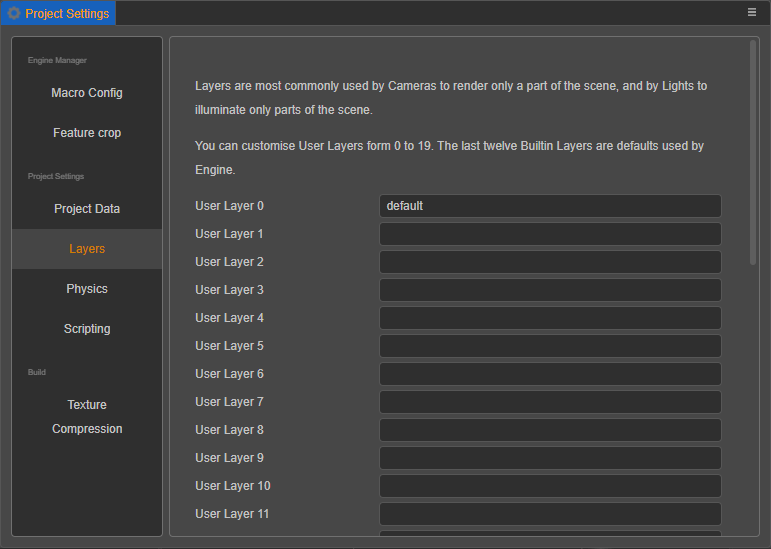
Layers allow the camera to render parts of the scene and lights to illuminate parts of the scene.
Layers can be customized from 0 to 19, and clearing the input box removes the original settings.
The last 12 Layers are built-in to the engine and cannot be modified.
The locations where Layers are currently used include:
The
Layerproperty of the nodeNodein the Inspector panel, For more details, please refer to the Node Component documentation.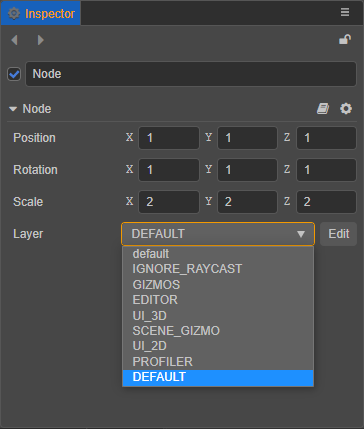
The
Visibilityproperty of the Camera node in the Inspector panel, theLayerproperty of the node matches theVisibilityproperty of the Camera. A node can only be seen by the Camera if theLayerproperty set by the node is checked in theVisibilityof the Camera. For more details, please refer to the Camera Component documentation.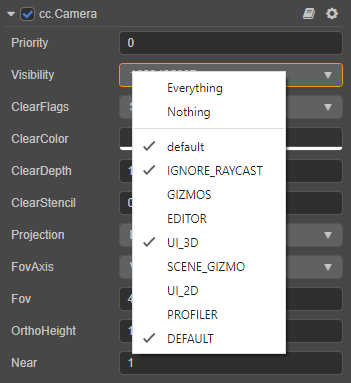
Physics

Used to configure various parameters of physics, please refer to the Physics Config documentation for details.
Scripting
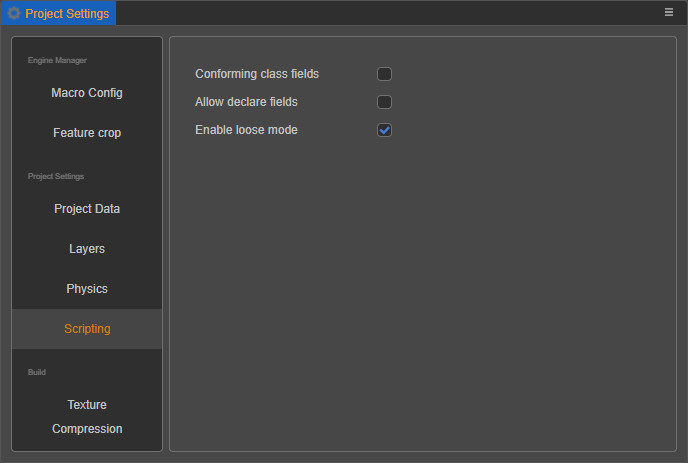
Conforming class fields: if enabled, class fields are implemented using
Definesemantics; otherwise, class fields are implemented usingSetsemantics.Allows declaration of class fields: if enabled, the
declarekeyword may be used to declare class fields in TypeScript scripts. In such case, class fields without explicit initializer would be initialized toundefined, according to the specification.Enable relaxed mode: if enabled, the script will be compiled in non-strict mode.
Texture Compression
The preset configuration of texture compression is moved to Project Settings, and developers can select how the image asset is preset in the Inspector panel. The editor will automatically scan all the texture compression configurations in the project and sort out a few presets. Since it is automatically scanned, the preset names may not match the project and can be modified here by developers.
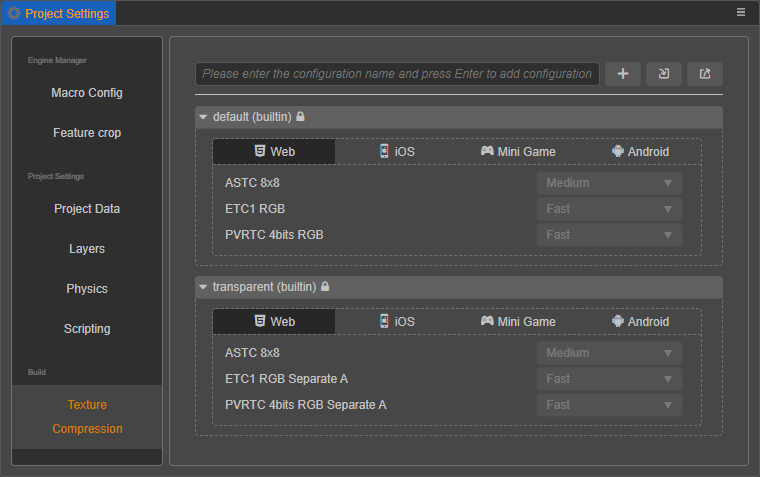
This panel is mainly used to add presets for texture compression. Each texture compression configuration allows to tailor the configuration for different platforms. Once added, developers can quickly add a texture compression preset in the Inspector panel by selecting the image asset in the Hierarchy panel. It is also possible to modify the preset directly in this panel to achieve the need to update the compression texture configuration in bulk.
The following platforms are currently supported for configuring texture compressions:
- Web: both Web-Mobile and Web-Desktop platforms
- iOS
- Mini Game: including all mini game platforms currently supported by Creator, such as WeChat Mini Game, Huawei Quick Game, etc.
- Android
Please refer to the Texture Compression documentation for details of texture compression on each platform.
Adding/Removing Texture Compression Presets
Enter a texture compression preset name in the upper input box and click Enter or the "+" button on the right to add a preset. The other two buttons are for importing/exporting texture compression presets, please refer to the description below for details.

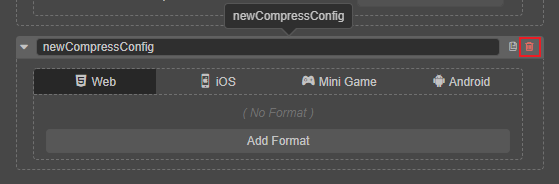
After adding a compressed texture, it can be deleted by hovering over the preset name and clicking the delete button on the right.
Note: the two presets default and transparent built into the panel cannot be modified/deleted.
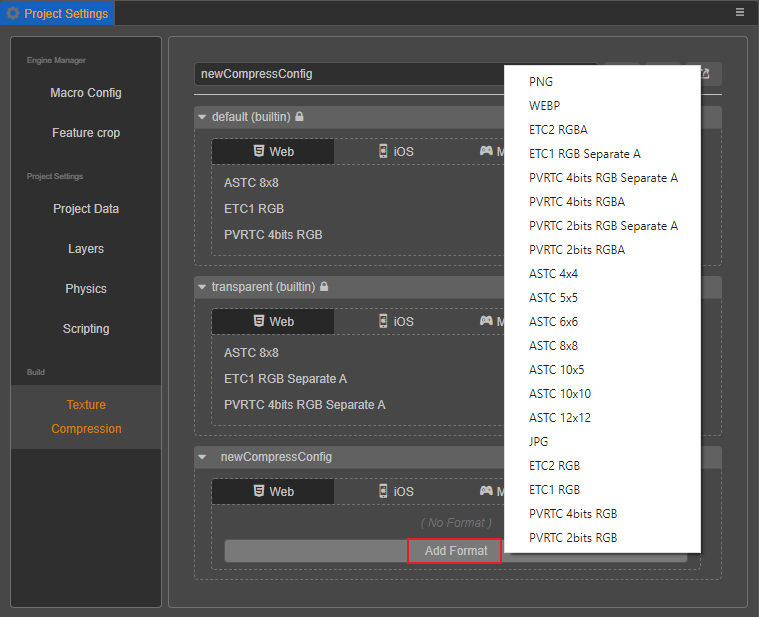
Adding/Deleting Texture Compression Format
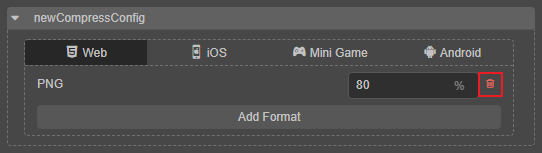
Select the platform, then click the Add Format button, select the desired texture format, and then configure the corresponding quality level. Currently the same type of image format can only be added once.
To delete, move the mouse over the texture format and click the red delete button on the right.
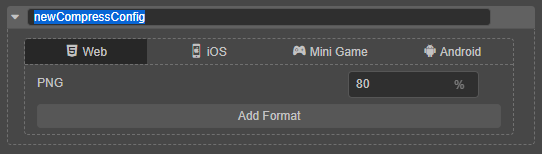
Modifying the Texture Compression Preset Name
The name of the texture compression preset is for display purposes only. When a texture compression preset is added, a random UUID is generated as the ID of the preset, so changing the preset name directly does not affect the reference to the preset at the image asset.
Exporting/Importing Texture Compression Presets
The texture compression configuration page allows importing/exporting texture compression presets for better cross-project reuse of the configuration, or edit the texture compression presets externally and import them to the editor.
To write a custom texture compression configuration, please refer to the following interface definitions and examples:
The interface is defined as follows:
ts
type IConfigGroups = Record<ITextureCompressPlatform, IConfigGroupsInfo>;
type ITextureCompressPlatform = 'miniGame' | 'web' | 'ios' | 'android' | 'pc';
type ITextureCompressType =
    | 'jpg'
    | 'png'
    | 'webp'
    | 'pvrtc_4bits_rgb'
    | 'pvrtc_4bits_rgba'
    | 'pvrtc_4bits_rgb_a'
    | 'pvrtc_2bits_rgb'
    | 'pvrtc_2bits_rgba'
    | 'pvrtc_2bits_rgb_a'
    | 'etc1_rgb'
    | 'etc1_rgb_a'
    | 'etc2_rgb'
    | 'etc2_rgba'
    | 'astc_4x4'
    | 'astc_5x5'
    | 'astc_6x6'
    | 'astc_8x8'
    | 'astc_10x5'
    | 'astc_10x10'
    | 'astc_12x12';
type IConfigGroupsInfo = Record<ITextureCompressType, IQuality>
interface ICompressPresetItem {
    name: string;
    options: IConfigGroups;
}Examples:
json
{
    "default": {
        "name": "default",
        "options": {
            "miniGame": {
                "etc1_rgb": "fast",
                "pvrtc_4bits_rgb": "fast"
            },
            "android": {
                "astc_8x8": "-medium",
                "etc1_rgb": "fast"
            },
            "ios": {
                "astc_8x8": "-medium",
                "pvrtc_4bits_rgb": "fast"
            },
            "web": {
                "astc_8x8": "-medium",
                "etc1_rgb": "fast",
                "pvrtc_4bits_rgb": "fast"
            },
        }
    },
    "transparent": {
        "name": "transparent",
        "options": {
            "miniGame": {
                "etc1_rgb_a": "fast",
                "pvrtc_4bits_rgb_a": "fast"
            },
            "android": {
                "astc_8x8": "-medium",
                "etc1_rgb_a": "fast"
            },
            "ios": {
                "astc_8x8": "-medium",
                "pvrtc_4bits_rgb_a": "fast"
            },
            "web": {
                "astc_8x8": "-medium",
                "etc1_rgb_a": "fast",
                "pvrtc_4bits_rgb_a": "fast"
            },
        }
    }
}
Extending the Project Settings Panel
Creator supports adding custom feature pages on the right side of Project Settings, please refer to the Extending the Project Settings Panel documentation.