Prefab
Creating a prefab
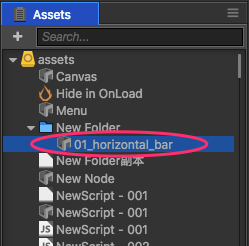
After editing the Node in the scene, drag it directly from Node Tree to Assets:

And thus you create a prefab:

Saving prefab
After changing the prefab object in the scene, click Save in the Properties panel and you can save the corresponding prefab:

Reverting prefab
After changing the prefab object in the scene, click Go Back in the Properties panel and you can restore the corresponding prefab to the status in Assets:

Auto Sync and Manual Sync
You can choose Auto Sync or Manual Sync for every prefab instances in the scene.
If set to Manual Sync, when its originating asset changed, the prefab instances will NOT dynamically refresh to stay synchronized with the originating asset. Refreshing only triggered when users manually revert the prefab.
If set to Auto Sync, the prefab instances will dynamically refresh to stay synchronized with the originating asset.
The icon represents current sync mode for the selected prefab, you can switch between two modes by clicking the icon:

The icon above represents the currently selected prefab uses Manual Sync mode, click the icon will switch to Auto Sync mode:

Pay attention, to keep the engine small and fast, there are limitations of auto-syncable prefab instance:
- To facilitate customizing prefab instances in scene, the
name,active,positionorrotationproperties of the prefab's root node will not be synchronized automatically. And child nodes and components should keep synchronized with the originating asset, if changes has occurred, the editor will ask if you want to revert modifications or save modifications back to the originating asset. - The component in the auto-syncable prefab can not reference to external object outside that prefab, otherwise the editor will alert.
- The component outside the auto-syncable prefab can only reference to that prefab's root node, but not its components or children, otherwise the editor will alert.
These limitations only affects operations in editor, runtime will not be affected.
Convert Prefab to Ordinary Node
After deleting a prefab from the Assets panel, you can convert the corresponding prefab instance in the scene to an ordinary node. To do this, select the prefab instance and click menu Node Presets > Convert to Ordinary Node.
Prefab Options
In Assets panel, select any of the prefab assets to edit the following options in Properties panel.
'Optimization Policy' option
The v1.8.0 added an Optimization Policy option to optimizes the instantiation time for the selected prefab, which is the time required to execute cc.instantiate. The values that can be set are:
Auto adjust (default)
When set to this option, the engine automatically adjusts the optimization policy based on the number of instantiations.
When you first create an instance, the behavior is the same as 'For single instance creation'. 'For multiple instance creation' will be automatically used after multiple creation.For single instance creation
This option skips code generation for this prefab.
For multiple instance creation
This option enables code generation for this prefab.
If this prefab requires repeated execution of cc.instantiate, select For multiple instance creation, otherwise leave as the default Auto adjust.
In the older version of the engine, the optimization was fixed to
For multiple instance creationand it is great for situations where you need to create objects repeatedly. However, many people use prefab as a tool for multi-people collaboration or step-by-step loading. Basically, these prefabs are only instantiated once, resulting in slower node creation. TheAuto adjustin the new version is a good solution to this problem.
'Async Load Assets' option
The default value is false. When selected, the use of Properties association, loadRes, etc., when loading the prefab asset, will delay the load on the dependencies of other assets, to enhance the loading speed of some web game. For details, please refer to Change the policy of scene loading.