Cocos Creator
Converting Native Code to Wasm/Asm Files Using Emscripten
Installing Emscripten on Windows
Download emsdk: Clone the emsdk repository by running the git command:
git clone https://github.com/emscripten-core/emsdk.gitNote: You need to have git installed on your computer to run git commands. If not installed, download and install it from git official website.
Choose an emsdk version: The latest version of emsdk is 4.0.10, but testing has revealed unexpected compatibility issues. We recommend using version 3.1.41, which is the version used by the engine team when compiling Spine module wasm files.
Install emsdk dependencies: In the emsdk root directory, run the command:
./emsdk install 3.1.41. This will automatically install the required runtime libraries for emsdk.Notes:
When switching emsdk versions, you need to both switch the source code version and reinstall the runtime libraries. Simply append the version number string after
./emsdk install.To install the latest version of emsdk dependencies, append
latestafter./emsdk install.If downloads fail during dependency installation, try using a VPN to accelerate the connection.
Configure system environment variables for emsdk: In the emsdk root directory, run the command:
./emsdk_env.batto automatically configure the required system environment variables for emsdk runtime libraries.Verify emsdk environment variables: Open the upstream/emscripten/.emscripten file in the emsdk directory and check if LLVM_ROOT and BINARYEN_ROOT match the following reference paths:
pythonLLVM_ROOT = 'D:\\git\\emsdk\\upstream\\bin' BINARYEN_ROOT = 'D:\\git\\emsdk\\upstream'If they don't match, manually modify them to point to the local paths where llvm tools and binaryen tools can be found.
Activate emsdk environment: In the emsdk root directory, run the command:
./emsdk activate --systemto activate the emsdk environment. After this, you can use theemcccommand in command line windows.Notes:
Adding
--systemmakes the emsdk environment available in all command line windows. Otherwise, you would need to run./emsdk activateeach time you open a new command line window.Older versions typically used
./emsdk activate --globalfor global activation.
Verify successful emsdk installation: Run the command:
emcc --versionin a command line window. If you see output likeemcc (Emscripten gcc/clang-like replacement + linker emulating GNU ld) 3.1.41, the installation was successful.
Generating Wasm Files
Create a C code file: Create a Cocos.c file in any directory with the following content:
C#include <stdio.h> int main() { printf("Hello World\n"); }Convert C code to Wasm/Asm file: In the root directory where Cocos.c is located (assuming it's in D:) run the command:
emcc D:\Cocos.c -s WASM=1. After execution, the wasm file will be generated in the current directory.Notes:
Adding
-s WASM=1specifies generation of wasm files. Using-s WASM=0generates Asm files for platforms without WebAssembly support.When generating Asm files, if the native code requires large memory initialization, a .mem file will also be generated and needs to be loaded.
For more command line parameters, run
emcc --helpor search for related documentation online.
Loading Wasm/Asm Files
Refer to Custom Loading of Wasm/Asm Files and Modules for instructions on loading Wasm/Asm files.
Compiling Cocos Engine's Spine Wasm (Available for 3.8.0 ~ 3.8.4 engine versions)
Install CMake: Download and install from CMake official website
Configure CMake system environment variables: Add
C:\Program Files\CMake\binto your system environment variables.Install MinGW: Download the package containing
win32-seh-ucrtfrom MinGW releases page, then extract it to your computer.Configure MinGW system environment variables: Add
C:\mingw64\binto your system environment variables.Navigate to Spine Wasm C++ code folder: Open a command line tool and use cd to enter the Cocos engine folder containing Spine Wasm C++ code:
cmdcd D:\CocosCreator\Creator\3.8.3\resources\resources\3d\engine-native\cocos\editor-support\spine-wasmNote: This is a reference path - modify it according to your actual installation path.
Generate CMakeFiles: Run the command
emcmake cmake -B ./buildto generate CMakeFiles in the build folder.Enter build folder: Use cd to enter the build folder:
cd ./build.Generate Spine Wasm files: Run the command
emmake make. You should now see spine.js and spine.wasm generated in the build folder.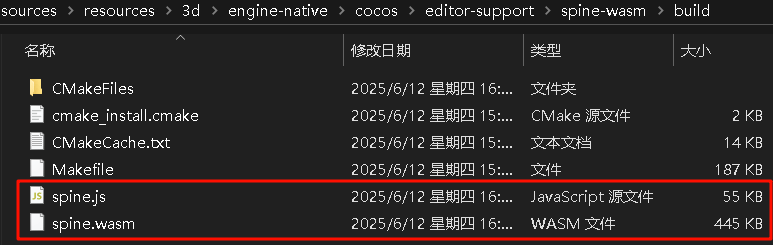
Modify emcc commands in CMakeLists.txt: The CMakeLists.txt file is located in the spine-wasm folder. Open it and modify the
emcccommand parameters to change the final output.Note:
- To compile a Debug version, set CMAKE_BUILD_TYPE to Debug in CMakeLists.txt, remove the -O3 optimization option from emcc commands, and add the -g compilation option.
Update Cocos Engine's Built-in Spine Wasm: Copy the generated spine Wasm and spine.js files to the folder at relative path
engine-native/external/emscripten/spine, rename spine.js to spine.wasm.js, and replace the old file.Note: You need to restart the editor after switching between debug and release modes.
Update Editor's Cached spine.wasm.js: Delete spine.wasm.js in the editor's cache folder at relative path
resources\3d\engine\bin\.cache, then restart the editor.
Compiling Cocos Engine's Spine Wasm (For engine versions 3.8.5 and above)
Refer to the content in Spine WASM Compilation Guide.
Debugging Debug Version of Spine Wasm
Use Google Chrome and install the C/C++ DevTools Support extension. After installation, you can open and debug Spine Wasm C++ related code files in the Chrome DevTools console.