Cocos Creator
Assets Panel
The Assets panel is an important work area for accessing and managing project assets. When starting a game, Import Assets is usually a mandatory step. Use the HelloWorld template project when creating a new project, and notice that the Assets panel already contains some basic asset types.
Panel introduction
The Assets panel can be divided into two main sections: Toolbar and Asset List.
The functions in Toolbar include New Asset (+), Sort by, Search Filter, Search Box, Collapse/Expand All and Refresh. For details, please refer to the description below.
The Asset List presents the contents of the project's asset folder in a tree structure, which by default includes the assets and internal base repositories (DBs for short).
- assets is similar to the file manager in the operating system, only assets placed in the
assetsdirectory of the project folder will be displayed here. For a description of the project folder structure, please refer to the Project Structure documentation. - The internal contains the default built-in assets (read-only). Built-in assets can be copied, but cannot be added, deleted, or changed. It can be dragged and dropped into assets as an asset template, i.e. a new project asset is created.
- assets is similar to the file manager in the operating system, only assets placed in the
The panel currently supports shortcuts for manipulating assets, including:
- Copy: Ctrl/Cmd + C
- Paste: Ctrl/Cmd + V
- Duplicate: Ctrl/Cmd + D, Ctrl + drag assets
- Delete: Delete
- Up and down selection: Up arrow, Down arrow
- Previous hierarchy: Left arrow
- Next hierarchy: Right arrow
- Multi-select: Ctrl/Cmd + Click
- Multi-select continuously: Shift + Click
- Select All: Ctrl/Cmd + A
- Rename: Enter/F2
- Cancel input: Esc
Creating assets
There are two ways to create an asset.
- Click the + button at the top left of the Assets panel.
- Right-click in the Assets panel and select Create.
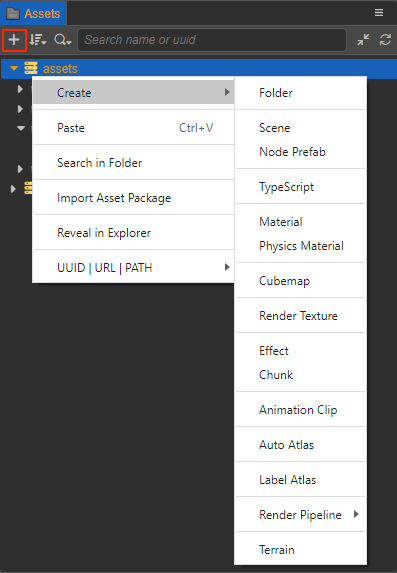
Note: when creating an asset, an INPUT BOX will first appear asking for the name of the new asset, which cannot be empty.
When creating an asset, select the folder where to place the asset in the tree asset list, then the new asset will be created in the currently selected folder directory. If a folder isn't selected, the new asset will be created in the current root directory (assets) by default.
For additional information about Assets, please refer to the Asset documentation.
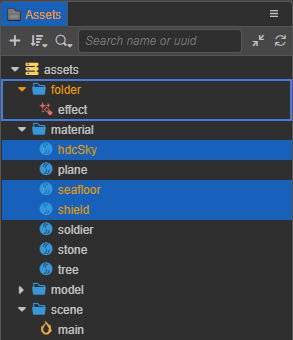
Selecting assets
The following asset selection actions can be used in the asset list:
- Click to select a single asset. The selected asset will be highlighted in yellow on blue.
- Double-click to open an asset, e.g.: scene, script, image; double-click on a folder to collapse/expand it
- Hold Ctrl/Cmd and select an asset to select multiple assets at once
- Hold Shift and select an asset to select multiple assets in a row
For selected assets, you can move, delete, etc.
Moving assets
After selecting an asset (multiple selections are possible), move the asset to another location by holding down the mouse and dragging it. When dragging the asset to be moved to the target folder, notice the folder where the mouse is hovering appears highlighted in yellow and has a blue box around it. Release the mouse at this point and the asset will be moved to the highlighted folder directory.
Asset movement also includes the following actions:
- Drag and drop assets from Assets panel to the Scene panel or Hierarchy panel to generate nodes, currently supporting dragging and dropping
cc.Prefab,cc.Mesh,cc.SpriteFrameassets. - Drag and drop files from the system's file manager to the Assets panel list to import assets.
- Drag and drop a node from the Hierarchy panel to a folder in the Assets panel to save the node as a
cc.Prefabasset. Please review the Prefab Assets documentation.
Sorting assets
The Sort by in the toolbar includes Sort by name and Sort by type. The current sorting method is recorded and will be maintained the next time the editor is opened.
Collapsing assets
Collapses are divided into single collapses or all collapses with subsets:
- The Collapse/Expand All button in the Toolbar works globally
- Click on the triangle icon of a parent asset (e.g.: folder) to expand or collapse its subsets. Use the shortcut key Alt and click on the triangle icon to expand or collapse all children of the asset
The current collapsed state of the asset will be recorded and will be maintained the next time the editor is opened.
Searching assets
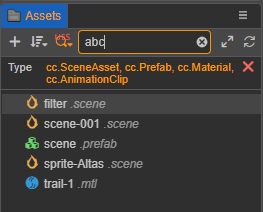
The search function can limit the search type and specify the search field, both of which can be used to achieve a type filtering effect. Depending on the selected type/field, all the corresponding assets will be displayed in the panel.
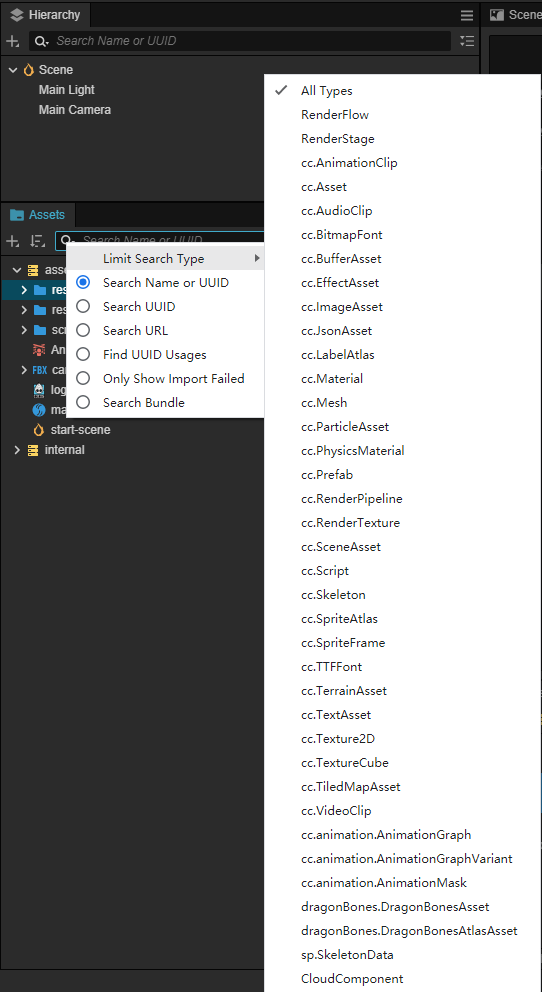
Limit search types: multiple selections are possible. The type is the asset type
assetType, not the suffix name or importer name.Specify search fields: the search name is not case sensitive and includes the following search types:
search Name or UUID, support searching for asset file extensions, such as
.png: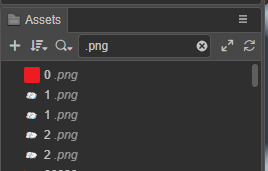
Search UUID
Search URL, starting with the
db://protocol.Find UUID usage, used to find out which assets the UUID asset is used by. For example:
Only Show Imported Failed: show asserts that failed to import.
Search Bundle: search for bundle assets/
If you want to search only in a parent asset (e.g.: folder), right-click and select Find in Folder to narrow the search.
Selecting an asset in the search result list and double-clicking on it is equivalent to the operation in normal mode. After clearing the search content, it will redirect to the selected asset.
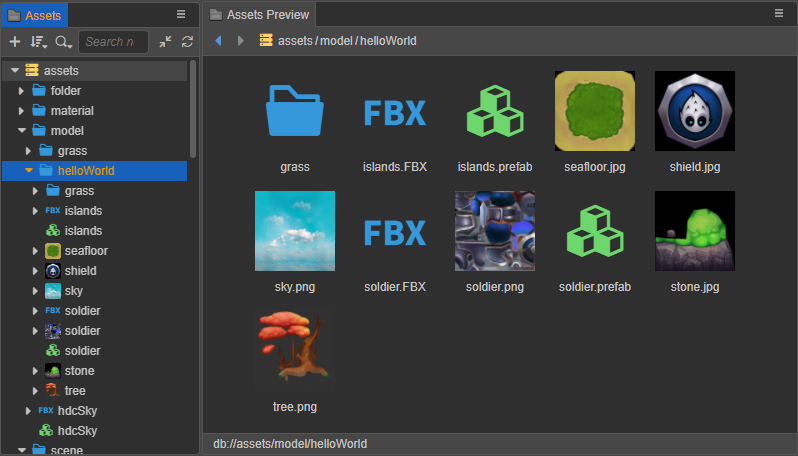
Assets preview
Selecting an asset in the Assets panel displays a thumbnail image of the asset in the Assets Preview panel. Selecting the folder where the asset is located, displays thumbnails of all assets under the folder for easy viewing.
Right-click menu for assets
After selecting a specific asset/folder, right-click on it to perform a series of actions on the asset in the pop-up menu:
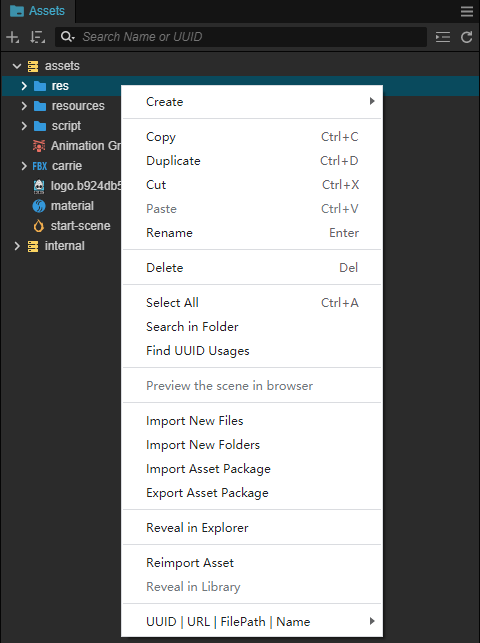
- Create: the same function as the Create button in the Assets panel, it will add the asset to the currently selected folder, if the currently selected is an asset file, it will add the new asset to the same folder as the currently selected asset.
- Copy/Cut/Paste: copy/cut the selected asset (multiple options available) and paste it under that folder or another folder.
- Duplicate: duplicate the selected asset (can be multi-selected), and the duplicated asset will be in the same hierarchy as the selected asset.
- Rename: modify the asset name, please check the description below for details.
- Delete: delete the asset (can be multi-selected), or you can use the shortcut Delete. The asset will remain in the Recycle Bin of the system after deletion, and can be restored if necessary.
- Select All: selects all assets in the same hierarchy.
- Search in Folder: when using the search function, only search the assets in that folder.
- Find UUID Usages: find which assets the asset is referenced by by the asset's UUID.
- Import New Files/New Folders: import new files or folder to the project.
- Import/Export Asset Package: please refer to the introduction below for details.
- Preview this scene in the browser: only available for scene assets.
- Reveal in Explorer (Windows) or Finder (Mac): opens the folder where this asset is located in the operating system's file manager window.
- Reimport Asset: updates the asset to the project's
./libraryfolder of the project, with multiple selections for bulk import. - Reveal in Library: opens the asset in the
Libraryfolder of the project, please read the Project Structure documentation. - UUID/URL/PATH: copies the UUID/URL/PATH of the asset and outputs it in the Console panel.
Also for specific asset types, double-clicking on an asset allows you to enter the edit state of that asset, such as scene assets and script assets.
Rename asset
Select the asset to rename, then right-click and select Rename to change the asset name, or use the shortcut keys Enter or F2. Click elsewhere in the panel or press the shortcut Esc to cancel the renaming.
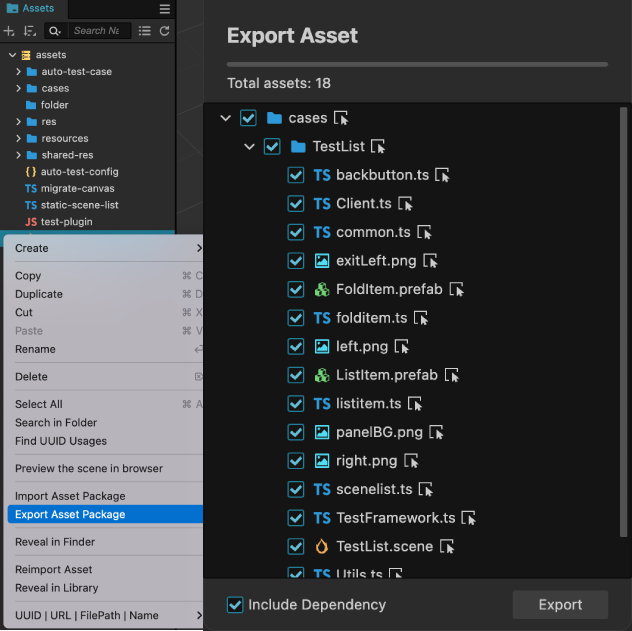
Exporting asset package
Select the asset to be exported and right-click on it, then select Export Asset Package. The Export Asset panel will automatically list the currently selected asset with its dependencies. If you don't need to export related dependent assets, uncheck Include Dependency in the lower left corner of the Export Assets panel.
After determining the assets to be exported, click the Export button, a file storage dialog will pop up, the user needs to specify a folder location and file name, click Save, and a filename.zip file will be generated, containing all the exported assets.
Note: the extension will automatically break the assets into a zip package, which is only available for use with the Import Asset Package extension.
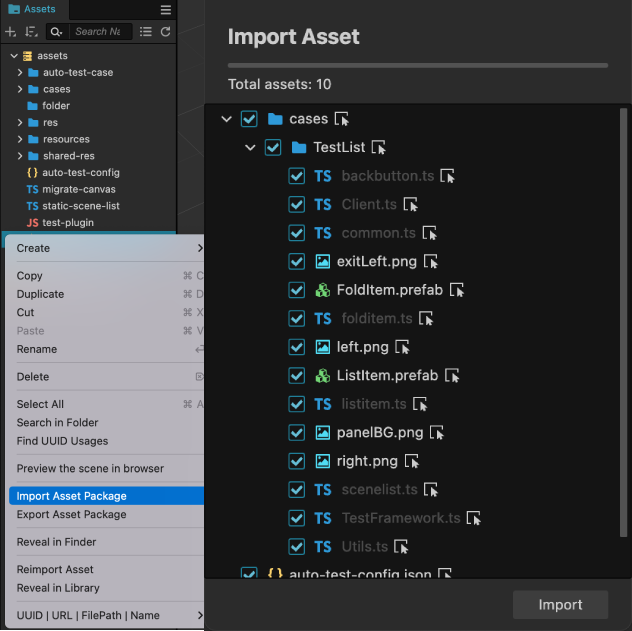
Importing asset package
Select and right-click on the folder you want to import assets from, or right-click on the blank space in the Assets panel, then select Import Package and select the zip package exported by Export Package in the pop-up file browse dialog. The assets in the zip package will be automatically parsed to the pop-up Import Asset Package panel.
During the import process, the user will be asked to confirm the imported assets again, uncheck some assets to remove the ones you don't want to import.
Notes:
- Imported zip packages are only supported by Cocos Creator 3.0.0 and above using Export Asset Package.
- Importing scripts with the same class name is not supported.
Extending the Assets Panel
Currently supported extensions include right-click menu and drop-in recognition, please refer to the Extending the Assets Panel documentation.