Cocos Creator
External Module Usage Case
This section provides examples of how to use npm modules in Cocos Creator projects. To obtain npm, please refer to the How to Get npm Packages documentation.
ESM and CJS Interaction Rules
The biggest problem with how to use npm in Cocos Creator 3.x is the interaction between ESM and CJS modules. To understand how these two modules are defined in Cocos Creator, check out the modules section. In fact, the way ESM and CJS modules interact is described in the official Node.js documentation. Briefly summarized as follows:
CommonJS modules are exported by
module.exports, and when importing CommonJS modules, use the default import method for ES modules or their sugar syntax counterparts.tsimport { default as cjs } from 'cjs'; // syntactic sugar form import cjsSugar from 'cjs'; console.log(cjs); // <module.exports> console.log(cjs === cjsSugar); // trueThe
defaultexport of the ESM module points to themodule.exportsof the CJS module.The non-
defaultpart of the export is provided by Node.js as a separate ES module through static analysis.
Next, consider the following code snippet:
js
// foo.js
module.exports = {
    a: 1,
    b: 2,
}

module.exports.c = 3;

// test.mjs

// default points to module.exports
import foo from './foo.js'; // equivalent to import { default as foo } from './foo.js'
console.log(JSON.stringify(foo)); // {"a":1, "b":2, "c":3}

// Import all exports of the foo module
import * as module_foo from './foo.js'
console.log(JSON.stringify(module_foo)); // {"c":3, "default":{"a":1, "b":2, "c":3}}

import { a } from './foo.js'
console.log(a); // Error: a is not defined

// According to the third point above, c has a separate export
import { c } from './foo.js'
console.log(c); // 3
npm Module Usage Cases
Case 1: using protobufjs
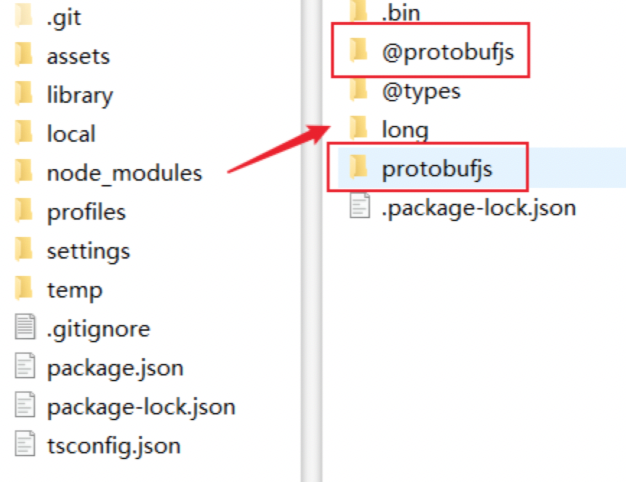
First, get the protobufjs package. Open a terminal in the project directory and execute npm i protobufjs. If the project is a multi-person collaboration, the protobufjs package can be written to the package.json as a dependency by adding npm install --save protobufjs to the above line to automatically write it to package.json from the command line. Once executed, find the protobufjs folder in the node_module folder under the project directory.
Once the protobufjs module package is installed, determine the module format.
- Look at the
mainfield in thepackage.jsonfile and determine the entry fileindex.js. - Look at the
typefield in thepackage.jsonfile and notice that there is notypefield.
Identify the module format, it can be inferred that this is a CJS module. By the way, you can see that each js file in the package corresponds to a .d.ts file, which means that the protobufjs package comes with a TypeScript declaration file, which makes it easy to import the protobufjs module and get the internal interface through code hints.
Next, notice it exported in index.js:
js
"use strict";
module.exports = require("./src/index");
Determine the module format and export method. The next step is how to use the protobufjs module in the script assets.
First, create a test.ts script under assets. Then, write the following code in the header of the script.
ts
// Most npm modules can be used by directly importing the module name.
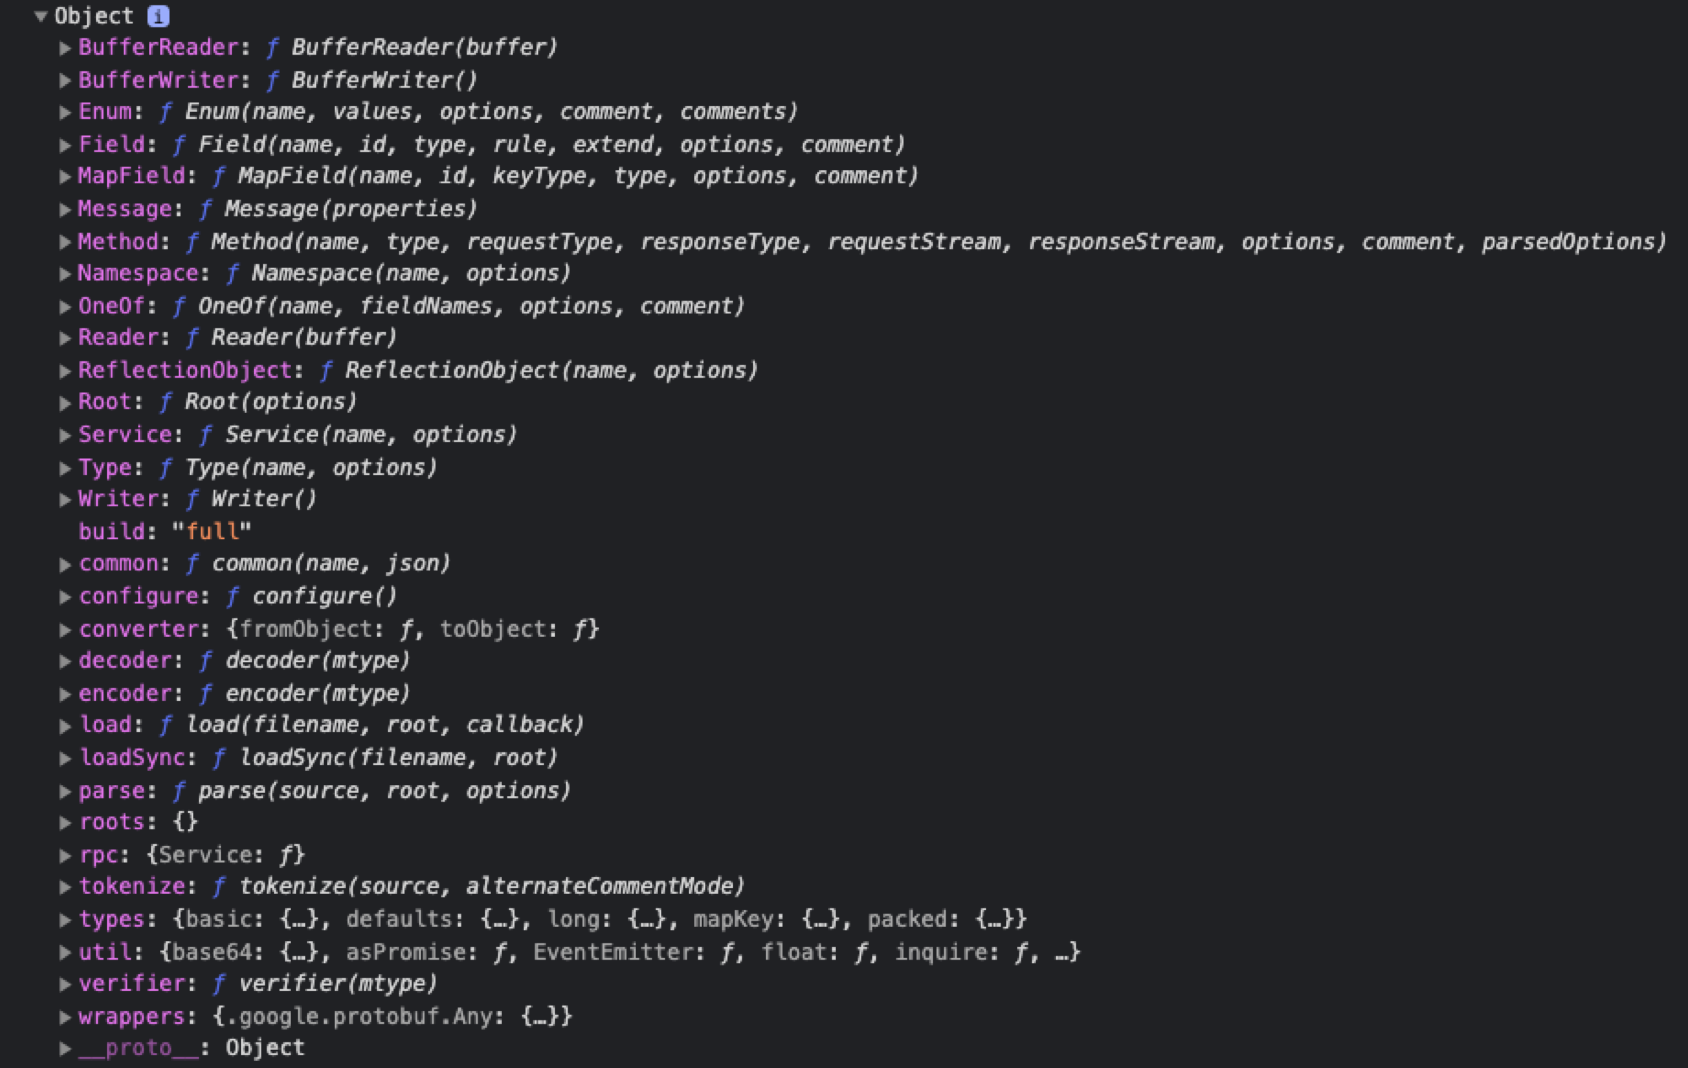
import protobufjs from 'protobufjs';
console.log(protobufjs);When run in Chrome, the console output is as follows:
Some developers may have received an error when writing import protobufjs from 'protobufjs', indicating that the module has no default export. This is because CJS does not have default export, and ESM and CJS interact with each other when is treated as module.exports as export default and does not mean that CJS modules have true default exports. Therefore, to keep the original way of writing, it is possible to configure TypeScript, see TypeScript configuration.
Now, all the modules provided by protobufjs are directly accessible. If only specific submodule functionality is needed, such as light and minimal, import the subpaths directly from the package:
ts
// Using the light version
import protobuf from 'protobufjs/light.js';
// Using the minimal version
import protobuf from 'protobufjs/minimal.js';Note: in the case of
protobufjsand many classic npm packages, the suffix is required when importing subpaths in the package. Please refer to the Cocos Creator module specification documentation.
TypeScript configuration
When importing modules without default export in TypeScript, it usually appears that Module '"/${project_path}/protobufjs"' has no default export.. This is because currently protobufjs only provides CommonJS modules, and Cocos Creator accesses CommonJS modules via "default import", but CommonJS modules really don't have a "default export". In this case, set the "allowSyntheticDefaultImports" option in the "compilerOptions" field to true by editing the tsconfig.json file in the project directory. If the field is not present, manually fill it in.
json5
{
  /* Base configuration. do not edit this field. */
  "extends": "./temp/tsconfig.cocos.json",

  "compilerOptions": {
      "allowSyntheticDefaultImports": true, // Needs to be turned on
  }
}
Case 2: Compiling a proto file from protobuf into a JavaScript file
This section is about how to compile a proto file into a JavaScript file. In fact, when looking through the protobufjs documentation, notice that it provides command line tools to convert static modules and ts declaration files. This time, let's take an empty 3.0 project, example, as an example to demonstrate the whole process.
First, install protobufjs via npm and write it to the package.json dependency in the project directory.
Next, create a new Proto directory in the project directory and define a few proto files:
proto
// pkg1.proto

package pkg1;
syntax = "proto2";
message Bar {
    required int32 bar = 1;
}

// pkg2.proto

package pkg2;
syntax = "proto2";
message Baz {
	required int32 baz = 1;
}

// unpkg.proto is not part of any package

syntax = "proto2";
message Foo {
    required int32 foo = 1;
}
Next, define it in package.json:
json
"scripts": {
    "build-proto:pbjs": "pbjs --dependency protobufjs/minimal.js --target static-module --wrap commonjs --out ./Proto.js/proto.js ./Proto/*.proto",
    "build-proto:pbts": "pbts --main --out ./Proto.js/proto.d.ts ./Proto.js/*.js"
},
The first directive build-proto:pbjs roughly means to compile the proto file into js. The parameter --dependency protobufjs/minimal.js is actually because the execution requires to protobufjs, but all we need to use is its submodule minimal.js. Then, generate the js into the Proto.js folder.
Note: if a Proto.js folder is not present, manually create it.
The second command build-proto:pbts generates the type declaration file based on the output of the first paragraph.
Following the above steps successfully completes the process of converting the proto file into a JavaScript file. Next, the JavaScript file can be introduced into the project script under assets.
ts
import proto from './Proto.js/proto.js';
console.log(proto.pkg1.Bar);
Here it is still important to state that if anyone gets an error when importing, indicating that proto is not exported by default, there are two solutions:
It can be solved by allowing default import fields for modules containing default exports in
tsconfig.jsonjson"compilerOptions": { "allowSyntheticDefaultImports": true, }Add the default export
Create a
Tools/wrap-pbts-result.jsfile in the project directory with the following script code:jsconst fs = require('fs'); const ps = require('path'); const file = ps.join(__dirname, '...' , 'proto.js', 'proto.d.ts'); const original = fs.readFileSync(file, { encoding: 'utf8' }); fs.writeFileSync(file, ` namespace proto { ${original} } export default proto; `);Replace the original
build-proto:pbtscommand with the following:json"build-proto:pbts": "pbts --main --out ./Proto.js/proto.d.ts ./Proto.js/*.js && node ./Tools/wrap-pbts-result.js"
Eventually, it will be ready to run directly. For the full project content, please refer to: npm-case.
Note: the packaged JavaScript file can be placed in the
assetsdirectory of the project or elsewhere in the project. The js file in theassetsdirectory no longer needs to be checked for export as a plugin, please be aware of that.
Case 3: use of lodash-es
Similar to Case 1: protobufjs use, install the lodash-es package. The entry file is lodash.js, and the entry file also automatically helps to export all submodules under it in ESM module format, and according to type it also confirms that it is currently an ESM module. Therefore, it is possible to import any module directly. Taking the test.ts script asset under assets as an example, and introduce the submodules within lodash:
ts
import { array, add } from 'lodash-es';At this point, notice that an error is reported at the code level, but it actually works. This is because there is a clear distinction between JavaScript, which is dynamically typed, and TypeScript, which is statically typed, this means there is no way to know the exact type of the exported module when using JavaScript, and the best thing to do is to declare a type definition file .d.ts. Fortunately, when hovering over the error, it will prompt that the type declaration file for the lodash module can be installed by running npm i --save-dev @types/lodash-es. After installation, restart VS Code and notice the error message disappears, along with the code hint.
Case 4: Using web3
Install the web3 package in the same way as the protobufjs case above. Using the same detection method, determine that web3 is a CJS module. Import in the same way:
ts
import web3 from 'web3';When going back to the editor, a bunch of errors are still present:
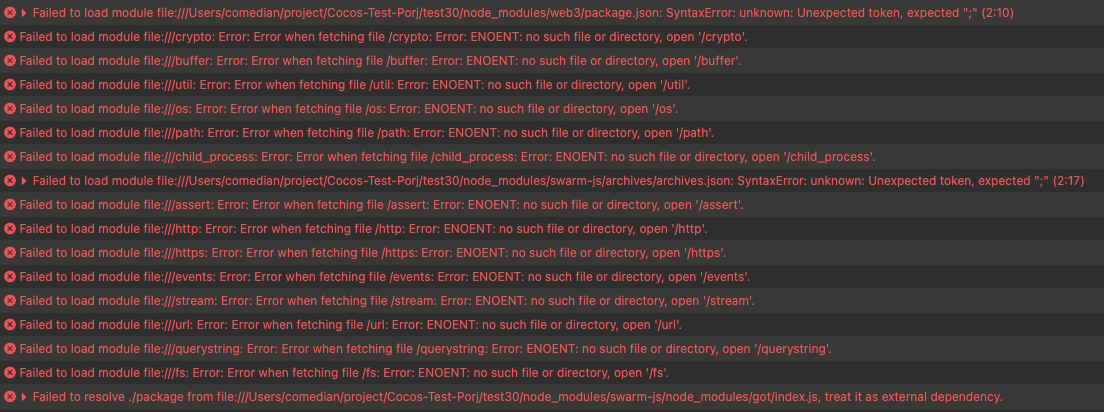
This is because the package is customized for Node and contains built-in modules from Node.js, which are not available in Creator, resulting in errors. Usually, these packages also take care of web users. When importing the package directly, the package entry points directly to the Node version, while the web version is placed in the dist/**.js or dist/**.min.js file under the package. In this case, it is necessary to import the custom version of the Web provided in the package as follows:
ts
import web3 from 'web3/dist/web3.min.js';At this point, the editor does not report errors anymore, but the code prompts: Could not find a declaration file for module 'web3/dist/web3.min.js'. '/${project_path}/node_modules/web3/dist/web3.min.js' implicitly has an 'any' type..
This is because even if these packages have a type specification, it is a type specification for the Node version of that entry. In general, the interface definitions are the same for both versions, just "borrow" the type description from the Node version. Just create an arbitrary new .d.ts to the project and write:
ts
// Add a type specification for the module "<package name>/dist/**.js"
declare module "<package name>/dist/**.js" {
    export * from "<package name>"; // "Steal" the type description of the main entry
}Note: currently it is necessary to confirm that if a package is customized for Node. But in the new version of Node, package.json has a nice mechanism added to tell the user which version to use for what case.
Special case: firebase usage
This is a special case, take a look at the special features of this case. After installing the firebase package in the way described above, and analyzing the package according to the package.json file, notice the package is in CJS format. Based on the entry file, infer that this package is customized for Node (this can be tested according to Case 4: Using web3), so we have to use the Web custom version index.esm.js. The problem is, index.esm.js is an ESM module, and Creator recognizes this package as a CJS module, but it is also an ESM module, which naturally causes errors.
The proposed solution is for the user to package it as a separate js file as a non-npm module via a packaging tool like rollup.