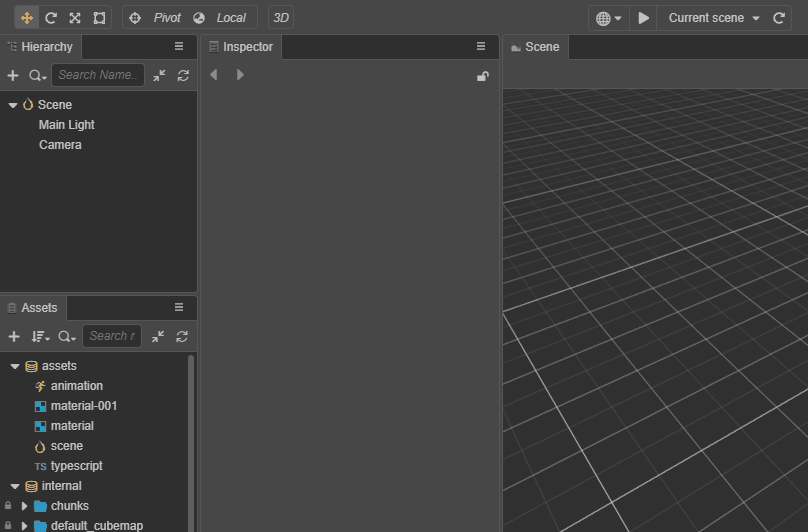
Cocos Creator
Inspector Panel
The Inspector panel is the work area for viewing and editing the currently selected nodes, node components, and assets. Properties can be displayed and edited in the Inspector panel by selecting a node in the Scene panel or Hierarchy panel, or by selecting an asset in the Assets panel.
Panel overview
The Inspector panel can be divided into two parts: Toolbar and Property Settings.
Toolbar
The two arrows in the top left corner are the edit history, click on them to advance/reverse the selected nodes/assets.
The lock button in the upper right corner can lock the panel, fixing the currently edited object and not allowing the panel to change with new selections.

Property Settings
The Property Settings area allows setting node properties, component properties, asset properties, etc.
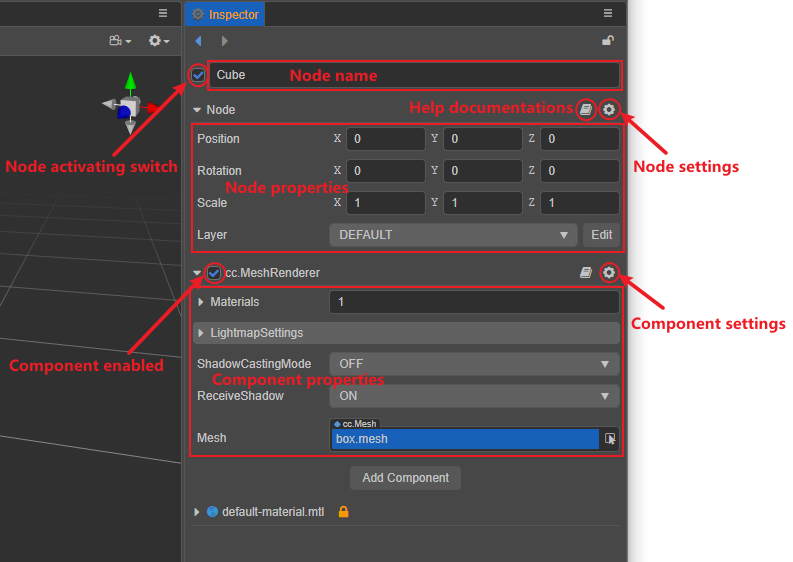
Node name and activation switch
Node name, consistent with the node name displayed in Hierarchy panel.
The Node checkbox indicates the node's enabled/disabled status. When unchecked, the node is disabled and rendering of the node will be suspended, and the node's children will be hidden (grayed out).
Node properties
Click Node below the node name to collapse or expand the node's properties. To the right of Node are the Help Documentations and Node Settings buttons.
The Help button jumps to the official documentation about the node.
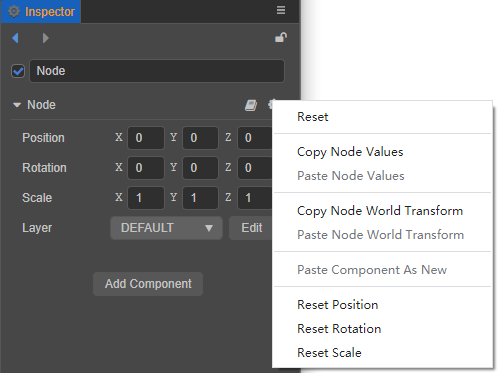
Click the Node Settings button to perform the following operations on the node:
- Reset the node properties.
- Copy/paste the node values.
- Copy/paste world transform of the node, including
worldPosition/worldRotation/worldScaleproperties. - Reset the
Position/Rotation/Scaleproperties of the node respectively.
The transformation properties of nodes include Position, Rotation and Scale. Modifying the properties of a node will usually result in immediate changes in the appearance or position of the node in the Scene panel. For details, please review the Coordinate Systems and Transformations documentation.
To modify node properties in a batch, press Shift in the Hierarchy panel to select multiple nodes and then set them in batch in the Inspector panel. The batch setting of node properties is similar to that of assets, please refer to the Batch Setting of Assets Multiple Selection section at the end of this article for details.
Component property settings
The Component checkbox indicates the enabled/disabled state of the component. When unchecked, the component is disabled and will not participate in rendering.
Below the node properties, all the components attached on the node and the component properties are listed. As with the node properties, clicking on a component's name toggles the collapsed/expanded state of that component's properties. In the case of many components attached on the node, collapse infrequently modified component properties to get a larger working area.
To the right of the component name are buttons for Help Documentations and Component Settings.
- The Help Documentations button jumps to the official documentation page for the component.
- The Component Settings button allows resetting, deleting, moving up, moving down, copying the component, paste the component's value, paste it as a new component, etc. for the component.
The properties and settings of each component are different, please refer to the corresponding component description documentation for details.
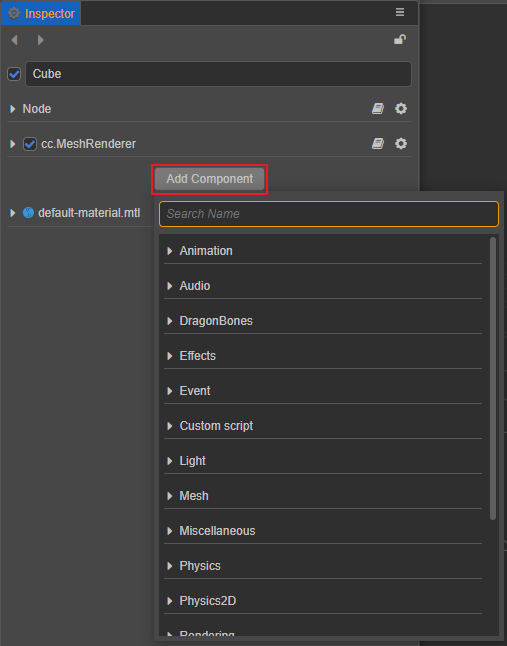
Adding components
Clicking the Add Component button brings up a list of components, including system-provided components and custom script components. The list of added components has a search box that supports toggling with the up and down keys and confirming the selection with Enter.
Developers' script in the Assets panel can be dragged and dropped directly into the Inspector panel to generate a script component, or added via Add Component -> Custom Script. The properties of a script component are declared by the script. Different types of properties have different control appearance and editing in the Inspector panel. We will add the properties in Declare Properties section for details on how properties are defined.
Property types
Property is a publicly available variable declared in the component script that can be serialized and stored in the scene and animation data. The Inspector panel allows quickly modifying property settings for the purpose of adjusting game data and game play without modifying the script.
Property can usually be divided into two categories, value type and reference type, depending on where the variable uses memory.
Value type properties
Value Types include simple variable types that take up very little memory, such as numbers, strings, booleans, enumerations, etc.
Number: can be entered directly using the keyboard or incremented or decremented by pressing the up and down arrows next to the input box.Vec2: the control of a vector is a combination of two numeric inputs, and the input box is marked with x and y to identify the sub-property name corresponding to each value.String: entered directly into the text box using the keyboard.Boolean: edited in the form of a checkbox, the selected state means the property value is true, the non-selected state means false.Enum: edited in the form of a drop-down menu. Click the enumeration menu, and then select an item from the pop-up menu list to finish modifying the enumeration value.Color: click on the color property preview box, the Color Picker window will pop up, in this window use the mouse to directly click on the desired color, or directly enter the specified color in the RGBA color input box below. Clicking anywhere outside the Color Picker window will close the window and use the last selected color as the property value. For example, the color picker component.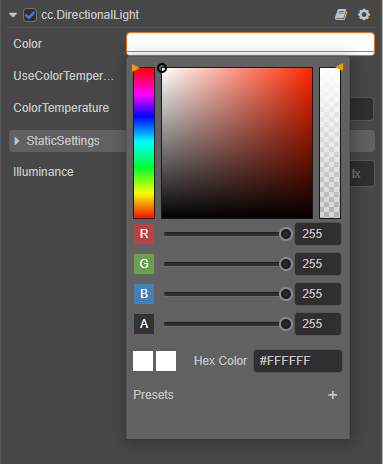
Reference type properties
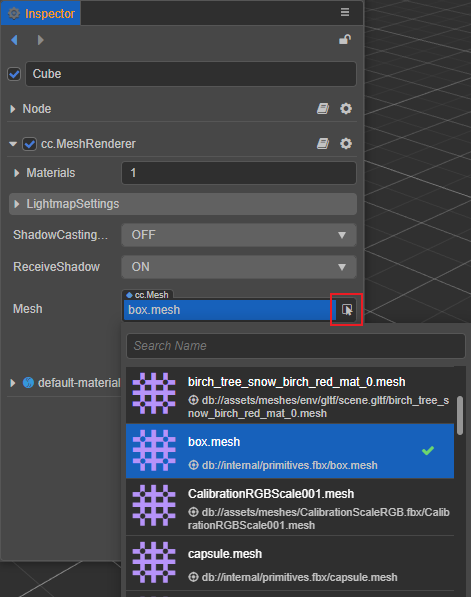
Reference Types include object objects, such as nodes, components, or assets. They can be selected and assigned by dragging the node or asset into the property bar or by popping up the asset panel.
Batch operations
When needing to set asset properties of the same type in a batch, press Shift in the Assets panel and select multiple assets, the Inspector panel will show the number of assets selected and the editable asset properties. Click the Apply button at the top right when done.
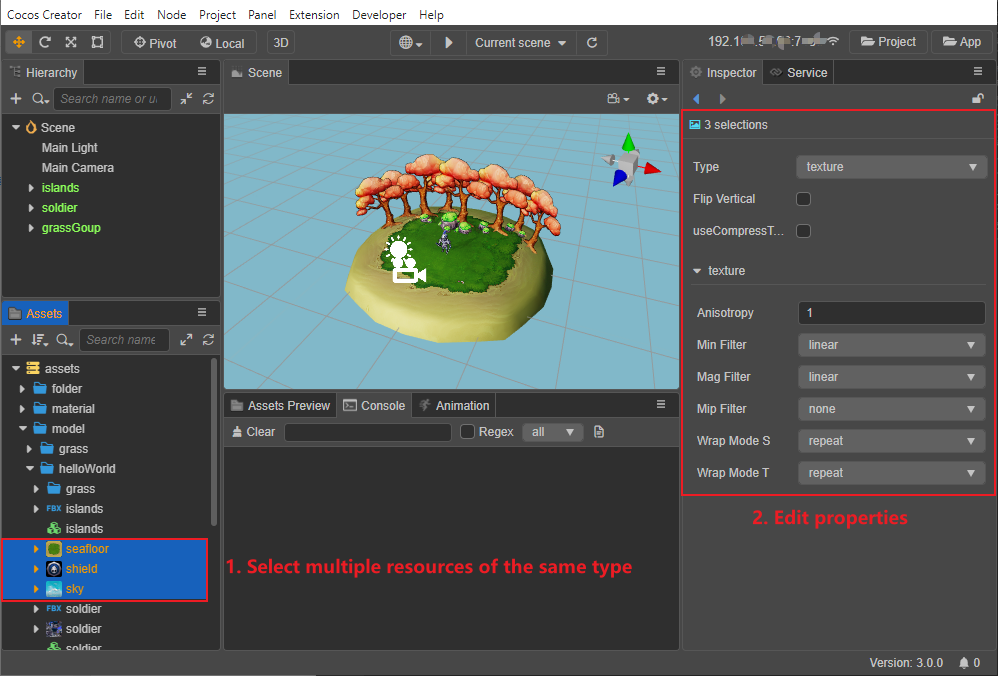
Batch modification of node properties is the same. However, if an property in the Inspector panel displays one of the following states, it means that the property has inconsistent property values across the multiple assets selected, and choose whether to continue to batch modify the property as needed:
- The check box displays Grey.
- The input box displays -.
- The selection box displays blank.
Notes:
- Batch setting operations are not currently supported for Material assets.
- Assets of different types can be selected at the same time, but they do not support setting properties in batch.
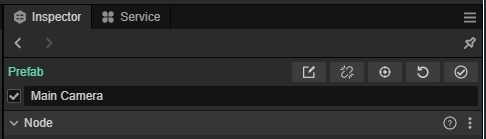
Edit Prefab node properties
The Prefab node functions in the top toolbar of the Inspector panel include: disassociate, locate asset, restore from asset, and update to asset. For details, please refer to the Prefab documentation.
Note: when editing the asset, please remember to save it by clicking the green tick button in the upper right corner.
