Cocos Creator
Project Settings
The Project Settings panel can be opened by clicking on Project -> Project Settings in the editor's main menu bar and is mainly used to set project-specific configuration items. These settings are stored in the project's settings/packages folder. To synchronize project settings between developers, please add the settings directory to version control.
Project Settings consists of several different sub-pages, including Project Data, Layers, Physics, Scripting, Macro Config, Feature Cropping and Texture Compression. The Project Settings panel will automatically save the changes after modifying the settings.
Project Data
The Project Data tab is mainly used to set the default Canvas, render pipeline, etc. and only works for the current project.
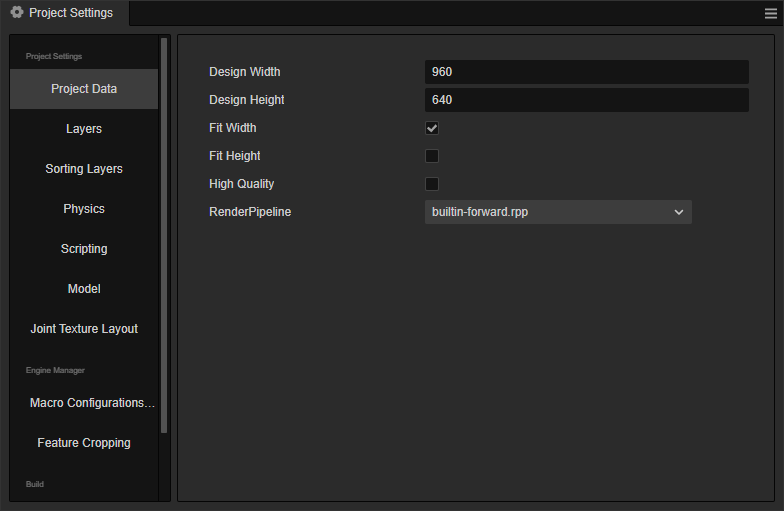
Default Canvas Settings
The default Canvas settings include Design Resolution and Fit Screen Width/Height, which specify the default design resolution values in Canvas when a new scene or Canvas component is created, as well as Fit Height and Fit Width. For more details, please refer to the Multi-Resolution Adaptation Solution documentation.
High Quality
When using Cocos Dashboard to create projects with the default template 3D HQ, shadows and lighting settings are turned on by default to achieve higher quality rendering, eliminating the need to manually turn on multiple shadows and lighting settings for scenes, objects, lights, etc. This high quality mode is the toggle switch for the template function. It mainly affects the lighting effect of 3D projects, and has no effect on the game quality.
Render Pipeline
The render pipeline is used to control the rendering process of the scene, currently supports builtin-forward (Forward Render Pipeline) and builtin-deferred (Deferred Render Pipeline), developers can also customize the render pipeline. Please refer to the Render Pipeline Overview documentations for details.
Layers
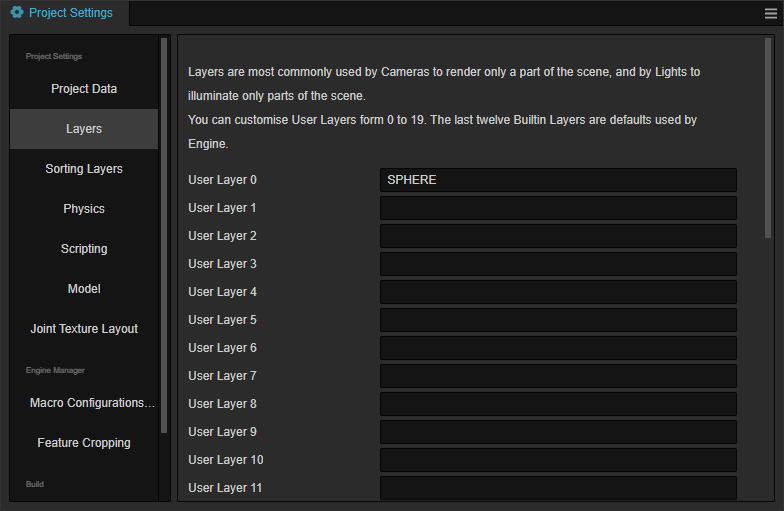
Layers allow the camera to render parts of the scene and lights to illuminate parts of the scene.
Layers can be customized from 0 to 19, and clearing the input box removes the original settings.
The last 12 Layers are built-in to the engine and cannot be modified.
The locations where Layers are currently used include:
The
Layerproperty of the nodeNodein the Inspector panel, For more details, please refer to the Node Component documentation.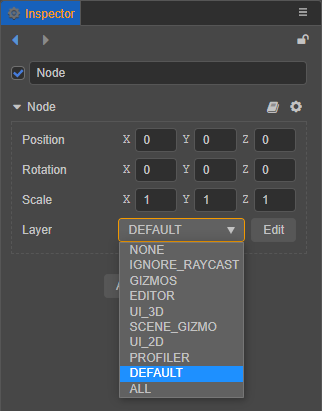
The
Visibilityproperty of the Camera node in the Inspector panel, theLayerproperty of the node matches theVisibilityproperty of the Camera. A node can only be seen by the Camera if theLayerproperty set by the node is checked in theVisibilityof the Camera. For more details, please refer to the Camera Component documentation.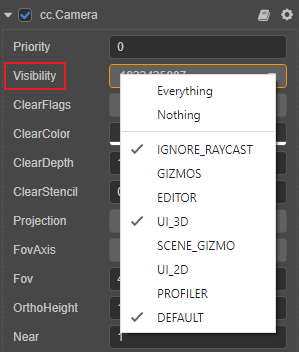
Sorting Layers
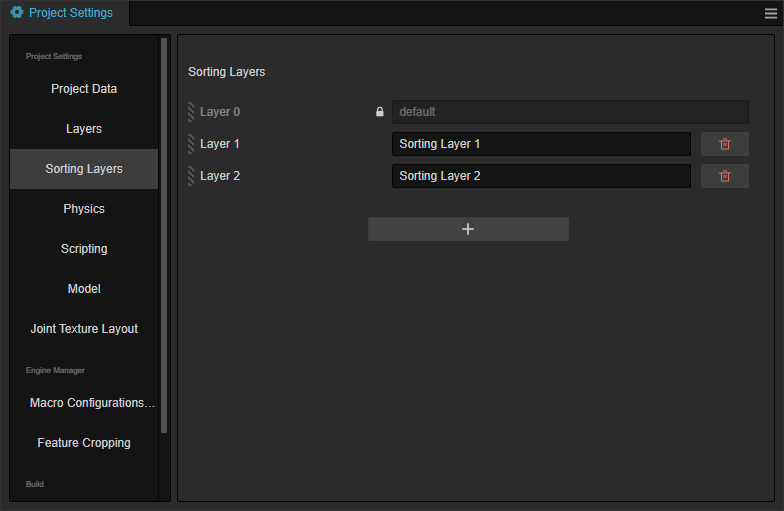
Customize the rendering order for both 2D UI and 3D objects.
Operation Instructions
- Click the delete button on the right to remove the corresponding layer.
- Except for the
defaultlayer which cannot be edited, all other layers can have their names manually edited. - Click the plus button to add different layers.
- Drag and drop the gray striped button on the left side of layers to manually rearrange them.
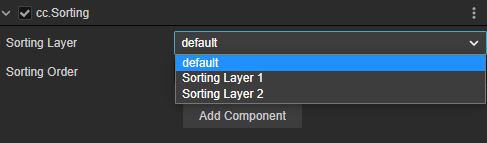
(2D UI Rendering Order) After adding render layers, attach the Sorting2D component to any 2D render component node and configure the sorting layer and in-layer order to customize the 2D UI rendering sequence.

(3D Object Rendering Order) After adding render layers, attach the Sorting component to any node with MeshRenderer or SpriteRenderer components and configure the sorting layer and in-layer order to customize the 3D object rendering sequence.
Physics
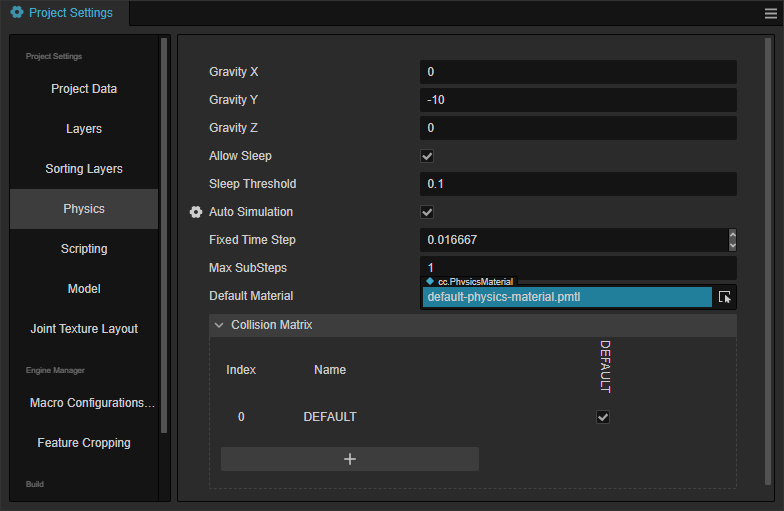
Used to configure various parameters of physics, please refer to the Physics Config documentation for details.
Scripting
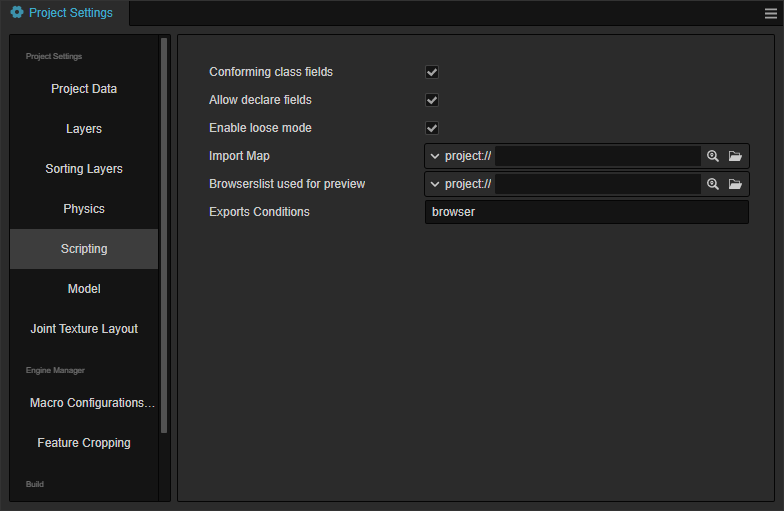
Conforming class fields: if enabled, class fields are implemented using
Definesemantics; otherwise, class fields are implemented usingSetsemantics.Allows declaration of class fields: if enabled, the
declarekeyword may be used to declare class fields in TypeScript scripts. In such case, class fields without explicit initializer would be initialized toundefined, according to the specification.Enable loose mode: if enabled, the script will be compiled in non-strict mode.
Import Map: used to control the import behavior of TypeScript/JavaScript, see the Import Map documentation for details.
Browser list used for preview: sets the browser list config file for TypeScript/JavaScript compilation at preview time.
Example: For instance, when previewing, async/await uses polyfill by default. If we don't want to use polyfill, we can create a previewbrowserlist.txt file in the project root directory with the content chrome 80. Then go to Project Settings -> Scripts -> Browser List for Preview -> select the previewbrowserlist.txt file. Restart the editor or restart the script compilation process. The polyfill for async/await will no longer be applied.
Exports Conditions: specify the parsing conditions for conditionalized export modules, see Conditional exports for details.
Sorting Plugin Scripts
A partial introduction to plugin scripts can be found in the document Plugin Scripts.
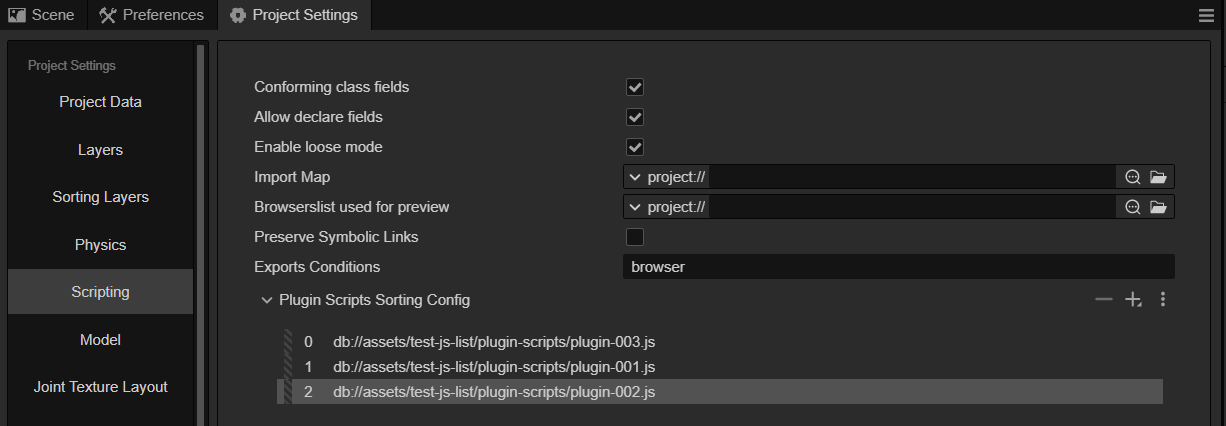
When some of the plugin scripts have a certain prioritized loading order between them, you can add the sorting here. (Just add the plugin scripts that have a prioritized order)
How to operate:
Click the
+button to add plug-in scripts that are recognized but not added to the project.Click the
-button to delete the selected plugin scripts.Click the
┇button to expand the menu and selectAdd All Plugin ScriptsorEdit as JSON.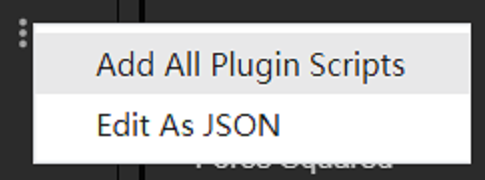 Editing in JSON is for those who want to edit the data directly, this is only a simple conversion, please check the data and format by yourself, illegal JSON format will not be submitted and saved.
Model
- Start Material Conversion: Please refer to FBX Smart Material Conversion for more details.
Joint Texture Layout
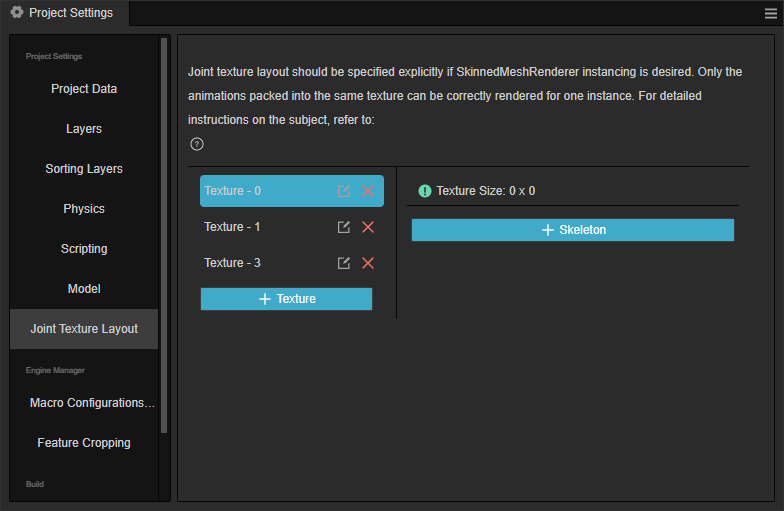
Configure the joint texture layout within the project. Please refer to Joint Texture Layout Settings。
Macro Config
Macro Config provides a shortcut to modify the macro configuration. The configured macros will take effect on preview and build, and will also follow the custom engine configuration to update the default values of the current macro configuration.
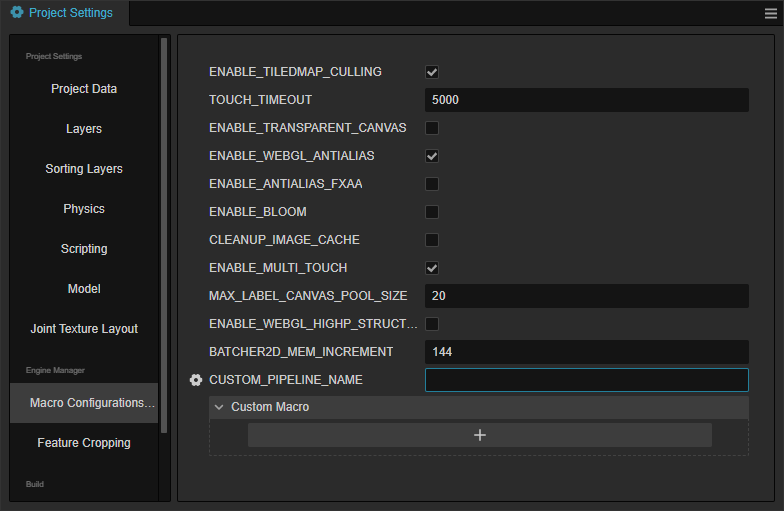
ENABLE_TILEDMAP_CULLING: whether or not to enable TiledMap auto-culling. It's enabled by default. Note that if
skewandrotationare set in the TiledMap, it's necessary to turn it off manually, otherwise it will cause rendering errors.TOUCH_TIMEOUT: the duration of the delay used to screen a contact object to see if it has failed and can be removed. This value can be modified to get the desired effect, the default value is 5000 ms. Please refer to the API TOUCH_TIMEOUT for details.
ENABLE_TRANSPARENT_CANVAS: used to set whether the Canvas background supports alpha channels.
- If enabled, the Canvas background will be transparent and show the other DOM elements behind it.
- If disabled, it will result in higher performance.
ENABLE_WEBGL_ANTIALIAS: whether to activate WebGL antialias setting in the engine, it's enabled by default. This setting only affects WebGL graphics back-end, it indicates whether to turn on the anti-aliasing option when creating WebGL Context (for forward pipeline only).
ENABLE_ANTIALIAS_FXAA: used to enable FXAA anti-aliasing (for deferred pipeline only).
ENABLE_BLOOM: used to enable the BLOOM post-processing.
CLEANUP_IMAGE_CACHE: whether to clear the image cache after uploading a texture to GPU. If the cache is cleared, Dynamic Atlas will not be supported. It's disabled by default.
ENABLE_MULTI_TOUCH: whether to enable multi-touch.
MAX_LABEL_CANVAS_POOL_SIZE: set the maximum number of Canvas object pools used by the Label, and adjust it according to the number of Labels in the same scene of the project.
ENABLE_WEBGL_HIGHP_STRUCT_VALUES (new in v3.4.1): on the Android platform with WebGL backend, the internal variables of the structures defined in the fragment shader use mediump precision, which may lead to incorrect results for some data that requires high precision (such as position information). To avoid this problem, check this option and enable WebGL to calculate variables with highp precision.
If this option is enabled, use the
HIGHP_VALUE_STRUCT_DEFINEmacro in the fragment shader code to define structural variables, and useHIGHP_VALUE_TO_STRUCT_DEFINEDandHIGHP_VALUE_FROM_STRUCT_DEFINEDto assign values between structural and non-structural variables.For specific information and code on the above macro calls, please refer to packing.chunk for details.
BATCHER2D_MEM_INCREMENT (new in v3.4.1): this option affects the maximum number of vertices in each MeshBuffer, the default value is 144KB, please refer to the MeshBuffer Batch Description documentation for the conversion relationship between the number and the value.
Custom Macro: used to customize macro configurations, providing a macro tagging feature for current project scripts for easy visual configuration. Click the + button below to add a new macro configuration, hover over the added macro configuration and the Delete and Modify buttons will be displayed on the left side for deleting/renaming the current macro configuration respectively.

For more specific information and code about the engine macro module, please refer to the Engine Macro source.
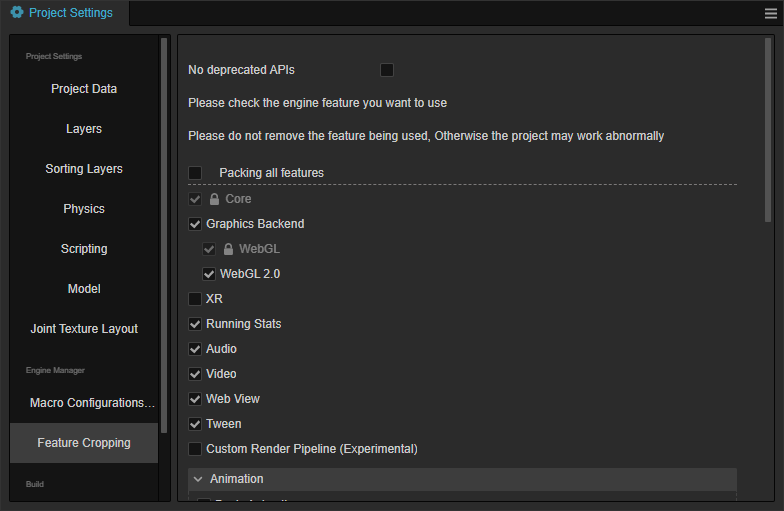
Feature Cropping
The Feature Cropping tab is mainly for modules used in the engine when releasing the game, to achieve the effect of reducing the package size of the released version of the engine. The unchecked modules in the list will be cropped out when packaging and previewing. It is recommended to do a complete test after packaging to avoid scenes and scripts that use modules that have been cropped out.
Texture Compression
The preset configuration of texture compression is moved to Project Settings, and developers can select how the image asset is preset in the Inspector panel. The editor will automatically scan all the texture compression configurations in the project and sort out a few presets. Since it is automatically scanned, the preset names may not match the project and can be modified here by developers.
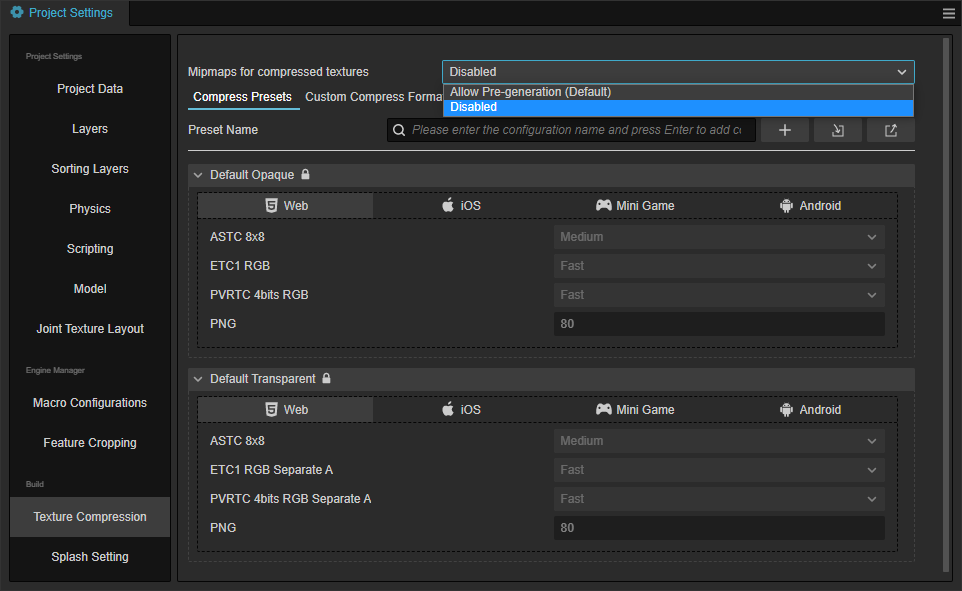
Compress Presets
This panel is mainly used to add presets for texture compression. Each texture compression configuration allows to tailor the configuration for different platforms. Once added, developers can quickly add a texture compression preset in the Inspector panel by selecting the image asset in the Hierarchy panel. It is also possible to modify the preset directly in this panel to achieve the need to update the compression texture configuration in bulk.
The following platforms are currently supported for configuring texture compressions:
- Web: both Web-Mobile and Web-Desktop platforms
- iOS
- Mini Game: including all mini game platforms currently supported by Creator, such as WeChat Mini Game, Huawei Quick Game, etc.
- Android
Please refer to the Texture Compression documentation for details of texture compression on each platform.
Properties
- Mipmaps for compressed textures: Pre-generated Mipmap for compressed mapping, options: Allow Pre-generation (default); Disabled Disabled
- If the project is upgraded from a version before v3.7, this option is disabled by default
- Generate multiple images when turned on, it will affect the package size, please choose according to your needs
- If the user is using texture with generate mip maps checked, and needs to generate mipmaps with texture compression checked and some formats that need to be compressed by third-party tools such as pvr etc, you need to turn this option on in the project settings. Once enabled, the build will generate compressed mipmaps of the corresponding format for use at runtime
Adding/Removing Texture Compression Presets
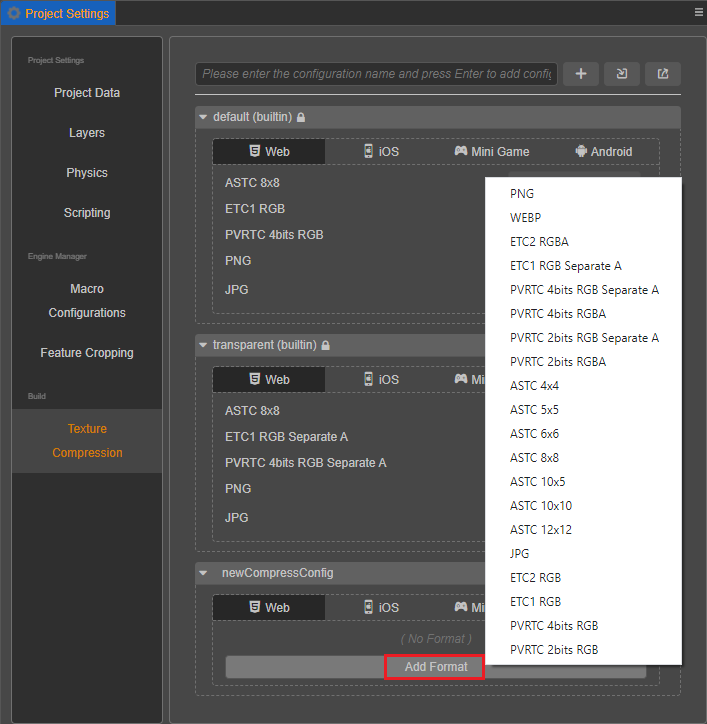
Enter a texture compression preset name in the upper input box and click Enter or the "+" button on the right to add a preset. The other two buttons are for importing/exporting texture compression presets, please refer to the description below for details.

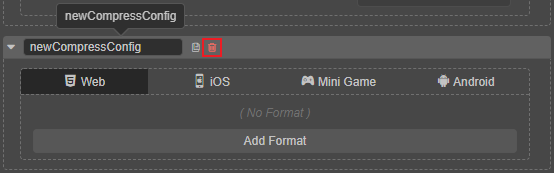
After adding a compressed texture, it can be deleted by hovering over the preset name and clicking the delete button on the right.
Note: the two presets default and transparent built into the panel cannot be modified/deleted.
Adding/Deleting Texture Compression Format
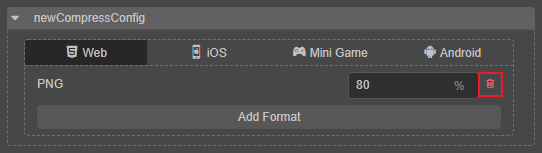
Select the platform, then click the Add Format button, select the desired texture format, and then configure the corresponding quality level. Currently the same type of image format can only be added once.
To delete, move the mouse over the texture format and click the red delete button on the right.
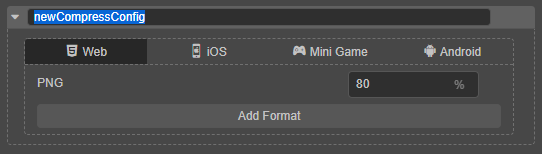
Modifying the Texture Compression Preset Name
The name of the texture compression preset is for display purposes only. When a texture compression preset is added, a random UUID is generated as the ID of the preset, so changing the preset name directly does not affect the reference to the preset at the image asset.
Exporting/Importing Texture Compression Presets
The texture compression configuration page allows importing/exporting texture compression presets for better cross-project reuse of the configuration, or edit the texture compression presets externally and import them to the editor.
To write a custom texture compression configuration, please refer to the following interface definitions and examples:
The interface is defined as follows:
ts
type IConfigGroups = Record<ITextureCompressPlatform, IConfigGroupsInfo>;
type ITextureCompressPlatform = 'miniGame' | 'web' | 'ios' | 'android' | 'pc';
type ITextureCompressType =
    | 'jpg'
    | 'png'
    | 'webp'
    | 'pvrtc_4bits_rgb'
    | 'pvrtc_4bits_rgba'
    | 'pvrtc_4bits_rgb_a'
    | 'pvrtc_2bits_rgb'
    | 'pvrtc_2bits_rgba'
    | 'pvrtc_2bits_rgb_a'
    | 'etc1_rgb'
    | 'etc1_rgb_a'
    | 'etc2_rgb'
    | 'etc2_rgba'
    | 'astc_4x4'
    | 'astc_5x5'
    | 'astc_6x6'
    | 'astc_8x8'
    | 'astc_10x5'
    | 'astc_10x10'
    | 'astc_12x12';
type IConfigGroupsInfo = Record<ITextureCompressType, IQuality>
interface ICompressPresetItem {
    name: string;
    options: IConfigGroups;
}Examples:
json
{
    "default": {
        "name": "default",
        "options": {
            "miniGame": {
                "etc1_rgb": "fast",
                "pvrtc_4bits_rgb": "fast"
            },
            "android": {
                "astc_8x8": "-medium",
                "etc1_rgb": "fast"
            },
            "ios": {
                "astc_8x8": "-medium",
                "pvrtc_4bits_rgb": "fast"
            },
            "web": {
                "astc_8x8": "-medium",
                "etc1_rgb": "fast",
                "pvrtc_4bits_rgb": "fast"
            },
        }
    },
    "transparent": {
        "name": "transparent",
        "options": {
            "miniGame": {
                "etc1_rgb_a": "fast",
                "pvrtc_4bits_rgb_a": "fast"
            },
            "android": {
                "astc_8x8": "-medium",
                "etc1_rgb_a": "fast"
            },
            "ios": {
                "astc_8x8": "-medium",
                "pvrtc_4bits_rgb_a": "fast"
            },
            "web": {
                "astc_8x8": "-medium",
                "etc1_rgb_a": "fast",
                "pvrtc_4bits_rgb_a": "fast"
            },
        }
    }
}
Custom Compress Format
Since v3.5.0, custom texture compression pages have been supported in order to make it easy for users to customize the texture compression tool and some custom parameters, encryption, etc. Interface interaction is similar to texture compression presets.
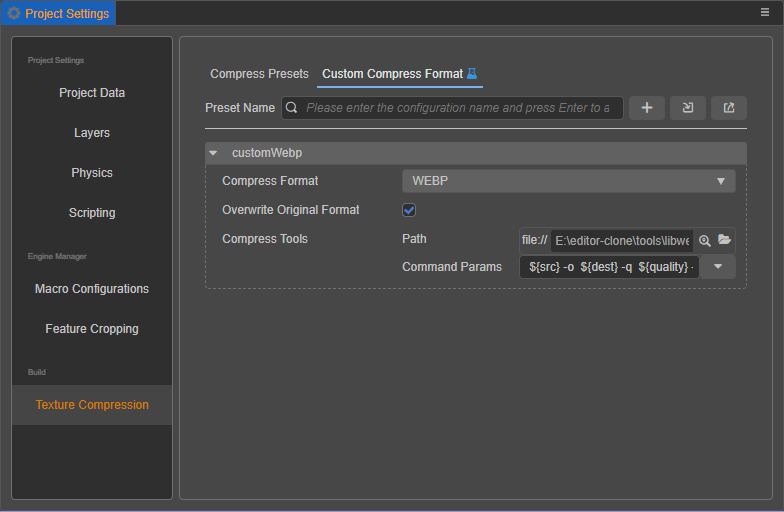
Configuration
Compress format: Config the processing format. After selecting a different format, quality options will keep the same type. If the customized compression mode fails, the system will automatically revert to the original compression scheme of the editor.
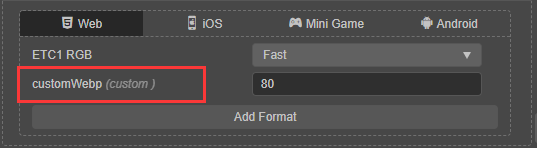
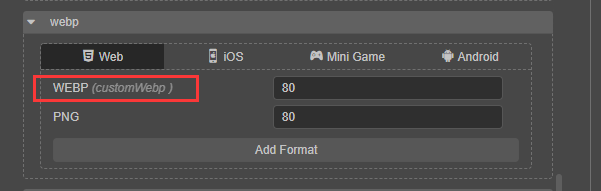
Overwrite original format: If this option is selected, the original compression format in the existing texture compression preset will be automatically overwritten. The name of the custom compression mode will appear next to the original configuration name. One format can only be overwritten by one custom compression mode.
Compression tool:
- program: compress tool path.
- Command line parameters: Sets the parameters to be passed by the calling program. The names of the parameters to be passed by default to build texture compression can be added quickly through the control on the right of the parameter input box. Currently, the 'src, dest, quality' fields are passed by default.
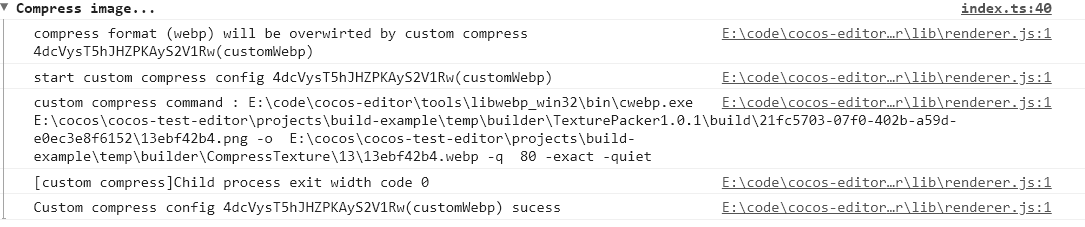
Custom Compress Format In Build
After the custom texture format is configured, the word custom-compress and the command line parameter information will be printed to console when build the project.
Splash Setting
The splash screen setting is a feature that displays the engine logo or a developer-defined logo at the start of the game.
The splash screen will only be shown after the release, not during the preview.
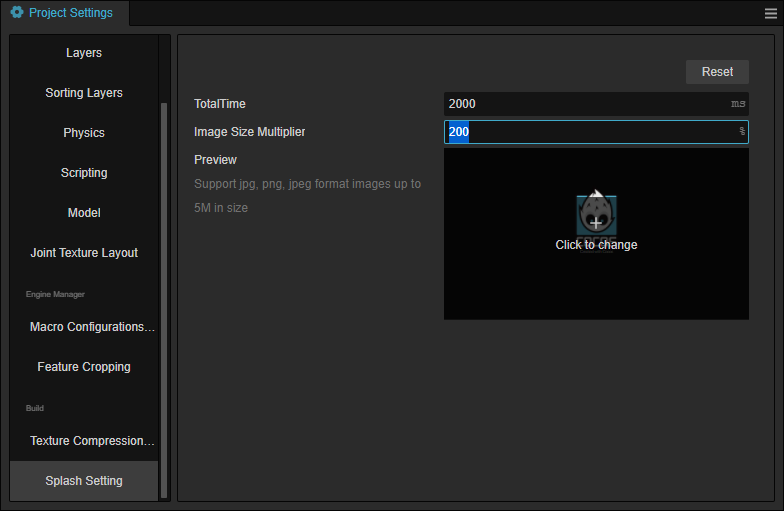
- TotalTime:Total duration of splash screen(ms)
- Image Size Multiplier: The size multiplier of the splash image
- Preview: If you want to change the Splash Image, Hover the mouse on the preview window, then click the '+' button, then select a new image path.
If you want to disable the splash screen, please refer to Build Options for details.
Notes.
- After selecting different build platforms in the build options, adjust the splash screen rules again to achieve the diversity of splash screen on different platforms
- the splash screen will only take effect after packaging, not when previewing
- some countries and regions are not open for full splash screen, we apologize for any inconvenience caused to you.
Bundle Config
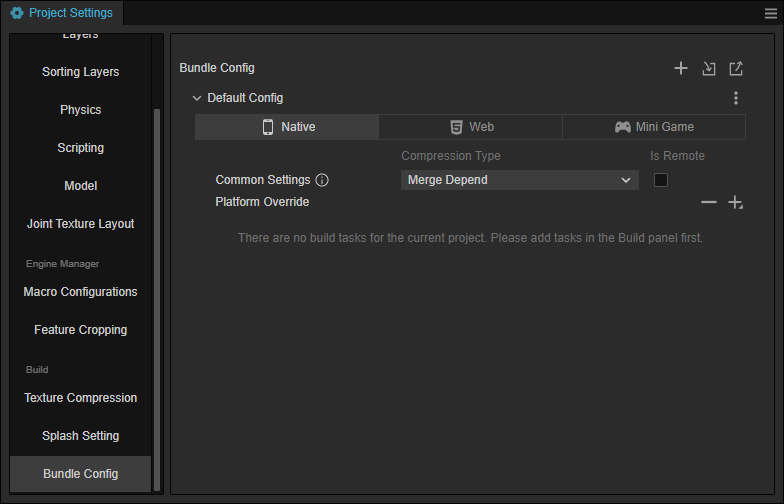
Bundle Config allows users can config different configurations for various platforms. For example, to distinguish normal textures and high-resolution textures, or for different shops, etc. For more, please refer to Asset Bundle.
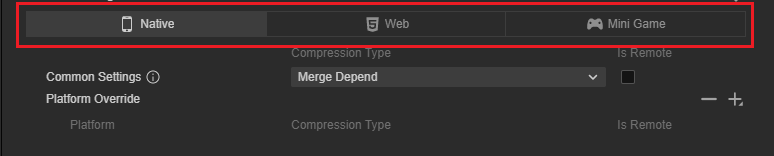
Currently, three main types of platforms are supported by Cocos Creator including the native platform, web, and mini-games.
You can select the target platform by clicking on the platform buttons.
Use the menus on the top right of the panel to create a new, import, or export config.

New Config: Create a new config.

After a config is created, you can select it by clicking on the drop-down box beside Platform Settings on the Inspector panel when a bundle is selected.
Different bundles can use different configs.
Import Config:To import a JSON file as the bundle config.
Export Config:Export the config to reuse it in other projects.
For the created config, you can Copy Config, Copy ID, Rename or Delete the config by clicking the menu button.

Platform Override
Currently, Cocos Creator supports multiple platforms for publishing. When publishing on each platform, you can choose the option to add a new configuration to override the currently configured platform.
Click the "+" sign on the right side of Platform Override to select the target platform.
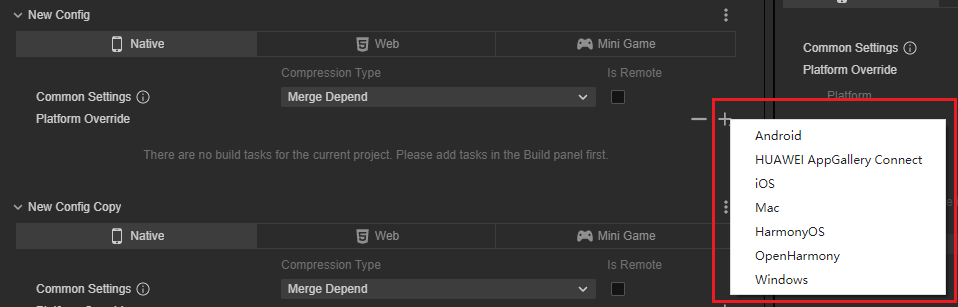
After selecting new platforms as needed, the configuration of these new platforms will override the previous generic configuration.
This operation allows developers to optimize for certain platforms.
Extending the Project Settings Panel
Creator supports adding custom feature pages on the right side of Project Settings, please refer to the Extending the Project Settings Panel documentation.