Cocos Creator
About the Build Panel
Click Project -> Build in the main menu of the editor or use the shortcut key Ctrl/Cmd + Shift + B to open the Build panel:

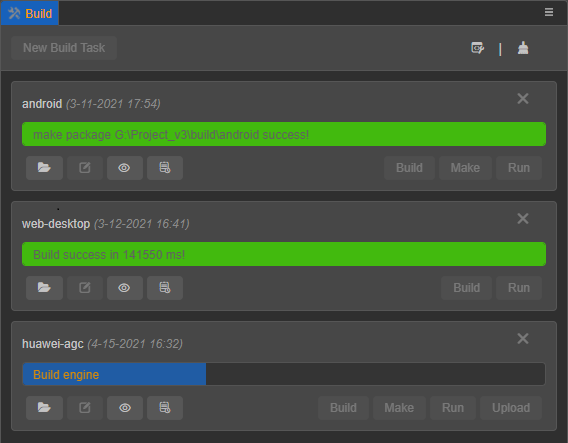
If a platform has already been built, open the Build panel to enter the Build Task page. The build of each platform for v3.0 is carried out in the form of a build task, similar to a download task:
Build Panel
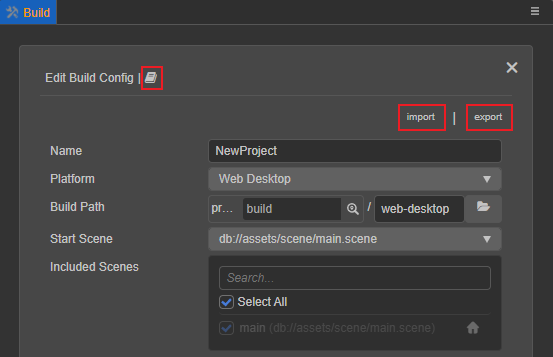
In the Build panel, select the platform to be built, and then configure the build options. After the configuration is complete, click the Build button in the lower right corner to jump to the Build Task page to execute the build process. Another way is to click the Close (X) button in the upper right corner to enter the Build Task page.
There are three function buttons at the top of the panel:
 : click this button to jump to the official manual documentation of the current platform.
Import: click this button to import the JSON file that saves the configuration of the build options.
Export: click this button to export the current platform's build option configuration as a JSON file for the command line build, or share it among project members. The exported configuration is differentiated according to the platform. When using the command line to build, specify the file path of the build parameter
configPathas the exported JSON configuration file path.
Notes:
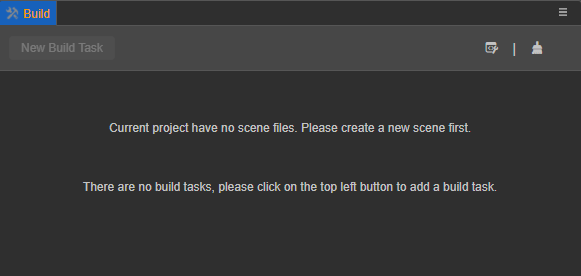
It is meaningless to build a project without a scene, if there is no scene in the currently opened project, a prompt will appear to create a scene first when opening the Build panel:
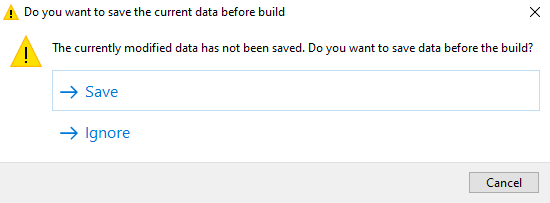
Before building, please make sure that the current scene has been saved, otherwise when click the Build button, and a pop-up prompt will be displayed. Choose Save, Ignore or Cancel. Select Save and Ignore to continue the build process.
Build Tasks
On the Build Tasks page, developers can view the current platform's build progress and build results.
- Building: the progress bar is displayed as blue.
- Build success: the progress bar reaches 100%, and the actual build time is output and displayed as green.
- Build failed: the progress bar reaches 100%, prompting the reason for the failure of the build or an error message, and it is displayed as red.
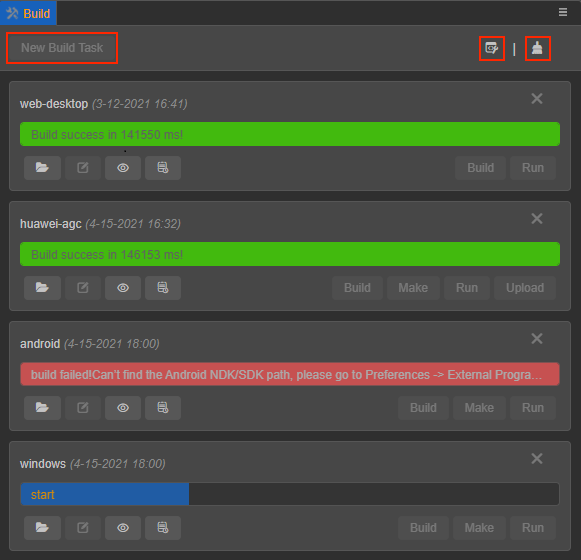
There are three buttons at the top of the page, including New Build Task, Open Build DevTools and Clear Build Cache:
New Build Task: click this button to return to the Build panel, select a new platform to build.
 : click this button to open the Build DevTools, and view all the log information generated during the build process, including the call stack.
 : clear the build cache. In order to reuse the reusable build results, and in order to speed up the build and reduce memory usage when rebuilding, many processes in the build process have added cache management mechanisms, such as compressed textures, automatic atlas generation, engine compilation, and resources being serialized JSON, etc.
Under normal circumstances, this part of the cached data does not need to be manually cleaned, but if it is needed to avoid cache interference under special circumstances, click this button to clear the cached data.The project-related resource cache will be stored in the project directory, and the engine compilation-related cache will be stored in the global directory. Developers can choose to clear the project cache, the global cache, or all of them according to their needs.

Platform Build Tasks
The build of each platform is carried out in the form of a build task, similar to a download task. The name of the platform build task depends on the Build Path option in the Build panel. For details, please refer to the Build Options documentation.
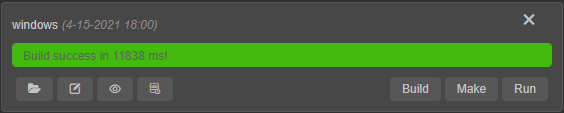
Each building task has corresponding function buttons for easy use.
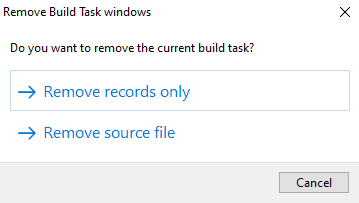
The remove (X) button at the top right of the build task is used to remove the current build task. Choose Remove records only or Remove source files. Remove source files means to delete the project release package generated in the build directory after the corresponding platform is built.
The buttons at the bottom left of the build task include:
 : click this button to open the project release package generated after the corresponding platform is built (the default is in the
 builddirectory). : click this button to return to the Build panel, modify the build options configured during the last build of the corresponding platform, and then click the Build button at the bottom right to rebuild. For details, please refer to the content in the Modify Build Options section below.
 : click this button to return to the Build panel to view the build options configured during the last build of the corresponding platform.
 : click this button to open the log file generated by the corresponding platform during the build process. For more information, please refer to the content in the Building Log Information View section below.
The button at the bottom right of the build task is mainly used for each platform to execute the release process such as generation, operation, and upload according to the platform requirements after the completion of the build. The Build button is used to rebuild.
After each platform is built, the build options configuration information related to the build will be saved in the profiles/v2/packages/builder.json file in the project directory, as long as the build of the corresponding platform is not deleted on the Build Tasks page or delete the project release package in the build directory. To view the build option configuration of the last build after reopening the editor, and continue to run the preview, etc.
For the specific release process of each platform, please refer to:
Modifying Build Options
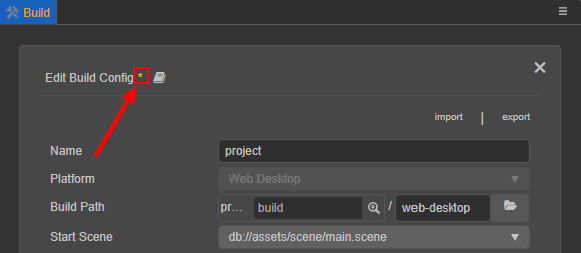
Click the edit button at the bottom left of the build task to return to the Build panel to modify the build options configured during the last build for rebuilding. Since it is only possible to modify the build option configuration during the last build of the current platform, the Platform option on the page is grayed out and cannot be modified.
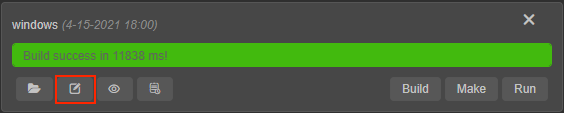
Click the button to the right of the edit button to view the configuration of the build options during the last build of the current platform.
After the modification is completed, clicking the Build button will clear the project release package generated after the last build and rebuild. Or click the X button at the top right of the Build panel to return to the Build Tasks page, and then click the Build button at the bottom right of the platform build task to rebuild.
Note: in order to avoid accidentally deleting customized content, the native platform only updates project resources when rebuilding, and does not overwrite the original native project content. Therefore, when returning to the Build panel to modify the previously configured build options, the native platform-related build options are in the disabled state. To regenerate the project, please create a new build task.
If the Build button is not clicked to rebuild after modifying the configuration, the modified configuration will also be saved. If the configuration in the current Build panel is inconsistent with the configuration in the project release package in the build directory generated after the last build, a yellow key will be displayed at the top of the Build panel.
Build Log Information View
Since the build process will generate a lot of log information, only error messages will be printed to the editor's console panel by default.
To view all the log information, there are the following operations:
Open the Build DevTools
To view, click Developer -> Open Build DevTools in the main menu or click the
button at the top right of the Build Task page. All log information printed during the build process includes the call stack.Open the build logging file
The error message generated during each build process will be recorded and stored in the
temp/builder/logfolder under the project directory. Click the button at the bottom right of the build task to view it. When feedback on build related issues, directly paste the file to locate the problem.
Build Queue and Interrupt Build

You can still add a new build task during the build process, and the new build task will be added to the build queue. During the build process, you can click the X button on the right side of the build task to interrupt the current build task.
Build Bundle Only
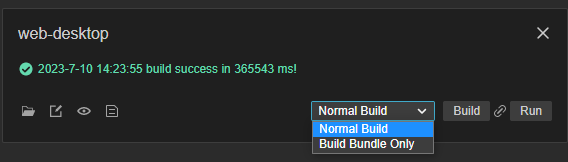
Cocos Creator supports Build Bundles Only since v3.8. All selected Bundles can be built at once when building the project. Unlike building individual Bundles, the Build Bundles Only option will build all Bundles and store public assets in high-priority Bundles.