Cocos Creator
Shader Syntax
Shaders in Cocos Creator are called Cocos Shaders, and have the file extension *.effect. It consists of YAML and GLSL. The YAML is used for the flow control instructions, while the GLSL is for the shader code. These two parts complement each other to form a complete Cocos Shader.
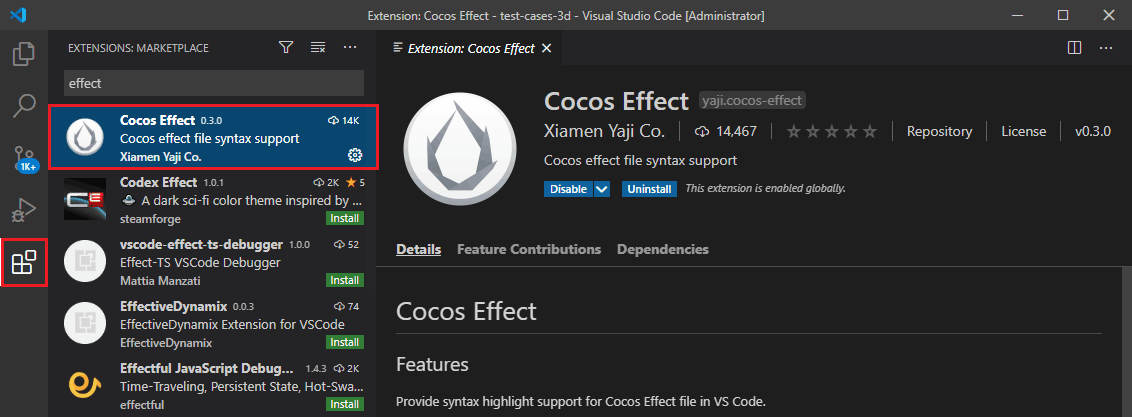
Note: It is recommended to use Visual Studio Code to write Cocos Shader and install the Cocos Effect extension from the marketplace in Visual Studio Code to provide syntax highlighting and autocompletion.
Syntax Overview
A Cocos Shader typically consists of two parts.
CCEffect: Used to declare techniques, passes, render states, properties, etc.CCProgram: Used for shader code, such as the vs, fs, uniforms, etc.
Let's explore the syntax of Cocos Shader by taking the built-in shader builtin-unlit.effect as an example.
In VS Code, Open the builtin-unlit.effect file located in the internal/effects/ folder.
glsl
CCEffect %{
  techniques:
  - name: opaque
    passes:
      - vert: unlit-vs:vert
        frag: unlit-fs:frag
        properties: &props
        mainTexture:    { value: grey }
        tilingOffset:   { value: [1, 1, 0, 0] }
        mainColor:      { value: [1, 1, 1, 1], linear: true, editor: { type: color } }
        colorScale:     { value: [1, 1, 1], target: colorScaleAndCutoff.xyz }
        alphaThreshold: { value: 0.5, target: colorScaleAndCutoff.w, editor: { parent: USE_ALPHA_TEST } }
        ...
  - name: transparent
    passes:
      - vert: unlit-vs:vert
        frag: unlit-fs:frag
        depthStencilState: &d1
        ...
}%

CCProgram unlit-vs %{
  precision highp float;
  #include <...>
  #cinlude <....>

  vec4 vert(){
    vec4 position;
    CCVertInput(position);
    ....
    return cc_matProj * (cc_matView * matWorld) * position;
  }
}%

CCProgram unlit-fs %{
  precision highp float;
  #include <...>
  #cinlude <....>

  vec4 frag(){
    vec4 o = mainColor;
    ....
    return CCFragOutput(o);
  }
}%
CCEffect
The section wrapped by CCEffect in Cocos Shader contains the description of the rendering process declared using YAML. Developers who are unfamiliar with YAML can refer to YAML 101 for more details.
The overall structure of CCEffect is as follows.
glsl
CCEffect %{
  techniques:
  - name: tag
    passes:
    - vert: vs:entry
      frag: fs:entry
      <optional: material properties>
      <optional: pipeline states>
      <optional: one or more definitions>
    ...
  ...
}%
A CCEffect can declare multiple techniques, but only one can be applied to a material instance during rendering.
Taking builtin-unlit.effect as an example, it contains the following 4 techniques.
- opaque
- transparent
- add
- alpha-blend
The opaque technique is specifically used for rendering opaque objects, while the transparent, transparent, add and alpha-blend are used for rendering transparent objects.
Each technique includes a name and one or more render passes.
The name is used to describe the purpose of the render technique, and the passes defines all the necessary information for a complete render call.
Pass
The characteristics of a render pass are as follows.
- A render technique can contain multiple render passes, and the passes are executed one by one in the defined order.
- A render pass must include a vertex shader and a fragment shader, while the rest are optional. For details, please refer to Pass Optional Parameters。
- The VS/FS shaders need to specify the CCProgram to use and specify the entry function of the shader. If the entry function is not specified, the default entry 'main' will be used.
The format is as follows:
glsl
CCEffect %{
  techniques:
  - name: opaque # Define an opaque render technique
    passes:
    - vert: vs: entry # Select a vertex shader defined in CCProgram, with the entry function.
      frag: fs: entry # Select a fragment shader defined in CCProgram, with the entry function.
    ...
  ...
}%
Each render pass has only one vert and one frag, which are used to declare the vertex shader and fragment shader used in the current pass. The format is ShaderName: EntryFunctionName.
The ShaderName can be a fragment name declared in the current shader file or a standard header file (*.chunk) provided by the engine.
Note: The customized shader should not use the
mainfunction. Cocos Shader automatically adds amainfunction during compilation and calls the entry function (e.g.vertoffrag) of the render pass. Themainfunction will use the return value of the entry function as the output of the current shader.
Render Pass Properties
Properties in a render pass are used to configure related uniforms for the shader code. Through properties, you can define how a uniform is displayed in the panel. Here's an example.
glsl
CCEffect %{
  techniques:
  - name: opaque
    passes:
    - vert: vs: entry
      frag: fs: entry
      properties:
        mainTexture: { value: grey }
        colorScale: { value: [1, 1, 1], target: colorScaleAndCutoff.xyz }
      depthStencilState:
        depthTest: true
        depthWrite: true
    ...
  ...
}%
For more details, please refer to Pass Optional Parameters。
CCProgram
The section wrapped by CCProgram in Cocos Shader is declared using GLSL for the shader code. It is recommended to have a basic understanding of GLSL Basic.
glsl
CCProgram shader-name %{
  <required: precision settings>
  <optional: include>
  <optional: ubo>
  <optional: custom attribute>
  <optional: >
  vec4 entry(){
    // Should return a vec4 type data.
  }
}%
Macros
By using macros, you can control code branches and combinations during the compilation of Cocos Shader, enabling efficient and convenient management of shader code.
For more detailed information, please refer to.
More
If you want to see more complex shader examples, you can refer to the Surface Shader Overview and Built-in Surface Shader.