Getting Started Example - Panel
In the document Getting Started Example - Menus explains how to create a minimal extension, next we look at how to create a panel and communicate with it.
Creating via templates
The quickest way to create a panel in Cocos Creator is through the Extension template with a panel, as shown in the following image:
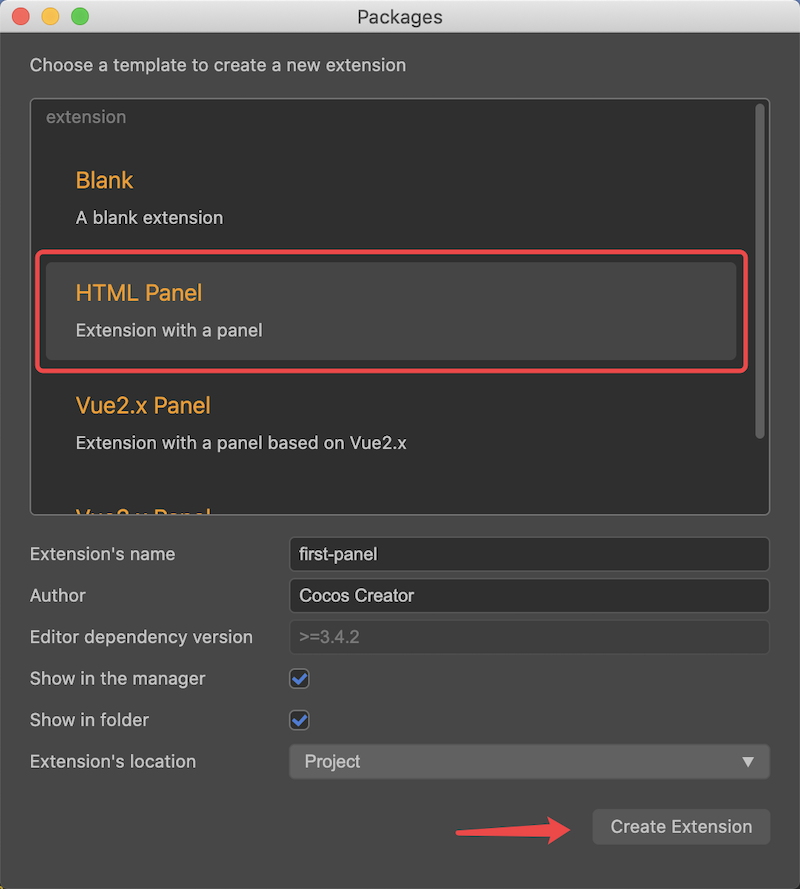
After clicking the Create button, you can find the extensions/first-panel extension in the project root directory.
Compile, Install
In the command line tool, locate the extensions/first-panel directory and execute the following statement:
npm install
npm run build
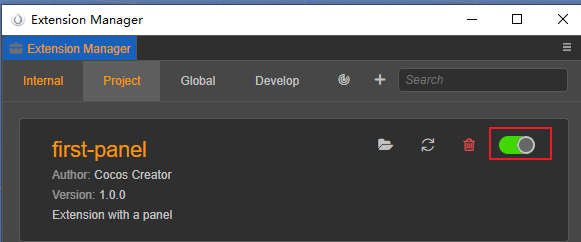
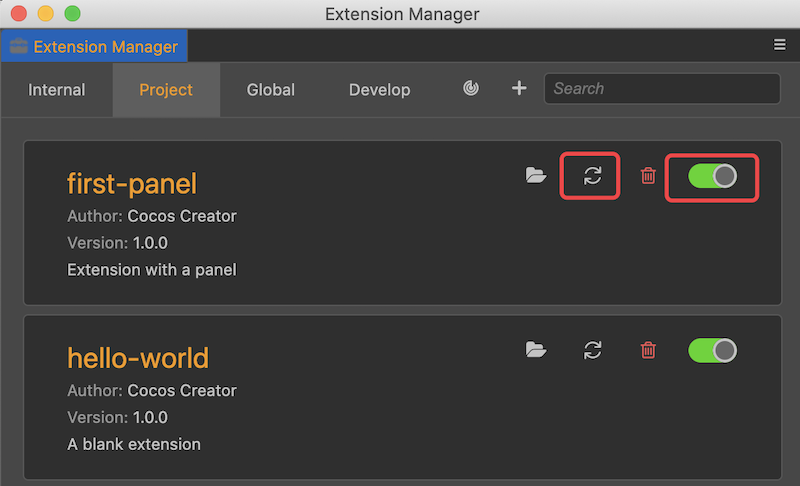
After the command is executed, go back to the Extension Manager, find the first-panel extension, enable it and refresh it, as shown in the following image:
View Panel
After enabling and refreshing the extension, you can find the menu items in the Panel menu as shown in the following figure.
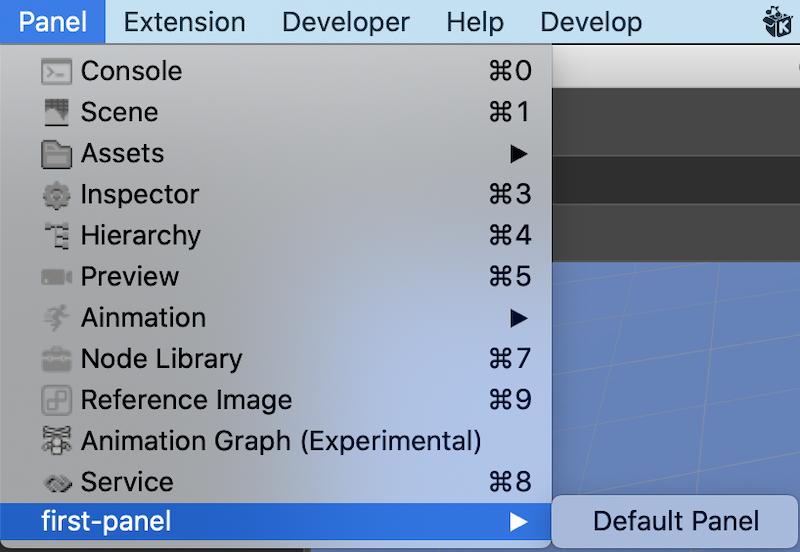
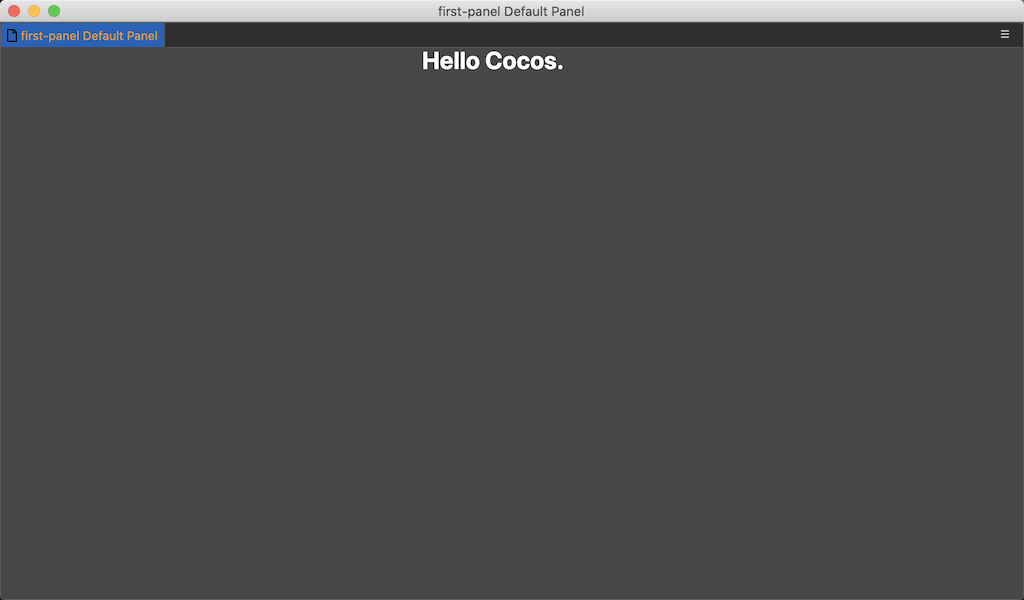
Click on the Default panel menu item to bring up the panel shown below.
This example also defines another menu item for communication in the Developer menu, as shown in the following image.
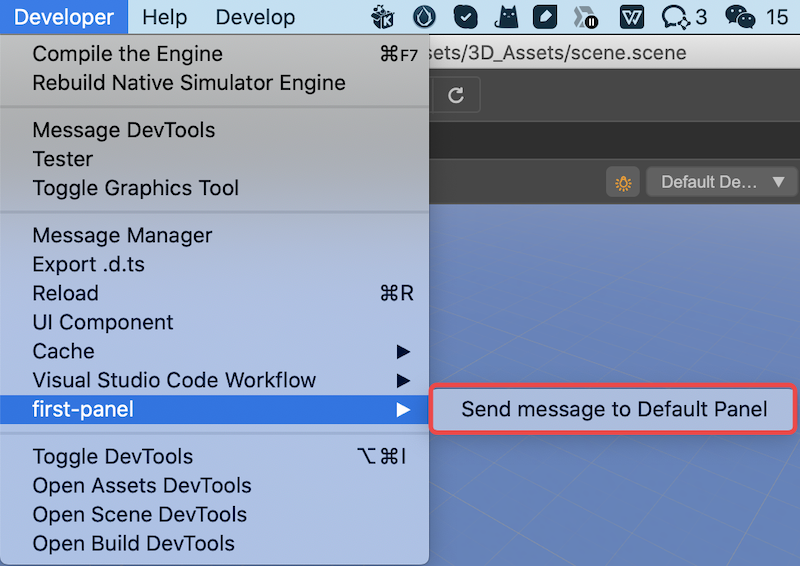
After clicking the Send message to Default Panel button shown in the red box in the above image, you can see that the content displayed on the panel will change.
Note: If this menu is not displayed, please open the Extension Manager panel and make sure the extension is enabled.
Panel Explanation
In the following, we'll explain the panel directory structure, definition and communication mechanism one by one.
Panel Directory Structure
In the project directory, find ./extensions/first-panel folder, which is the directory where the entire extension can be viewed.
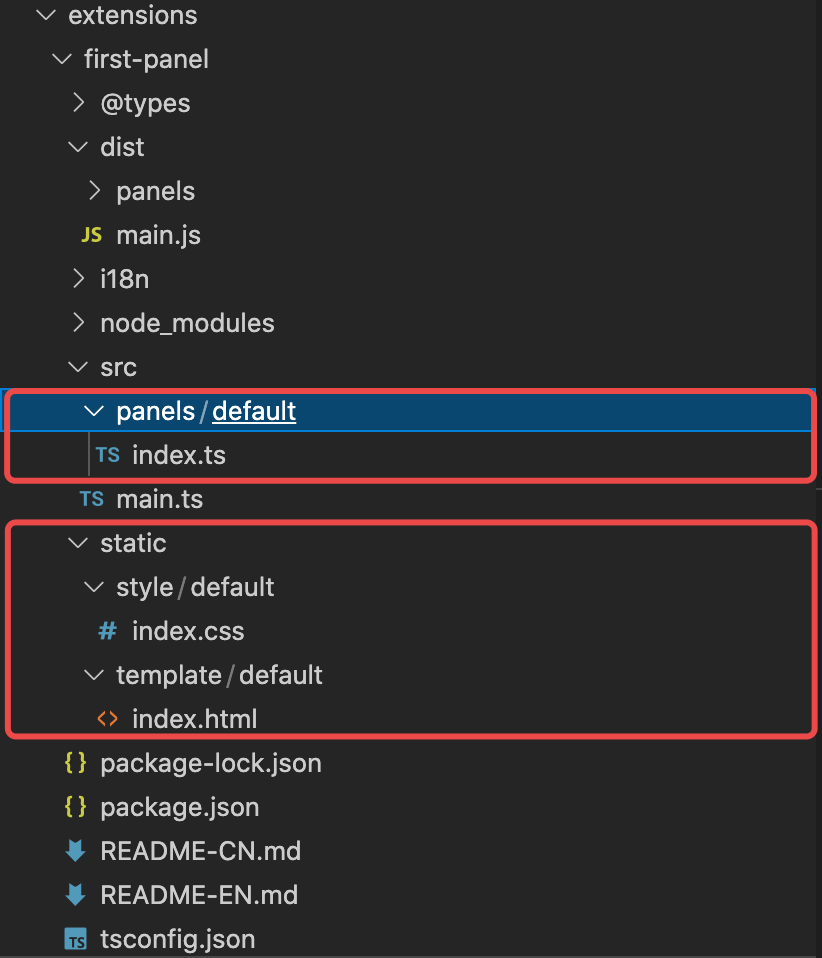
As shown above, there are more static and panels directories than hello-world.
static - used to store panel layout files, such as css\html, etc.
panels - used to store panel-related source code, each panel has an index.ts entry source file.
index.ts, style, template Please refer to the documentation Write a Custom Panel
Description File package.json
Before we understand the panel, let's look at the panel-related definitions in package.json, as follows:
{
    "package_version": 2,
    "version": "1.0.0",
    "name": "first-panel",
    "description": "i18n:first-panel.description",
    "main": "./dist/main.js",
    "dependencies": {
        "fs-extra": "^10.0.0"
    },
    "devDependencies": {
        "@types/node": "^16.0.1",
        "@types/fs-extra": "^9.0.5",
        "typescript": "^4.3.4"
    },
    "panels": {
        "default": {
            "title": "first-panel Default Panel",
            "type": "dockable",
            "main": "dist/panels/default",
            "size": {
                "min-width": 400,
                "min-height": 300,
                "width": 1024,
                "height": 600
            }
        }
    },
    "contributions": {
        "menu": [
            {
                "path": "i18n:menu.panel/first-panel",
                "label": "i18n:first-panel.open_panel",
                "message": "open-panel"
            },
            {
                "path": "i18n:menu.develop/first-panel",
                "label": "i18n:first-panel.send_to_panel",
                "message": "send-to-panel"
            }
        ],
        "messages": {
            "open-panel": {
                "methods": [
                    "openPanel"
                ]
            },
            "send-to-panel": {
                "methods": [
                    "default.hello"
                ]
            }
        }
    },
    "author": "Cocos Creator",
    "editor": ">=3.4.2",
    "scripts": {
        "build": "tsc -b",
        "watch": "tsc -w"
    }
}panels: {} - The panels defined in this extension
- default: String - defines a panel named default
- title: String - the title of the panel
- type: String - the type of the panel
- main: String - the panel source directory
- size: {} - size information
- min-width: Number - the minimum width
- min-height: Number - the minimum height
- width: Number - the default width of the panel
- height: Number - the default height of the panel
Additional Reading
panel For a detailed explanation of panels, please refer to the documentation Extension Panel.
i18n for multi-language configuration, please refer to the documentation Multilingual System (i18n).
messages For the complete message definition mechanism, please refer to the documentation Customized Messages.
