Publishing to vivo Mini Games
Note: Some platforms only have Chinese documentation available when visiting the platforms website. It may be necessary to use Google Translate in-order to review the documentation.
Environment Configuration
Download the Quick App & vivo Mini Game Debugger and vivo Mini Game Engine and install it on your Android device (recommended Android Phone 6.0 or above)
Install nodejs-8.9.0 or above, globally:
Note: After installing nodejs, you need to note whether the npm source address is https://registry.npmjs.org/
  # View current npm source address
  npm config get registry

  # If not, reset the npm source address
  npm config set registry https://registry.npmjs.org/
Install
vivo-minigame/cliglobally:npm install -g @vivo-minigame/cliIf
vivo-minigame/cliinstallation fails, it may be caused by too low version of nodejs. Please check the version of node and upgrade.
Release Process
Use Cocos Creator 3D to open the project that needs to be released. Select vivo Mini Game in the Platform dropdown of the Build panel.
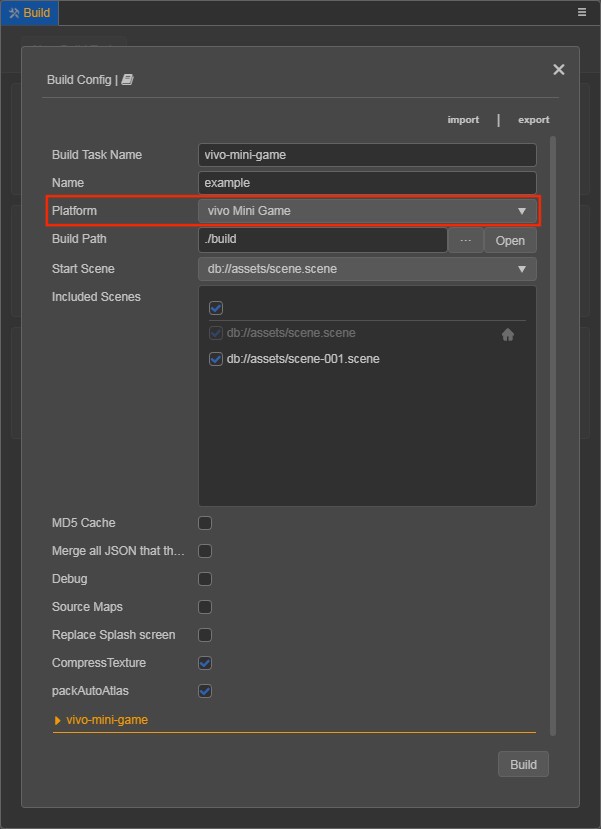
Click on the vivo-mini-game below to expand the parameter configuration of vivo Mini Game.
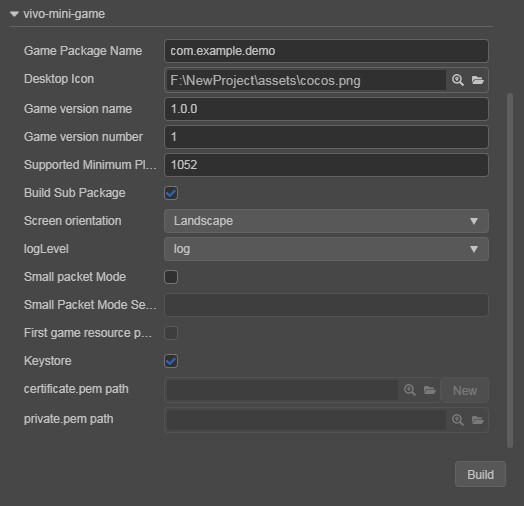
The specific filling rules for the relevant parameter configuration are as follows:
Game Package Name: is required. it is filled in according to the developer's needs.
Desktop Icon: is required. Click the search icon button at the back of the input box to select the icon you want. When building, the Desktop Icon will be built into the vivo Mini Game project. It is suggested to use
PNGimages for the Desktop Icon.Game Version Name: is required. Game Version Name is the real version, such as: 1.0.0.
Game Version Number: is required. Game Version Number is different from the Game Version Name, and the Game Version Number is mainly used to distinguish the version update. Each time when you submit audit, the game version number is at least 1 higher than the value of the last submitted audit. It must not be equal to or less than the value of the last submitted audit, and it is recommended that the Game Version Number be recursively incremented by 1 each time when the audit is submitted.
Note: The Game Version Number must be a positive integer.
Supported Minimum Platform Version Number: is required. Please refer to Official Documentation to check the latest version number of vivo engine.
Build Sub Package: is supported by v1.0.4 onwards and is enabled by default. For details, please refer to Subpackage Loading at the end of this document.
Small Packet Mode: is optional. The in-package volume of the mini-game contains code and assets that cannot exceed 10M, and assets can be loaded via network requests. Small Packet Mode is to help developers keep the script files in the mini game package, other assets are uploaded to the remote server, and downloaded from the remote server as needed. And the download, cache and version management of remote assets, Cocos Creator 3D has already helped the developer. What the developer needs to do is the following steps:
When building, check the Small Packet Mode and fill in the Small Packet Mode Server Path.
First game asset package into the game package, this item is optional.
In the Small Packet Mode, due to too many assets on the launch scene, downloading and loading assets for a long time may result in a short black screen when entering the game for the first time. If First game asset package into the game package is checked, you can reduce the black screen time when you first enter the game. However, it should be noted that the
res/importasset does not support split asset downloading at this time, and the entireimportdirectory is also packaged into the first package.Developers can choose whether to check this item according to their needs and then click Build.
After the build is complete, click the Open button after the Build Path to upload the
resdirectory under the release path to the small packet mode server. For example, if the default release path isbuild, the Build Task Name isvivo-mini-game, you need to upload the/build/vivo-mini-game/resdirectory.Note: If you are using the command line to compile small packet mode, remember to backup the
build/vivo-mini-game/resdirectory, then delete thebuild/vivo-mini-game/resdirectory, and then perform command line compilation (npm run build).
At this point, the
resdirectory will no longer be included in the built-up rpk, and the assets in theresdirectory will be downloaded from the filled Small Packet Mode Server Path through the network request.Keystore: when you check the Keystore, the default is to build the rpk package with a certificate that comes with Creator 3D, which is used only for debugging.
Note: When the rpk package is to be used to submit an audit, do not check the Keystore to build it.
If you don't check the Keystore, you need to configure the signature files certificate.pem path and private.pem path, where you build a rpk package that you can publish directly. The developer can configure two signature files by using the search icon button to the right of the input box.
There are two ways to generate a signature files:
Generated by the New button after the certificate.pem path in the Build panel.
Generated by the command line.
The developer needs to generate the signature file private.pem, certificate.pem through tools such as openssl.
# Generate a signature file with the openssl command tool openssl req -newkey rsa:2048 -nodes -keyout private.pem -x509 -days 3650 -out certificate.pemNote: openssl can be used directly in the terminal in Linux or Mac environment, and in the Windows environment you need to install
openssland configure system environment variables. Restart Creator 3D after the configuration is complete.
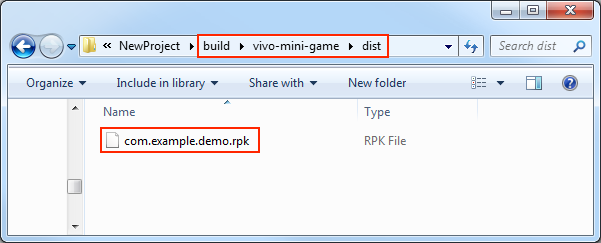
2. Build
After the relevant parameters of the Build panel are set, click Build. When the build is complete, click the folder icon button below the corresponding build task to open the build release path, you can see that a directory with the same name as the Build Task Name is generated in the default release path build directory, which is the exported vivo Mini Game project directory and rpk, rpk package are in the dist directory.
3. Run the built rpk to the phone
There are three ways to run rpk on your phone:
Method One
Click the Run button at the bottom right of the
vivo-mini-gamebuild task in the Build panel and wait for the QR Code interface to be generated: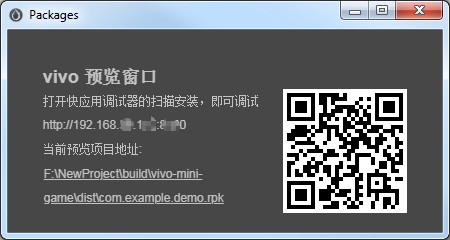
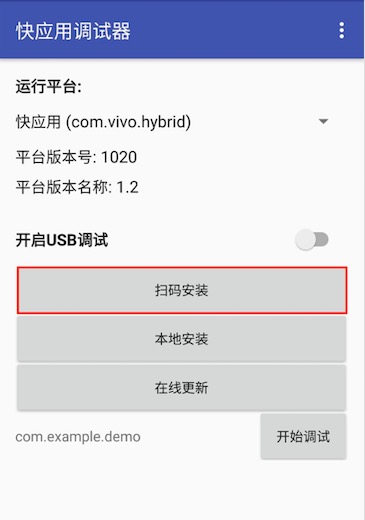
Then open the Quick App & vivo Mini Game Debugger that was installed before on your Android device. Click the Scan code install button to scan the QR Code to open the rpk.
Method Two
Copy the generated mini game rpk file (located in the
distdirectory) to thesdcarddirectory of the mobile phone.Open the Quick App & vivo Mini Game Debugger that has been installed before on your Android device, click Local Install, then find the rpk file from the
sdcarddirectory of your mobile phone and select Open.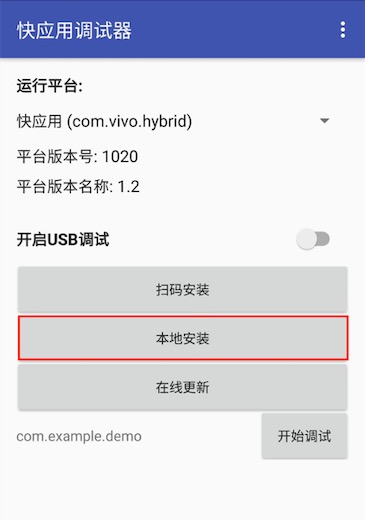
Method Three
Specify to the editor installation directory
resources/tools/vivo-pack-toolsin the command line, and execute the commandnpm run serverto generate URL and QR code using the vivo Mini Game Packer Commands.# Specify to the editor installation directory. cd F:/CocosCreator3D/resources/tools/vivo-pack-tools # Generate URL and QR code npm run serverThen open the Quick App & vivo Mini Game Debugger that was installed before on your Android device.
Finally, click the Scan code install button to copy the URL generated in the first step to the browser, and then directly scan the QR code on the web page to open the rpk.
Subpackage Loading
The subpackage loading of vivo Mini Games, is similar to WeChat Mini Games. Please refer to the Subpackage Loading documentation for details.
Reference documentation
Note: Some platforms only have Chinese documentation available when visiting the platforms website. It may be necessary to use Google Translate in-order to review the documentation.