Cocos Creator
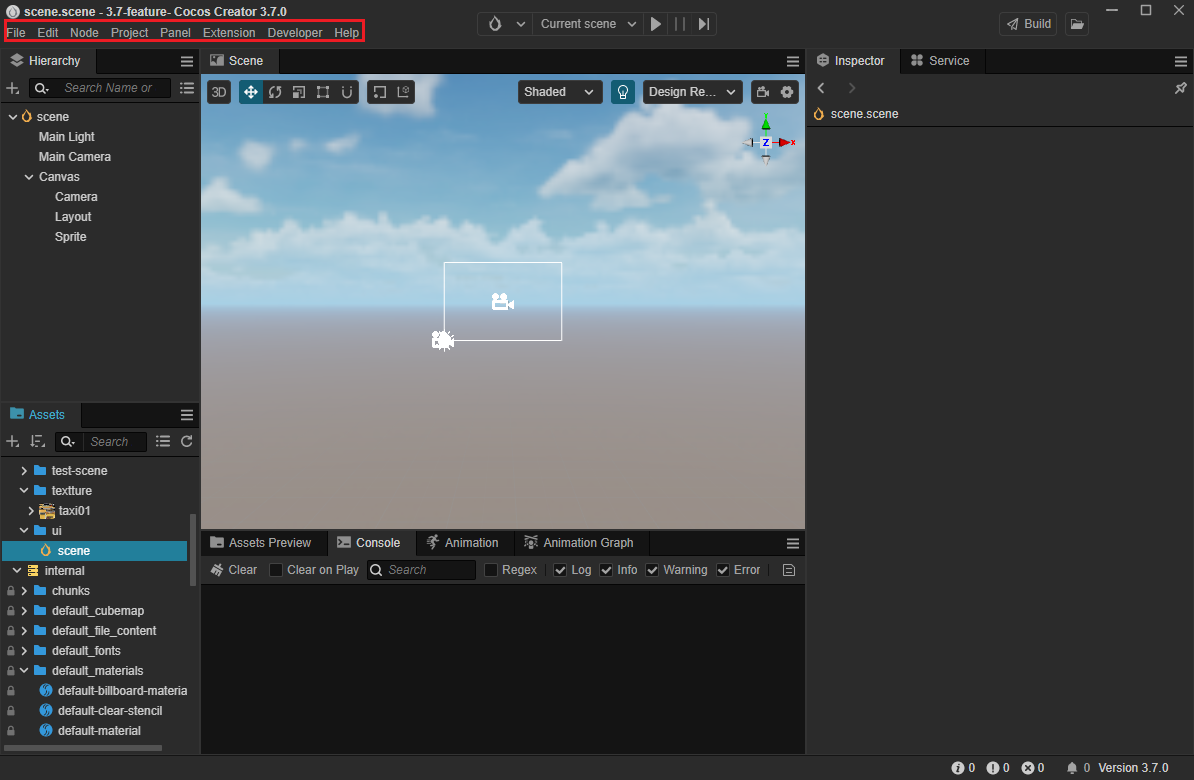
Main Menu
The main menu bar at the top of Cocos Creator contains 9 menu options, Cocos Creator, File, Edit, Node, Project, Panel, Extension, Developer and Help, which integrate most of Cocos Creator's functionalities.
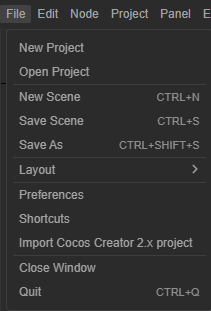
File
This option is mainly used to create, open, and save a project or scene, as well as import Cocos Creator 2.x projects.
| Option | Description |
|---|---|
| New Project | Opens Dashboard's Project tab of Dashboard to create a new project. If you are using Dashboard v1.0.19, you will open Dashboard's New Project tab. |
| Open Project | Open Dashboard's Project tab. |
| New Scene (Ctrl/Cmd + N) | Closes the current scene and create a new scene, the newly created scene needs to be saved manually before it will be added to the project directory. |
| Save Scene (Ctrl/Cmd + S) | Save the scene you are currently editing. If the scene is created using File -> New Scene, a dialog box will pop up when you save it for the first time, you need to choose the location to save the scene file and fill in the file name, then click Save to save it. Scene files have .scene as extension. |
| Save As (Ctrl/Cmd +Shift+ S) | Generates a copy of the current scene file and save it in the project. |
| Layout | Sets the editor interface layout. Custom layout can be saved and re-uesed |
| Preferences | Opens Preferences panel to customize the editor. |
| Shortcuts | Opens the Shortcuts panel to view the default shortcuts used by each panel or function module of the editor, support customization. |
| Import Cocos Creator 2.x Project | V2.x asset import tool, supporting the perfect import of old project assets, as well as the assisted migration of code. Please refer to v3.0 Upgrade Guide for details. |
| Close Window (Ctrl/Cmd + W) | Closes current window. |
| Exit | Closes the current editor and automatically opens Dashboard. |
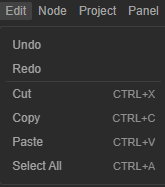
Edit
This option mainly includes common editing functions such as undo, redo, copy and paste.
| Option | Description | Default Shortcut |
|---|---|---|
| Undo | Undoes the last change to the scene. | Ctrl/Cmd + Z |
| Redo | Redoes the undo action from the previous step. | Ctrl/Cmd + Shift + Z |
| Cut | Cuts the currently selected node or character to the clipboard. | Ctrl/Cmd + X |
| Copy | Copies the currently selected node or character to the clipboard. | Ctrl/Cmd + C |
| Paste | Paste the contents of the clipboard into the appropriate location. | Ctrl/Cmd + V |
| Select All | Selects all nodes in the same hierarchy if the focus is within the Hierarchy panel, or all assets in the same hierarchy if the focus is in the Assets panel. | Ctrl/Cmd + A |
Note: Copy, Cut and Paste of nodes should be done using shortcut keys.
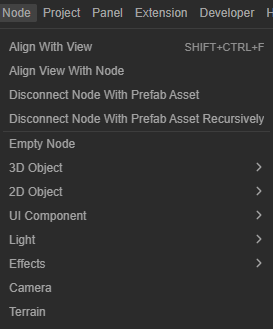
Nodes
This option contains functions to adjust the view, disconnect prefabricated nodes and create nodes.
| Option | Description |
|---|---|
| Align With View (Ctrl/Cmd + Shift + F) | Moves the currently selected node to the center of the view of the Scene panel. |
| Align View With Node | Sets the view in the Scene panel to be centered on the currently selected node. |
| Disconnect Node With Prefab Asset | For converting the selected prefab node to a normal node, please refer to Prefab for details. |
| Disconnect Node With Prefab Asset Recursively | Recursively convert prefab nodes containing nested nodes in the scene to normal nodes, see Prefab for details. |
| Empty Node | Creates an empty node in the scene. If the node is already selected in the scene before the command is executed, the newly created node will become a child of the selected node. |
| 3D Objects | Creator provides some relatively basic static model controls for use, currently including Cube, Cylinder, Sphere, Capsule, Cone, Torus, Flat and Quad. To create other types of models, refer to the MeshRenderer component documentation. |
| 2D Objects | Create Creator's pre-defined 2D nodes in the scene containing the base renderable components, which currently include Graphics, Label, Mask, ParticleSystem2D, Sprite, SpriteSplash (monochrome) and TiledMap (map), for details please refer to the Introduction to 2D Renderable Components documentation. |
| UI Components | Create Creator's pre-defined nodes containing basic UI components in the scene, which currently include Common UI controls such as Button, Widget, Layout, ScrollView, EditBox nodes, etc. For more UI components, please refer to the UI Basic Components documentation. |
| Lighting | Create Creator preset nodes in the scene containing base light components, currently including Parallel Light, Spherical Light and Spot Light, please refer to the Lighting documentation. |
| Effects | Create a Creator preset in the scene containing Particle System component in the scene. More effects components can be added in the Property Inspector panel by clicking Add Component -> Special Effects. |
| Camera | Creates a node in the scene with the Camera component pre-defined by Creator. For details on how to use it, please refer to the Camera component documentation. |
| Terrain | Creates a node containing the terrain component pre-defined by Creator in the scene. Please refer to the Terrain System documentation for more details on how to use it. |
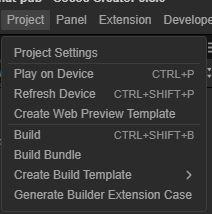
Project
This option is mainly used to perform preview run build projects, project configuration and custom builds, etc.
| Option | Description |
|---|---|
| Project Settings | Opens Project Settings panel to set the relevant configuration options for a specific project. |
| Play on Device (Ctrl/Cmd + P) | Click on this option to preview the project in the selected browser/simulator window, for details please refer to the Project Preview & Debugging documentation. |
| Refresh Device (Ctrl/Cmd + Shift + P) | Refreshes the opened browser preview window. |
| Create Preview Template | This option is used to customize the desired preview effect, please refer to the Web Preview Customization Workflow documentation for details. |
| Build (Ctrl/Cmd + Shift + B) | Opens the Build panel to package the game to the target platform. |
| Create Build Template | This option is used to customize the Build panel of the project, please refer to the Custom Project Build Process documentation for details. |
| Generate Build Extension | This option is used to extend the build process, please refer to the Extending Build Process documentation for details. |
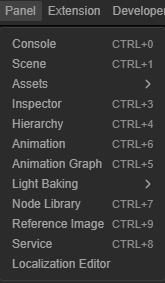
Panel
This option is mainly used to open various panels in the editor.
| Option | Description | Default Shortcut |
|---|---|---|
| Console | Opens Console. For viewing the output log messages. | Ctrl/Cmd + 0 |
| Scene | Opens the Scene panel. For selecting and placing various game elements such as scene images, characters, effects, UI, etc. | Ctrl/Cmd + 1 |
| Assets | Opens Assets/Assets Preview panel. For accessing/managing/viewing project assets, please refer to the Assets documentation for details. | The shortcut for the Assets panel is Ctrl/Cmd + 2 |
| Inspector | Opens the Inspector panel. For viewing and editing the working area of the currently selected node, node components and assets. | Ctrl/Cmd + 3 |
| Hierarchy | Opens the Hierarchy panel, which shows the hierarchical relationship between all nodes in the scene in the form of a tree-like list. | Ctrl/Cmd + 4 |
| Animation | Opens the Animation panel or Joint Texture Layout panel. For editing and viewing frame animation or skeleton animation, etc. | The shortcut for the Animation panel is Ctrl/Cmd + 6 |
| Animation Graph | Opens the Animation Graph panel. Animated Graphics and Program Animation is a visual animation editing panel. | The shortcut for the Animation panel is Ctrl/Cmd + 5 |
| Light Baking | Opens the Lightmapping panel to configure the baking properties for generating light maps. | |
| Node Library | Open the Node Prefab Library panel. This panel is a very simple and straightforward visual control repository, where developers can drag and drop the controls listed here into the Scene or the Hierarchy panel to quickly create pre-configured controls. | Ctrl/Cmd + 7 |
| Service | Opens the Service panel, which provides a number of quality official and third-party services that allow developers to access more extensions beyond the engine and make game development easier. | Ctrl/Cmd + 8 |
| Reference Image | Opens the reference image panel when creating UI in the scene | Ctrl/Cmd + 8 |
| Service | Opens the Service panel, which provides a number of quality official and third-party services that allow developers to access more extensions beyond the engine and make game development easier. | Ctrl/Cmd + 9 |
| Localization Editor | Opens the L10N panel. |
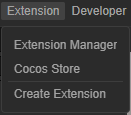
Extension
This option mainly includes Extension Manager, Store and Create Extension, please refer to the Extending the Editor chapter.
| Option | Description |
|---|---|
| Extension Manager | Opens the Extension Manager panel, which includes editor built-in extensions, extensions installed in project directory and global directory, please refer to the Extending the Editor chapter for details. |
| Store | The Cocos Store is built into Cocos Creator and allows users to browse, download and automatically install official or third-party extensions and assets. You can also submit your own extensions, art materials, music and sound effects to the extension store for sharing or selling. For more information, please refer to the Submitting Resources to Store documentation. |
| Create Extension | This option is used to generate an extension package in the project/global directory to extend the editor with features. |
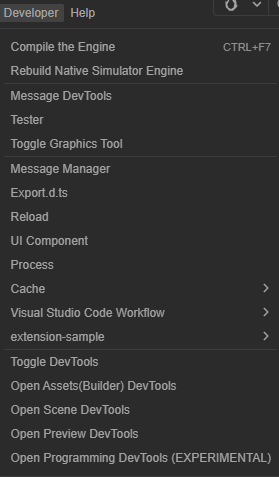
Developer
This option contains mainly development-related menu functions such as scripts, engine and DevTools.
| Option | Description |
|---|---|
| Compile Engine (Ctrl/Cmd + F7) | Compile custom engine, please refer to the Engine Customization Workflow documentation. |
| Rebuild Native Engine | Compile the custom native engine simulator, please refer to Customizing the Native Engine Simulator. |
| Message DevTools | Opens the Message DevTool for debugging IPC interactions at runtime inside the editor. |
| Tester | The editor's built-in extended testing tool, not yet fully functional |
| Toggle Graphics Tool | Toggles the Graphics tool panel for debugging scene rendering. |
| Message Manager | Opens the Message Manager panel to display public messages and their descriptions for each feature defined by the editor. |
| Export.d.ts | Exports editor-related APIs. |
| Reload (Ctrl/Cmd + R) | Reload the editor interface. |
| UI Components | Opens the UI Components panel, which lists how to use the pre-defined UI components provided within the editor, please refer to UI Components. |
| Cache | The clear code cache in this option is used to clear the cache generated when compiling scripts. |
| VS Code Workflow | The working environment-related features of the VS Code editor, currently supporting Add Chrome Debug Setting and Add Compile Task. Please refer to the Coding Environment Setup documentation for details. |
| Toggle DevTools (Ctrl/Cmd + Shift + I) | Opens DevTools window for editor interface extension development. It is also possible to customize the log output to Console, please refer to Custom output messages. |
| Open Assets DevTools | Opens the Assets DevTool panel for viewing log messages during modifications to the asset-db process. |
| Open Scene DevTools | Opens the Scene DevTool panel to view log messages during modifications to the scene. |
| Open Build DevTools | Opens the Build DevTool to view all log messages generated during the build process including the call stack. |
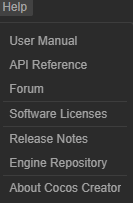
Help
| Option | Description |
|---|---|
| User Manual | Open User Manual in default browser. |
| API Reference | Open API Reference Documentation in default browser. |
| Forum | Open Cocos Creator Forum in default browser. |
| Release Notes | Open the release notes for each version of Cocos Creator in default browser. |
| Engine Repository | Open TypeScript Engine Repository in default browser. |
| About Cocos Creator | Shows Cocos Creator-related version number and copyright information. |