Cocos Creator
Prefab
Prefabs are pre-configured game objects that can be used as templates when we dynamically generate nodes.
Creating Prefab
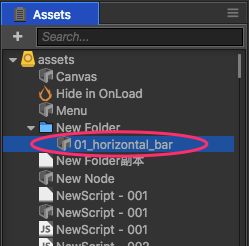
After editing the node in the scene, drag the node directly from the Node Tree to the Assets panel:

To create a prefab:
Editing Prefab
Double-clicking on a prefab in the Assets panel switches the scene editing mode of the Scene panel to prefab editing mode.
After editing, click the Save button on the top of the Scene panel to save the edited prefabs, and then click the Close button to exit prefab editing mode and return to scene editing mode.
Note: please avoid multiple people modifying the same prefab asset at the same time, as this may lead to conflicts that cannot be resolved by
gitmerging.
Using Prefab
Drag and drop a prefab from the Assets panel to the Node Tree or the Scene panel to generate a Prefab Instance in the scene. The Prefab Instance node is shown in blue in the Node Tree.
If any property of a prefab instance in the scene is modified and then the scene is saved, the modified data will be stored in that prefab instance and will not affect the prefabs in the Assets panel or the data of other prefab instances generated using prefabs.
Prefab Instances
When the prefab instance node is selected in the Node Tree/Scene panel, several actionable buttons appear at the top of the Properties panel.
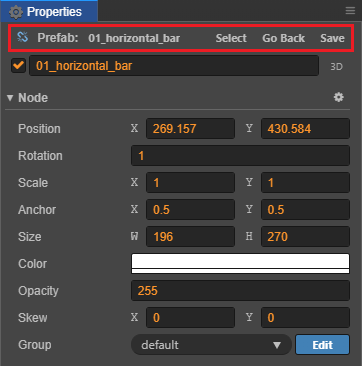
Select: click this button to yellow highlight the prefab for this prefab instance in the Assets panel.
Go Back: if the prefab instance is modified, click the Return button to restore the prefab instance to the initial state.
Note: the rollback operation is not valid for the modification of Node Activation Status, Node Name,
PositionandRotation.Save: after modifying a prefab instance in the scene, click Save directly in the Properties panel to synchronize the changes to the prefab that generated the prefab instance.
Automatic and Manual Synchronization
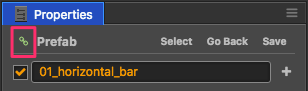
When the original prefab corresponding to a prefab instance is modified, choose whether to synchronize the prefab automatically or manually for each prefab instance in the scene. With the prefab instance selected, click  button to toggle manual/auto sync, the default is manual sync.
When set to Manual Sync, the prefab instance will not be updated automatically with the original prefab. If it is necessary to synchronize the update, click the Return button on the top right. The prefab instance node will be shown in blue in the Node Tree.

When set to Auto Sync, the prefab instance will be automatically synchronized with the original prefab and the prefab instance node will be shown in green in the Node Tree.
Note: in order to keep the engine lean, auto-syncable prefab instances have the following restrictions:
In order to facilitate individual customization of each scene instance, the
name,active,positionandrotationproperties of the root node of the prefab instance in the scene itself are not automatically synchronized. Instead, all other child nodes and all components must be synchronized with the original prefab, and if changes occur, the editor will ask whether to undo the changes to that prefab instance or to save the changes and update them to the original prefab when switching to another node.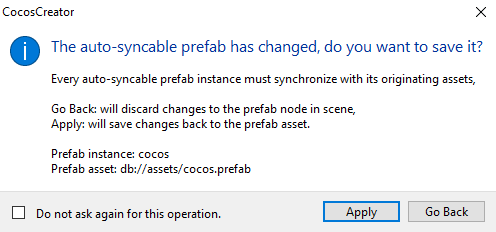
Components in an auto-syncable prefab instance cannot refer to other objects outside of that prefab instance, or the editor will pop up a prompt.
Components outside an auto-syncable prefab instance can only refer to the root node of the prefab instance, and cannot refer to its components and children, otherwise the editor will pop up a prompt.
These restrictions only affect the editor operation, not the runtime.
Reverting a prefab instance to a normal node
If it is not necessary to use a prefab and delete it in the Assets panel, the prefab instance generated by that prefab in the scene can be restored to a normal node by clicking Node -> Convert to Regular Node in the top menu bar.
Associating nodes to prefabs
Select both a node in the scene and a prefab in the Assets panel, then click Node -> Connect Node to Prefab in the top menu bar to associate the selected node and the prefab.
Prefab Options
When selecting any prefab in the Assets panel, set its Optimization Policy, Async Load Assets and Readonly in the Properties panel, and click the Apply button on the top right after setting to take effect.
Setting Optimization Policy
The optimization policy optimizes the instantiation time of the selected prefab, i.e. the time required to execute cc.instantiate. Possible settings include Auto Adjust (default), For Single Instance Creation, and For Multiple Instance Creation.
If set to Auto Adjust, the engine will automatically adjust the optimization policy based on the number of creations. When creating a prefab instance for the first time, the policy is equivalent to For Single Instance Creation, and will automatically switch to For Multiple Instance Creation after multiple creations.
If this prefab requires repeated execution of
cc.instantiate, please select For Multiple Instance Creation, otherwise just keep the default Auto Adjust.
Async Load Assets
This option is disabled by default. If this option is enabled, it will delay the loading of other assets that the prefab depends on, improving the loading speed of some page-based games. For details, please refer to the Enable Async Load Assets documentation.
Readonly
The readonly state, some editor-generated assets will not be modified.