Cocos Creator
Use a Sliced Sprite to make an UI image
The core design principle of the UI system is to automatically adapt to different device screen sizes. When developing the UI, we need to correctly set the each node's size, and which can be automatically stretched and adapted according to the screen size of the device. To achieve this, we usually use the 9-sliced images to render these nodes. In this way, even if small original images can be used to generate background images that can cover the entire screen. On the one hand, the game package is reduced, and on the other hand, it can flexibly fit different layout requirements.
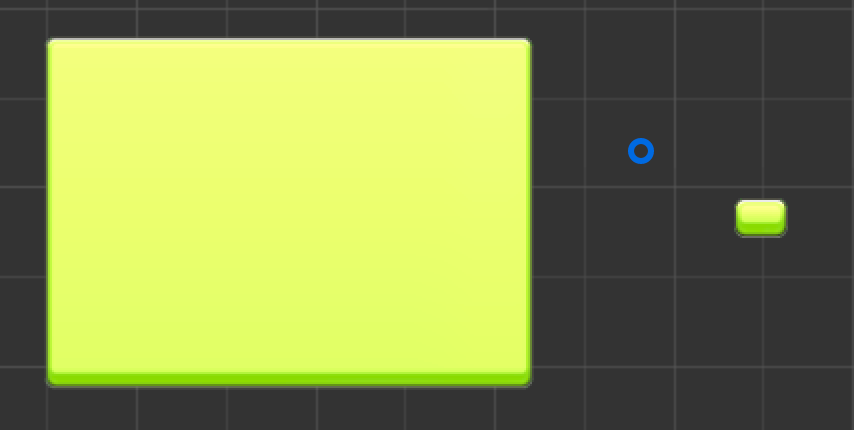
The right side of the picture above displays the texture of original size. The left side displays the effect of choosing Sliced mode and enlarging the size property.
Setting up your SpriteFrame for 9-slicing
To use a 9-sliced image effect that can be infinitely enlarged, we need to cut the image resource into a 9-slicing at first. There are two methods to open Sprite Editor to edit the image resource:
- Choose image resource in Assets, then click the Edit button on the bottom of Properties. If the height of your window is not large enough, you might need to scroll Properties downward to see the button at the bottom.
- Choose the image node that you want to cut into a 9-slicing in Scene/Node Tree panel. Then find and click the Edit button on the right side of the
Sprite Frameproperty in the Sprite component of Properties.
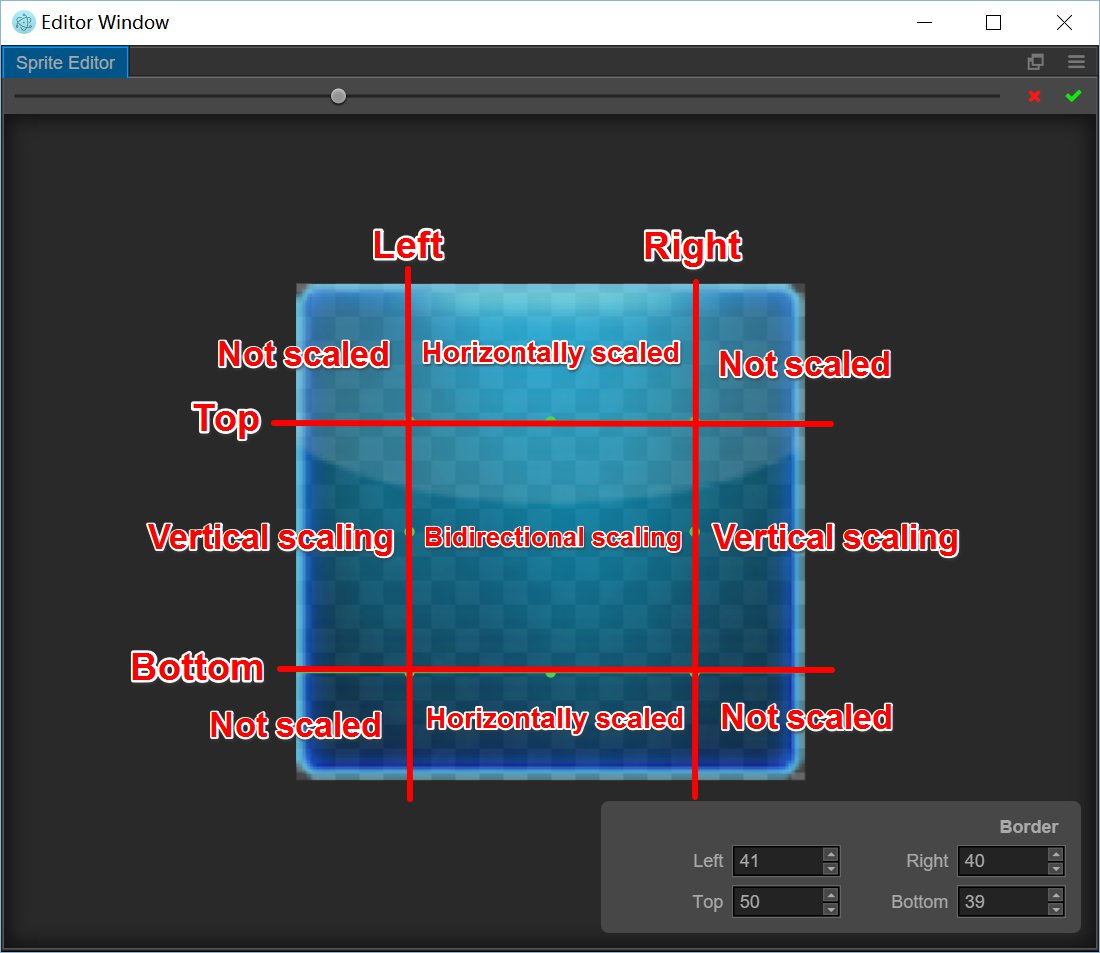
After opening Sprite Editor, you will see there is a green line around the image, which indicates the position of the current 9-sliced split line. Drag the mouse to the split line, you will see the shape of the cursor change, then you can press down and drag the mouse to modify the position of the split line.
We click and drag the four split lines at the left/right/upper/lower side respectively and cut the image into a 9-slicing. The nine areas will apply different zooming in/out strategies when the Sprite size changes, which is as illustrated below:
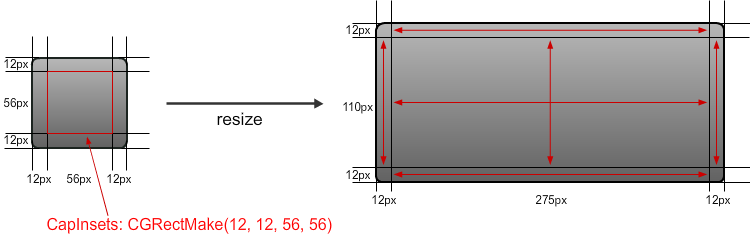
And the following picture illustrates the state of zooming in/out in different areas (the picture comes from Yannick Loriot's Blog):
After cutting, don't forget to click the green check mark on the upper right corner of Sprite Editor to save modifications to the resource.
Set the Sprite component to use Sliced mode
After you have prepared the 9-sliced resources, you can modify the draw mode of the Sprite and modify the size to make a UI element that can specify any size.
- First, select the Sprite node in the Scene / Node Tree, set the
Typeproperty of the Sprite asSlicedin the Properties. - Then drag the control point with the Rect Transform Tool to enlarge the
sizeproperty of the node. You can also modify thesizeproperty value directly in the Properties. Because the image resource has been set to 9-slicing, no matter how much the Sprite zooms in, there will be no vagueness or distortion.
Cautions
When using Rect Transform Tool or directly modifying the size property of Sliced Sprite, note that the size property value cannot be negative, otherwise it cannot be displayed normally in Sliced mode.