Android Publish Example
In this section, we will introduce how to build Cocos Creator project with Android Studio.
Please prepare a Cocos Creator project with at least one scene.

Publish Workflow
Configure the Android Development Environment
Download Android Studio
Developers should download the appropriate IDE from the official Android Studio.
Reference Setting up the Native Development Environment to set up the development environment
Download and install JDK
- Reference Native Development Environment)
Type
java -versionin the terminal to verify if the installation is successful.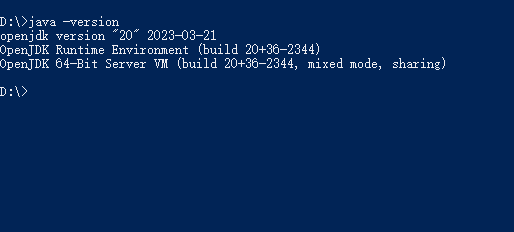
Please refer to How do I set or change the PATH system variable? to set up your environment
Note:The author utilizes OpenJDK, which has similar features as the JDK but follows another open-source protocol.
Download and install the Android SDK
Here is an example of how to download Android SDK through Android Studio
Start Android Studio
Open the Settings/Preferences panel from the main menu
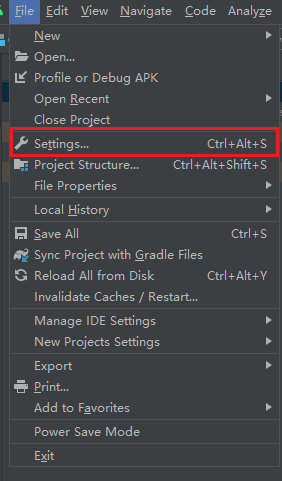
The name of the setting panel differs on the platform. It is called Settings on Windows but Preferences on MacOS.
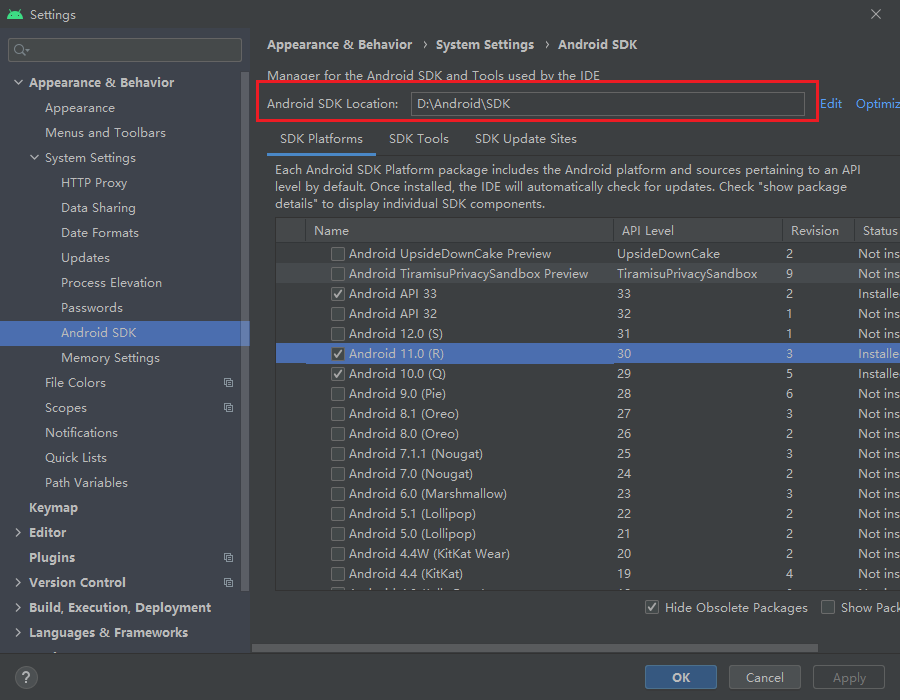
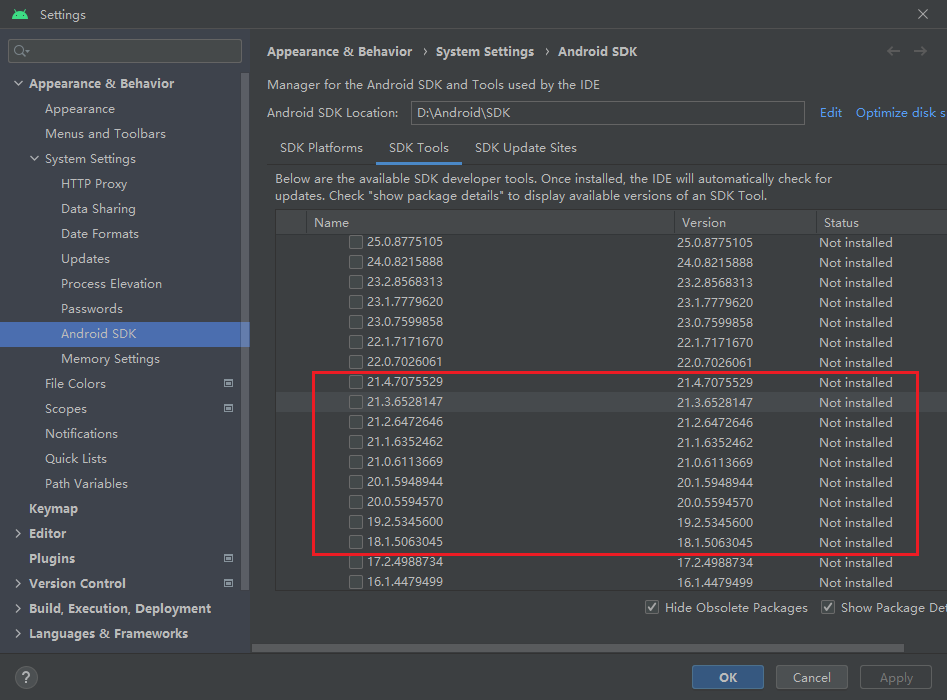
Navigate to the Android SDK page in the Settings/Preferences panel.
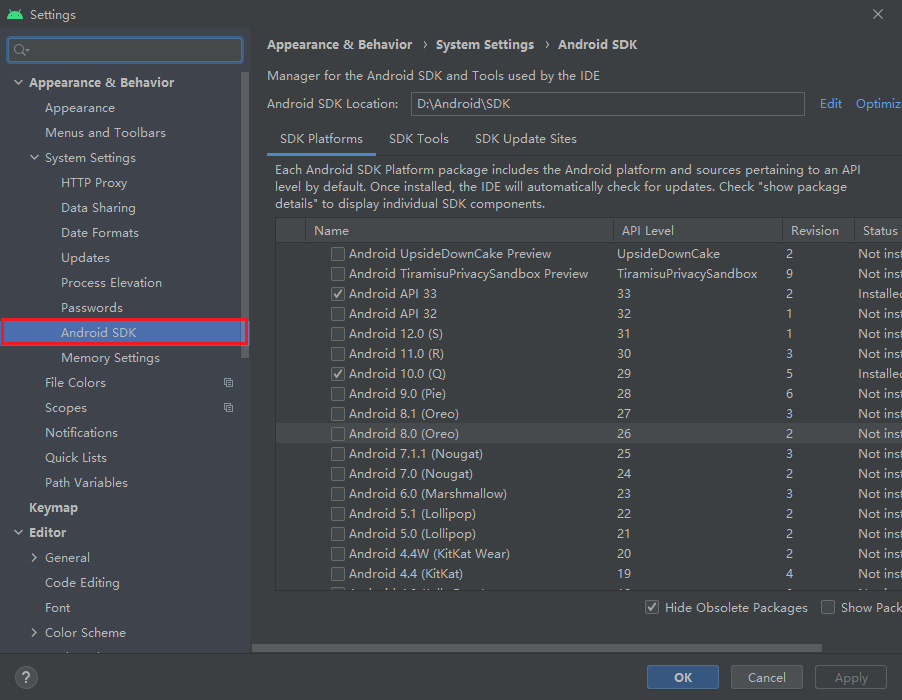
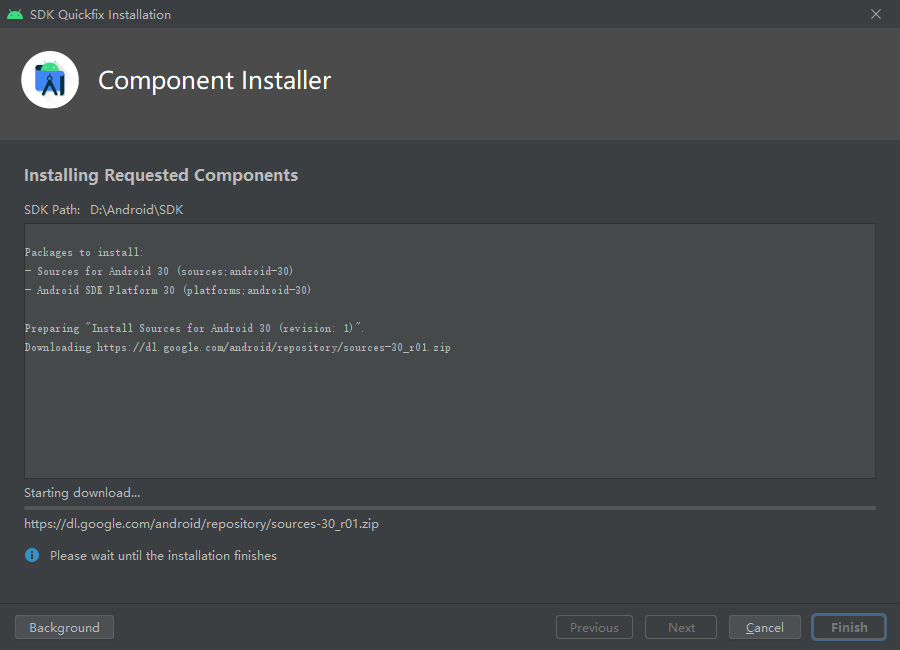
Select at least one suitable SDK to download. You can choose the recommended version mentioned in Downloading the SDK and NDK required to publish to the Android platform.
As an example, we will be using Android 11.0 (R). Check the box next to the name and then click either the OK or Apply button to proceed
Click the OK button in the pop-up dialog
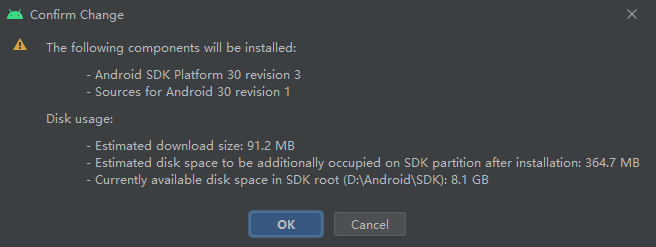
Please wait until the download is finished
Manually downloading the Android SDK
In case of network connectivity issues, you can manually download the Android SDK and put it in the directory configuring in Android SDK Location.
You could click the Edit button to choose a different path.
SDK mirrors(Optional)
Setting HTTP Proxy in Android Studio:
Auto-detect proxy settings:
In the Settings panel of Android Studio, navigate to the HTTP Proxy and select the Auto-detect proxy settings option, and then input the mirror links below.
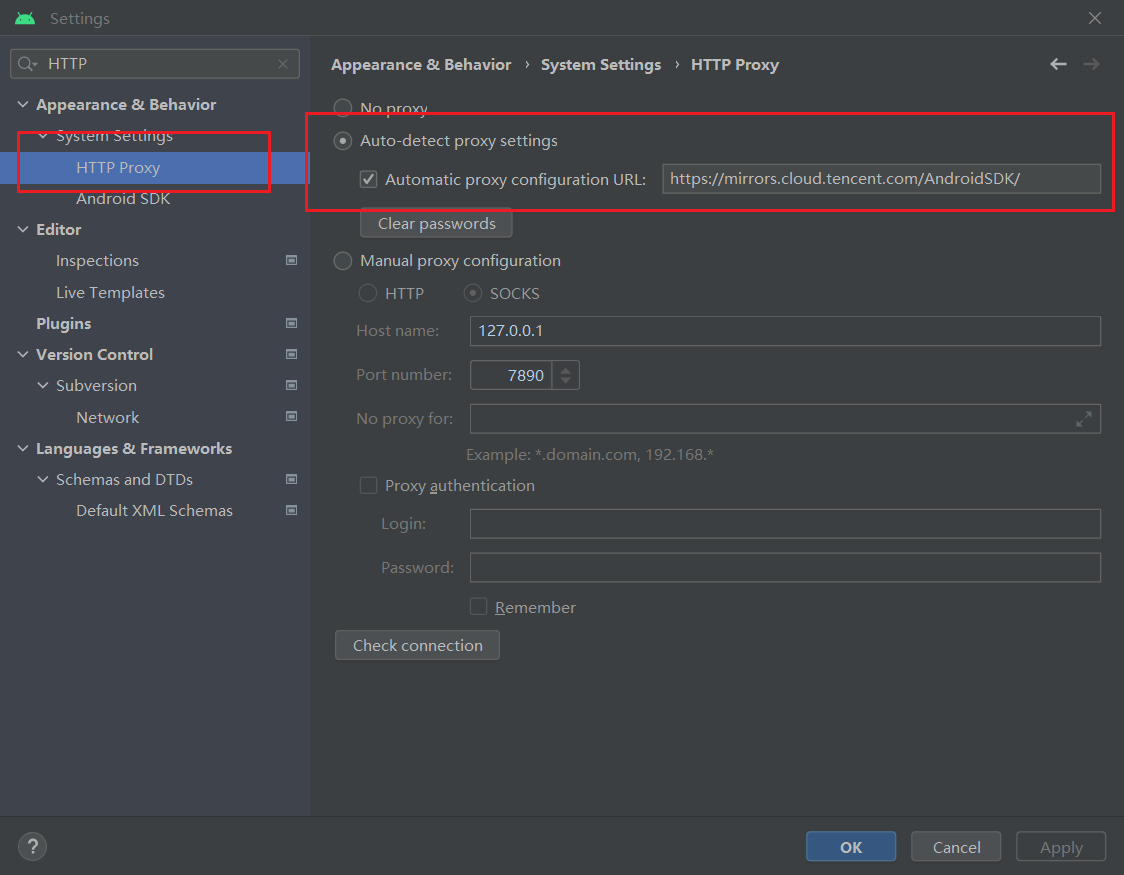
Optional mirrors:
Here are some alternative mirrors for the Android SDK and Gradle that can help developers resolve download issues when downloading failed from the official website. However, if these mirrors do not work, you may need to search for other mirrors.
| Mirror | Address | | :------- | :----------------------------------------------------- | | Tencent(CN) | https://mirrors.cloud.tencent.com/AndroidSDK/ | | AliCloud(CN) | https://mirrors.aliyun.com/android.googlesource.com/ |
In case these mirrors are not working, please search for other valid mirrors.
Download And Install Android NDK
Please refer to Downloading the SDK and NDK required to publish to the Android platform to download the appropriate version of Android NDK(r18~21).
Download the Android NDK from Android Studio
Navigate to the Android SDK page in Android Studio Settings panel
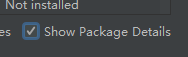
Note: check Show Package Details
Make sure to select the appropriate version to download. If the list fails to refresh, you can follow the steps in the next section to manually download the Android NDK.
Manually download
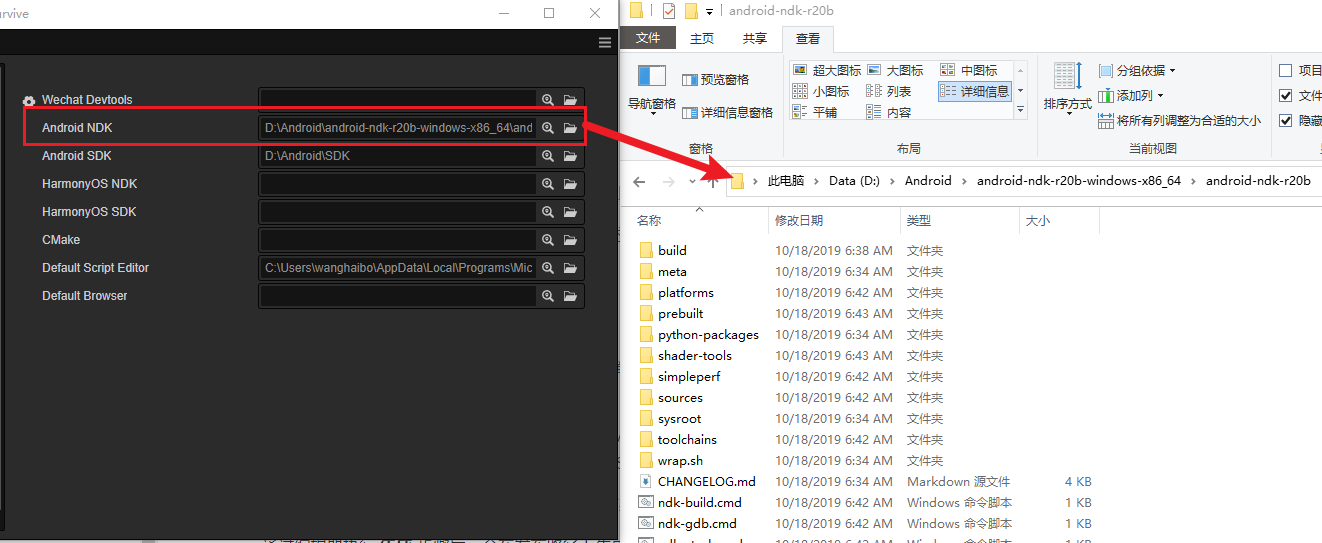
You could find the historical versions of Android NDK here
For instance, let's consider the version r20b, which can be found in the link provided above. Make sure to select the appropriate version according to your operating system, and extract it to the directory previously set as the Android SDK Location.

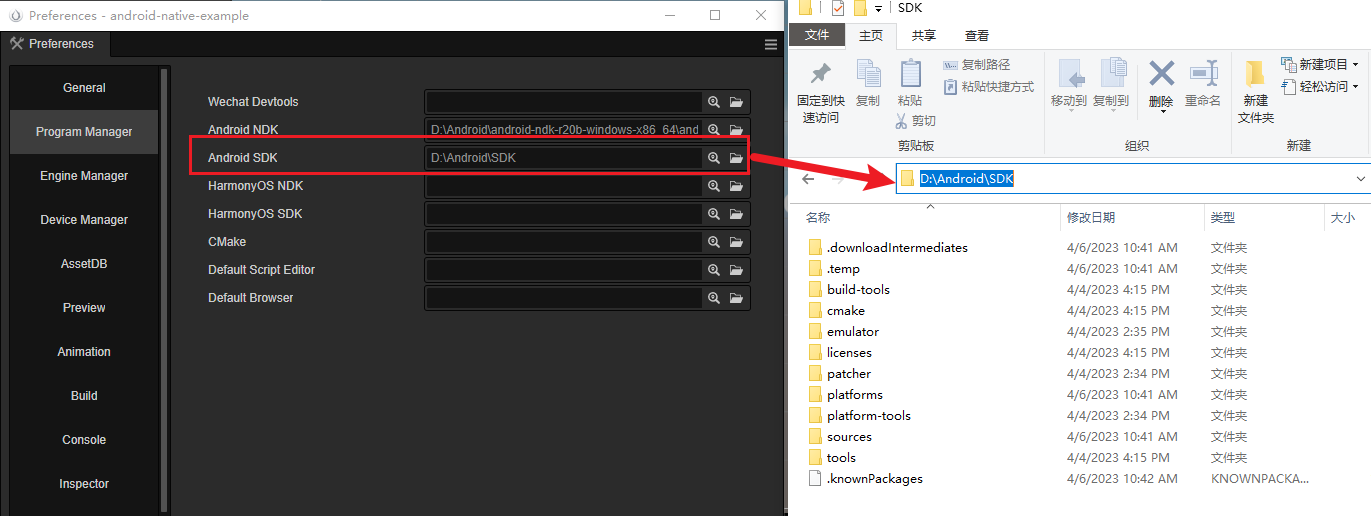
Configure Android SDK and NDK in Cocos Creator
Navigate to the Preferences panel in Cocos Creator by clicking the File -> Preferences menu. From there go to the Program Manager page and configure the Android SDK and Android NDK properties with the following images.

The path should be like follows:
NDK:
SDK:
Publish
The next step is to create a new build task and publish an Android APK on the Build panel in Cocos Creator.
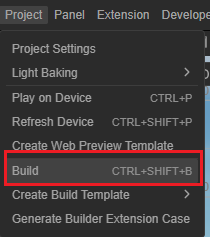
Create Build Task
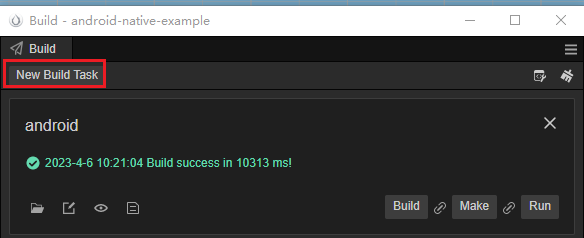
By clicking the Project -> Build menu to open Build panel.
At the top of Build panel, click on the New Build Task button
 P
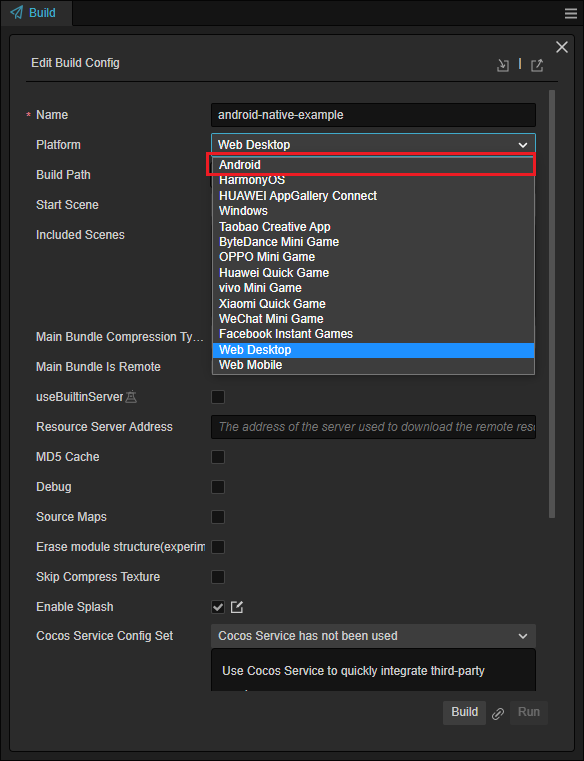
PTo select Android as the build target platform, click on the drop-down menu
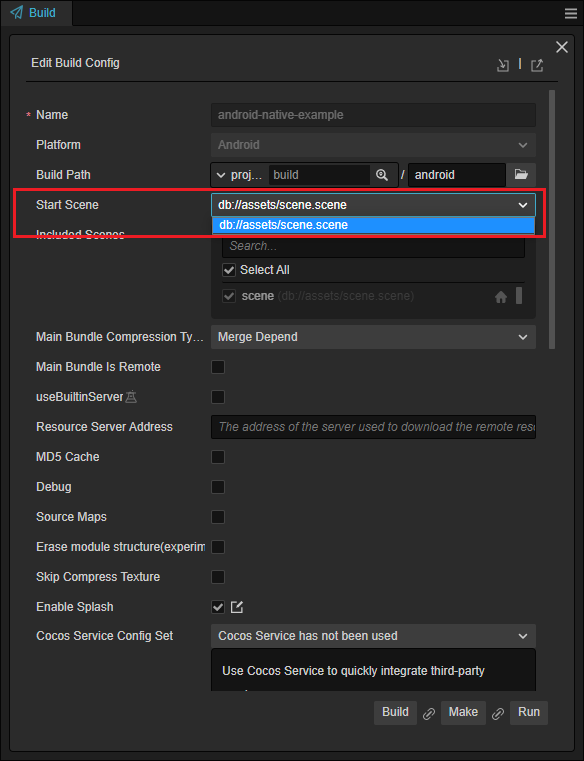
Make sure to have at least one scene designated as the Start Scene. If you have only one scene, it will be added by default
Please refer to Publishing to Native Platforms - Render BackEnd to select an appropriate render backend

Enter the Game Package Name
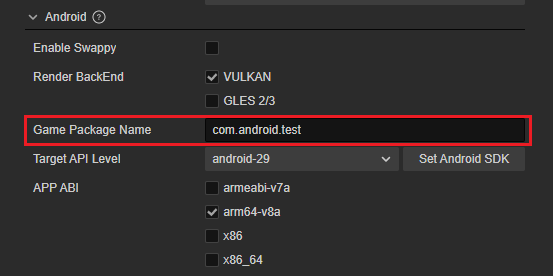
Please refer to Bundle Identifier for guidance your app's bundle identifier
Select Target API Level

In case no dropdown content, please check the SDK and NDK configuration in Cocos Creator
Other build options please refer to Publishing to Native Platforms
Build
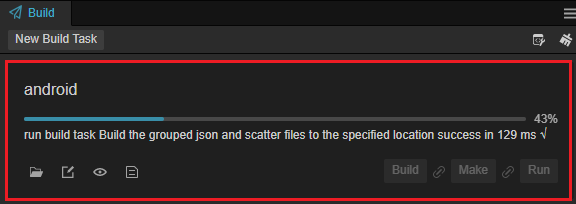
To begin a build process, click on the Build button for the selected build task.
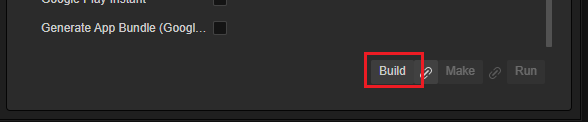
Please wait until the build process finished
Compile Android Project
Click on the button below to open the folder containing the exported Android Project
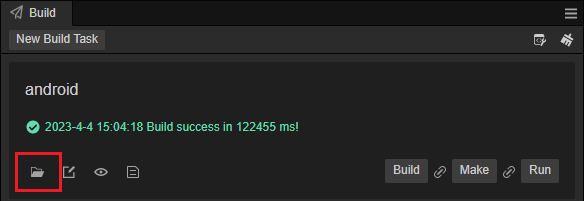
Locate the corresponding directory
Click on the open menu on android studio
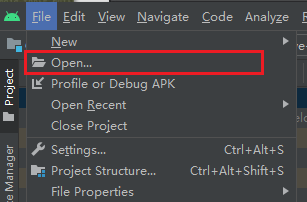
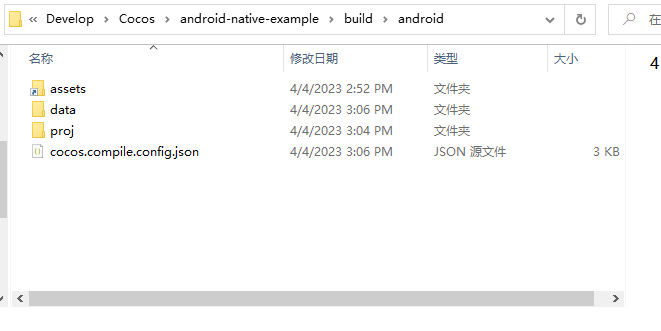
Navigate to the project path in the
{Your project}/builddirectory, which is named 'android' by default, and open it using Android Studio.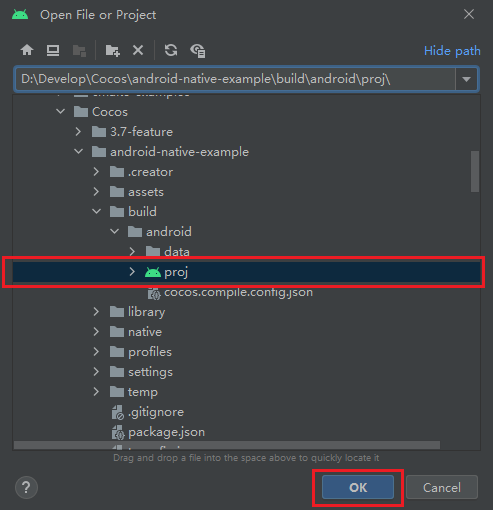
Build APK
After the preparation has been completed by Android Studio, you can start building an Android APK. However, the sync process may take a long time to complete. If this happens, you can stop any ongoing background tasks by following the steps below:
Click on the background task on the status bar:

Close all background tasks by clicking on the close button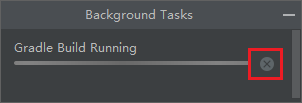
Click on Build Bundle(s) / APK(s) in the Build menu
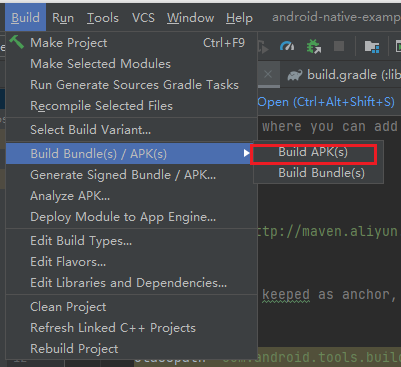
The debug APK could be found in the
{proj/build}directory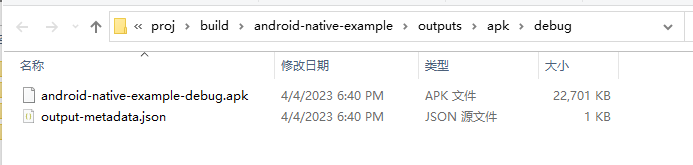
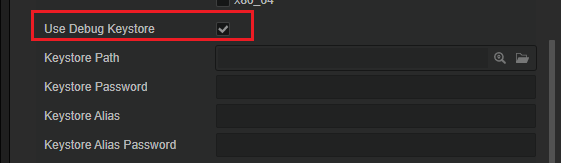
To build a release APK, you need to uncheck the Use Debug Keystore in your build task settings in Cocos Creator
Usually, you need to create a new build task to publish the release version.
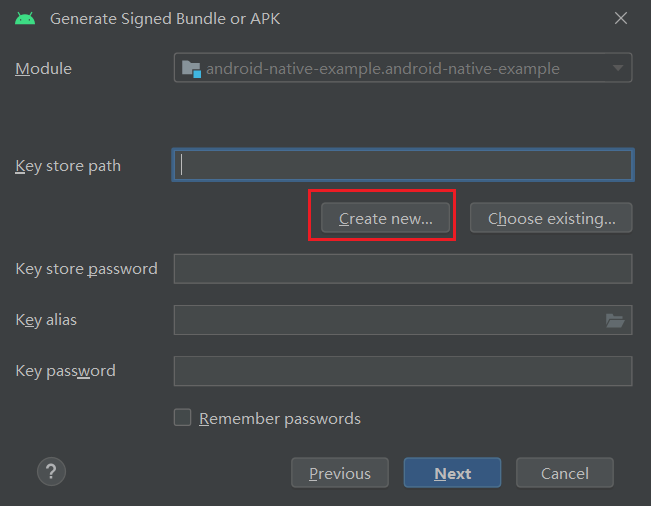
In case there is no valid keystore, You can generate a new one using JAVA or Android Studio.
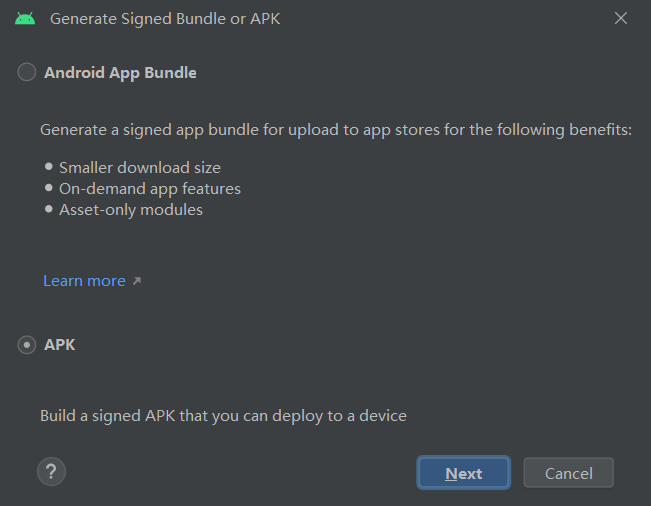
Here is an example to create a new keystone via the Android Studio menu.
Select Generate Signed Bundle / APK:

Select APK in the pop-up dialog
Create a new keystone by clicking on the Create new ... button
Advanced
Import Third-party Libraries
Please refer to Use your library in other projects to add third-party libraries that are required by the application marketplace if you intend to distribute your app to the market.
Communication between JAVA and TypeScript
Cocos Creator supports various ways to communicate between native and TypeScript.
When accessing common SDKs, we need to use the SDK's login interface to perform login operations. After obtaining the login result, the result is then passed to the TypeScript layer for game processing.
The engine provides Simplify the use of JavaScript to call Java methods to solve these problems more quickly. In general, this mechanism is convenient for interfacing with the SDK's actions such as registration and login.
After the
onCreatedmethod inAppActivity.javaof your Android Project, insert the provided code snippet@Override protected void onCreate(Bundle savedInstanceState) { super.onCreate(savedInstanceState); // DO OTHER INITIALIZATION BELOW SDKWrapper.shared().init(this); JsbBridge.setCallback(new JsbBridge.ICallback() { @Override public void onScript(String arg0, String arg1) { Log.d("[AppActivity]", "onScript: " + arg0 + "," + arg1); JsbBridge.sendToScript("sdklogin", "result json here"); } }); }One can receive messages from TypeScript in the
onScriptcallback ofJsbBridge.setCallback.To send messages to TypeScript, use
JsbBridge.sendToScript.To establish communication between Typescript and JAVA, you can add a new component and attach it to any node in your start scene. Use the following provided code for the component.
  import { _decorator, Component, Label, native } from 'cc';
  import { NATIVE } from 'cc/env';
  const { ccclass, property } = _decorator;

  @ccclass('DebugOnNative')
  export class DebugOnNative extends Component {

      @property(Label)
      debugLabel: Label = null;

      start() {
          if (NATIVE) {
              native.bridge.onNative = (arg0: string, arg1?: string | null) => {
                  console.log('onNative', arg0, arg1);

                  this.debugLabel.string = 'onNative' + arg0 + "," + arg1;
              }
          }
      }

      onSendToNative() {
          if (NATIVE) {
              native.bridge.sendToNative("logInToGameSerivceResult", "isOK=true");
          }
      }
  }
You can use the
native.bridge.sendToNativemethod to send messages to the JAVA layer, which can then be received in theonScriptmethod ofJsbBridge.setCallback. Similarly, thenative.bridge.onNativecallback can handle any messages sent from the JAVA layer usingJsbBridge.sendToScript.If you build the Android project and start the application on your Android device, logs can be noticed after trigger the
onSendToNativemethod:
Note:
- Use the NATIVE macro to control access permissions. Only the native application can access these methods.
- It's necessary to wait for the engine initialization to be completed before calling
JsbBridge.sendToScriptto send messages to JAVA. - One can only transfer strings through this method, for complex data, it is recommended to encode them in JSON format before transmission.
For complex data, please refer to JSB Swig or Tutorial: JSB 2.0。
Mechanism of Build Extension
Please refer to Extending Build Process to extend the publishing mechanism by the extension system.
Q&A
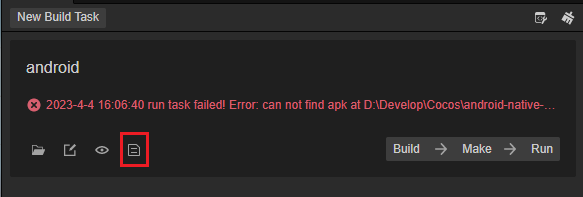
Q: How to debug publishing errors
A: You can debug publishing errors by opening the log.txt file using the log button
Q: Missing LIB_EGL
- A: Change your NDK to the version mentioned above.
Q: Asset name mechanism
- A: Since Android is based on Linux, some file specifications of Linux still apply in Android, such as
- Android is case-sensitive, make sure the path is case-sensitive, otherwise, it will not load correctly
- Do not include spaces in the folder or file name
- A: Since Android is based on Linux, some file specifications of Linux still apply in Android, such as